This ONE ingredient high-protein chickpea tofu is NOT like the others! Using the traditional soy tofu making method, this process takes away excess starch to make a bouncy, low carb tofu alternative that really feels and acts like soy tofu. You can easily pan fry it, marinate, grill, boil, simmer, or stew this tofu without it going mushy.
Please note, this is not like Burmese Tofu (aka Shan Tofu or Yellow Tofu) which is made in a polenta-like style with whole chickpeas or chickpea flour. Very delicious as well, but not a great substitute for soy tofu.
Video Tutorial for Chickpea Pea Tofu (ChickpeaFu? Zofu? ChickFu?)
What does Chickpea Tofu taste and feel like?

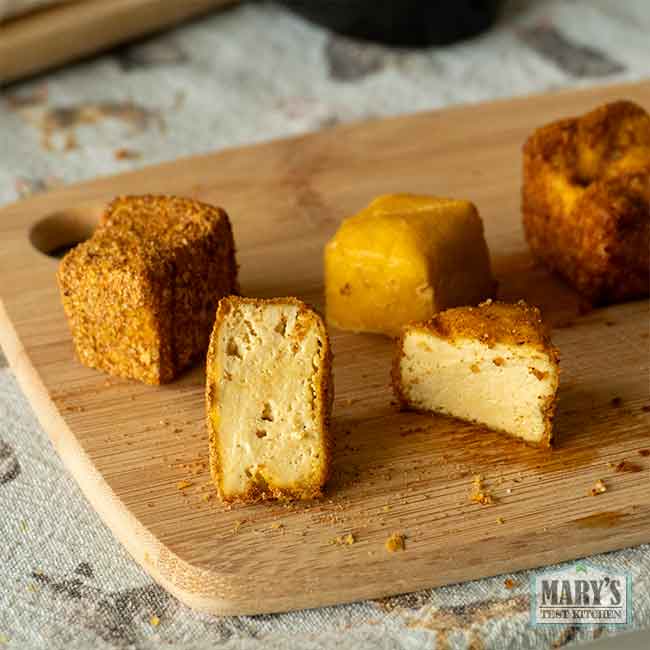
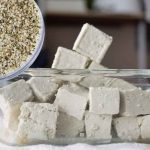
Freshly made high-protein chickpea tofu is very similar to regular soy extra firm tofu but with an even better chickpea savory flavour! It is:
- similar in firmness and texture (like commercially sold, vacuum packed extra firm tofu),
- has a meaty, bouncy bite,
- easy to crumble for making tofu “ground”,
- deliciously savory and can be eaten on its own with just a little salt or simple seasonings.
You can really use it just like regular soy tofu. It won’t fall apart if you boil or braise it gently. You can fry it, air fry it, pan fry, and stir-fry just like normal tofu too!

But why make Soy-Free Tofu in the first place?
If you are allergic to soy or the people you are cooking for are, this is a great alternative so that you can still make tofu recipes without any soy! Personally, I eat a lot of soy but I believe it’s good to have variety when it comes to plant-based protein sources. In this series, we have made high protein, low carb tofu from:
- fava beans,
- red lentils,
- pigeon peas,
- yellow split peas,
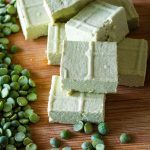
- green split peas,
- hemp seeds, and
- pumpkin seeds.
Applying the tofu-making method to peanuts and sunflower seeds made soft creamy curds that were more like soft cheeses than tofu.
If you were wondering, I did try with black beans, kidney beans, and pinto beans. However the process was exceedingly difficult and the results were more like a bean paste than a bean curd.
I even tried making tofu out of frozen edamame. The process was more difficult that usual and the results were…well, maybe you should read the blog post for that one.
But why are YOU making soy-free tofu?
Last year, I made the decision to stick to a keto diet for my chronic tendonitis. In the months following, my tendonitis symptoms completely resolved and stayed away (as long as I also stayed away from too many carbs). I was eating soy tofu two or three times per day and, while I don’t think I suffered any ill effects from eating delicious and nutritious soy products all day and everyday, I need variety in my life! And I missed other beans and peas. So I started experimenting with making high protein, low carb “tofu” by applying the traditional tofu-making method to non-traditional ingredients.
Beans and grains are great sources of vegan protein BUT if you are like me and cannot have too many carbohydrates for medical reasons, having protein sources that are not attached to a lot of sugars or starches is really important for health.
Why use Chickpeas for Soy-Free Tofu?
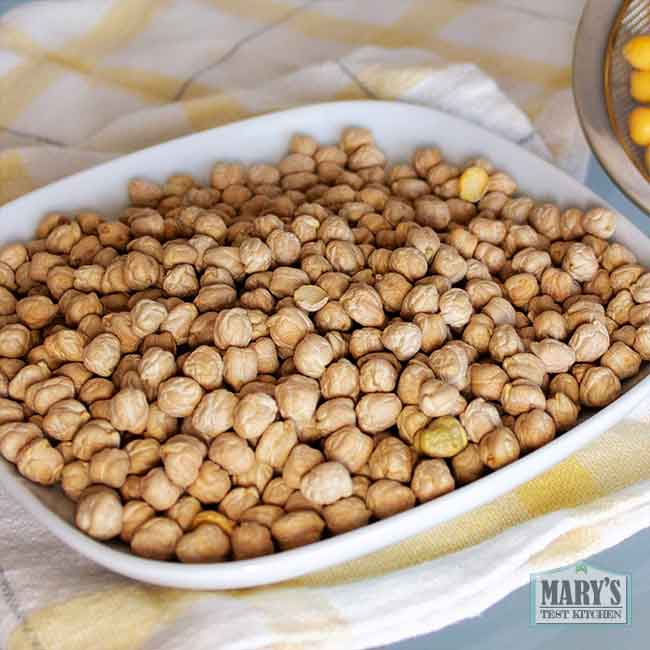
Chickpeas are one of the most popular legumes in the world! And for good reason. They have a wonderful mild savory flavour on their own and are full of plant-based protein. For those reasons, you should be able to find them in your local grocery store easily. I find the best prices for them usually in the bulk foods section.
Before experimenting with them, my main concern with using chickpeas for high-protein tofu is that they contain a lot of starch. Excess starch can get in the way of making tofu with good texture that isn’t mushy. However, the problem is solved with a simple “settling” step.
Plus, chickpeas have a special ability that CUTS a step from the traditional method. Usually, making tofu requires a coagulant to be added (such as gypsum or nigari). Chickpeas do not require a separate coagulant, making this a one ingredient soy-free tofu!
What you’ll need to make Chickpea Tofu
You only need ONE ingredient to make high protein chickpea tofu:
- 1 pound of dried chickpeas.
For equipment, it will be helpful to have:
- a blender (I tested using only my Vitamix but other lower-powered blenders should work fine too),
- a good quality nut-milk bag,
- a large cooking pot,
- a flat-edged spatula for stirring the peanut milk,
- a tofu making mold (I prefer this one that has a spring-pressure lid),
- fine cheesecloth (if your tofu press didn’t come with one),
- and a way to scoop up fine delicate curds (like a mesh strainer, slotted spoon, etc.)
Please note that these links are Amazon affiliate links. This means if you use them to make your purchases, I will receive a small commission but rest assured there is no extra cost to you.
How to Make Chickpea Tofu
Making tofu with chickpeas is a lot like making regular soy tofu. However, since there is more starch in peas, there is one extra (but easy) step to remove the starch. I’ll get into the details in the step-by-step below.
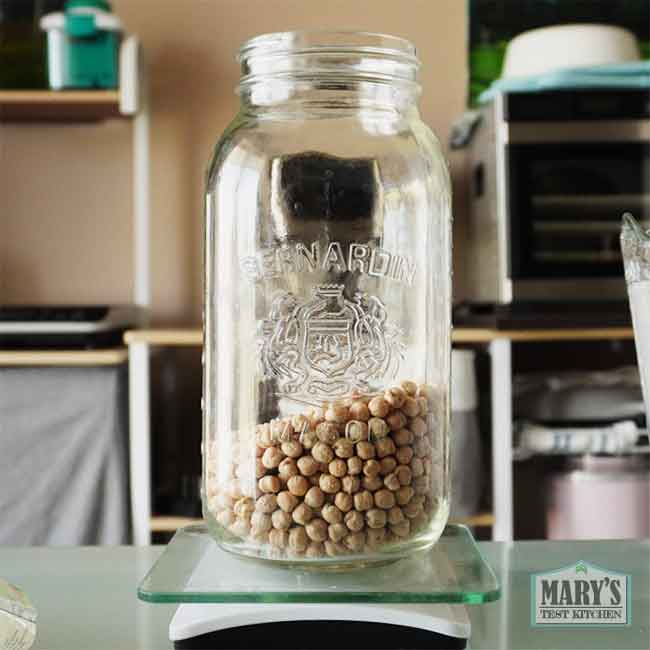
1. Soak the chickpeas
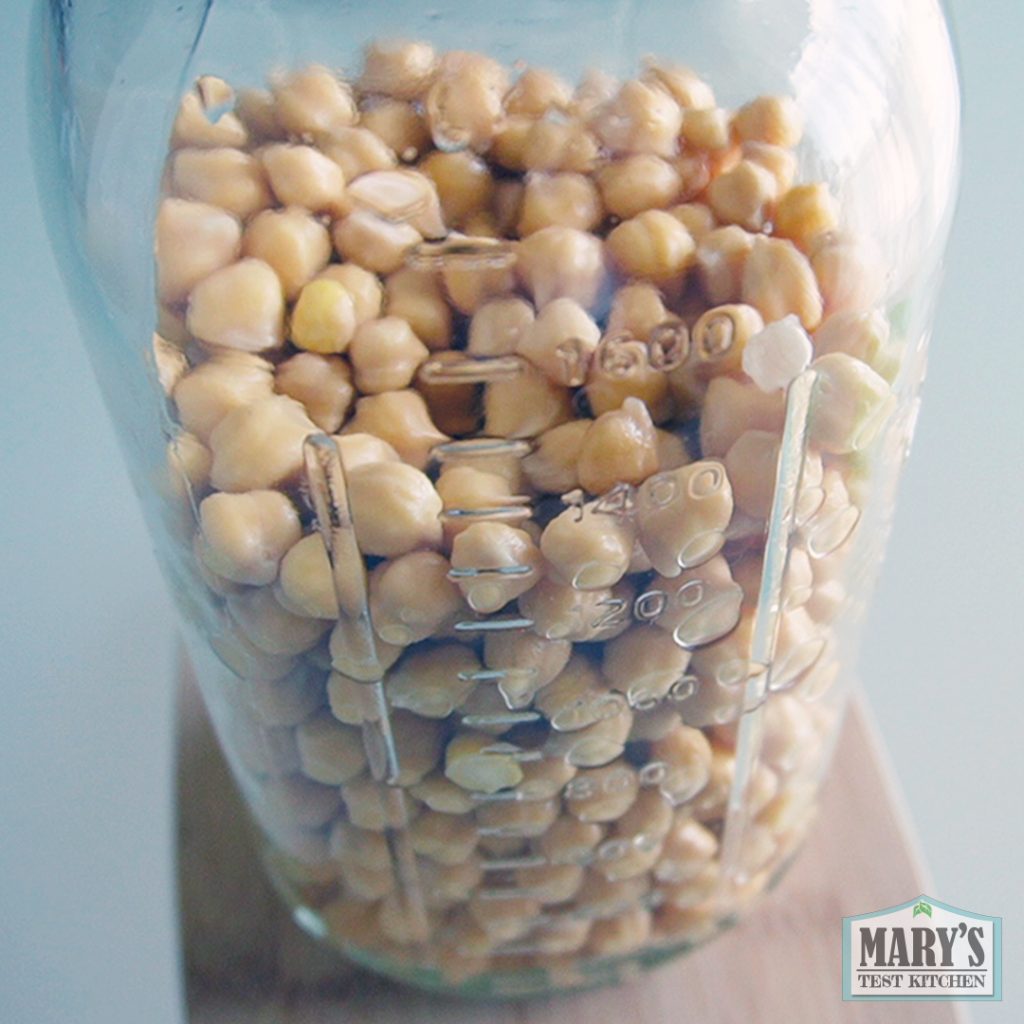
Soak whole dried chickpeas in plenty of cold water (at least 3 times the volume of peas) and let them rehydrate overnight in the fridge. I had a failure when I left them in the fridge too long so please keep that jar or pot in a visible location! Don’t forget about it (lol). I would recommend to soak the chickpeas for 2 days at the most.
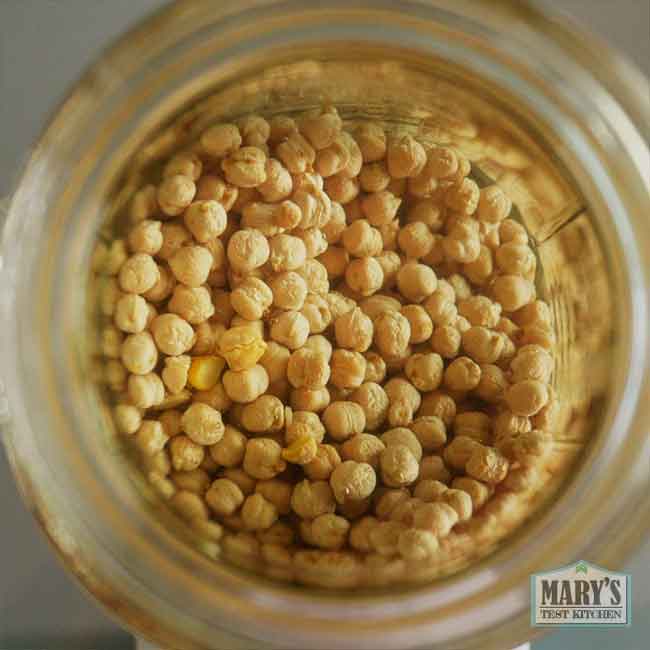
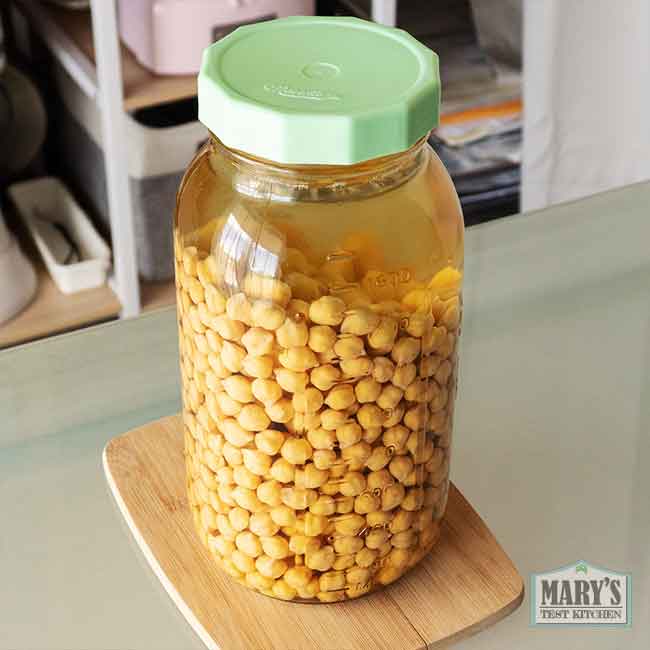
The next day, the chickpeas will have doubled in size. Drain the soaking water. Then rinse the peas to get rid of loosened starch and drain once more. You do not need to remove the skins.
2. Make Raw Chickpea Milk
Depending on the size of your blender, you may need to do this step in two batches. Combine the chickpeas peas with double their volume of water (no need to be exact) and blend for 30 seconds on high in your Vitamix or other high speed blender. If you are using a conventional blender, you may need to blend for 2 minutes or longer until the puree appears smooth. However, please try not to over blend as this will make the next step much more difficult.
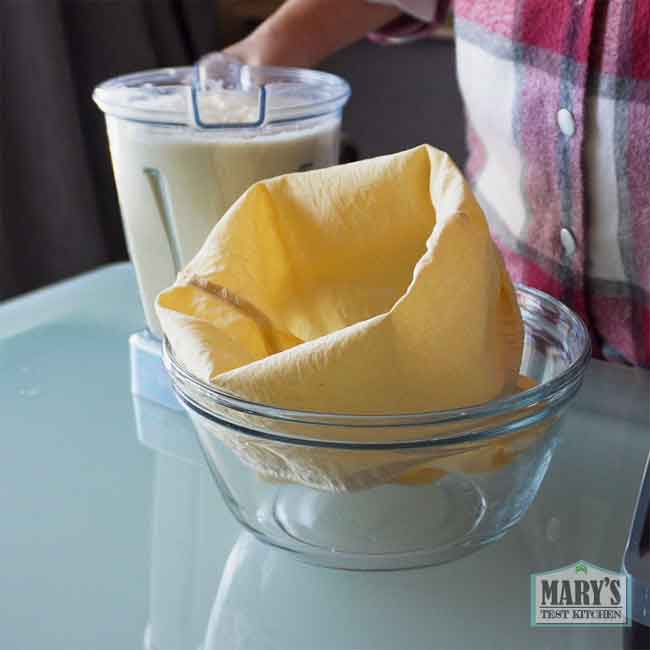
Pour the puree into a fine nut milk bag over a large bowl and strain until the pulp is as dry as you can get it.
The fibrous pulp should be quite fine and white with no obvious chunks of chickpeas peas in it. We want the pulp so fine that we get all the protein out of it but not so fine that it becomes impossible to strain.
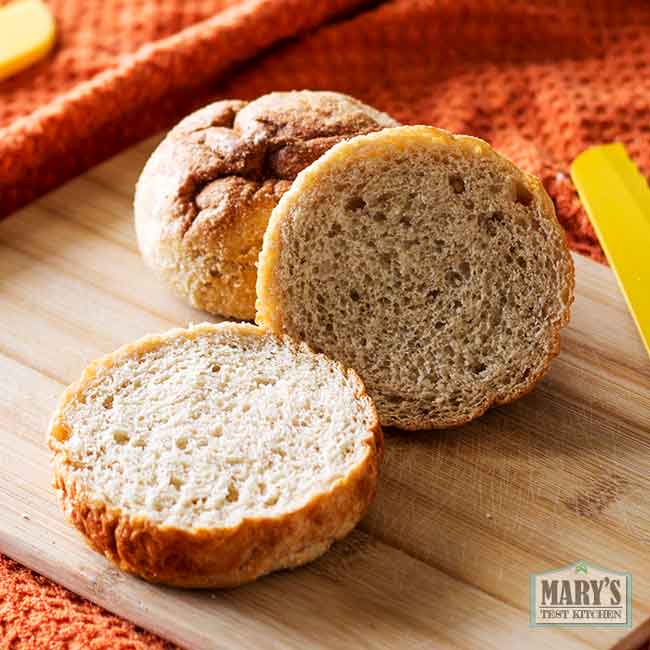
Save the Pulp!
The fibrous pulp can be used to thicken stews or soups. Or you can dry it to make low carb fiber flour and with that, you can make my Chickpea Fiber Buns!
If your pulp is still a bit chunky, run it through the blender again with just enough water to get it going.
Let the milk rest in the bowl for 60 – 90 minutes. This lets the starch sink to the bottom of the bowl.
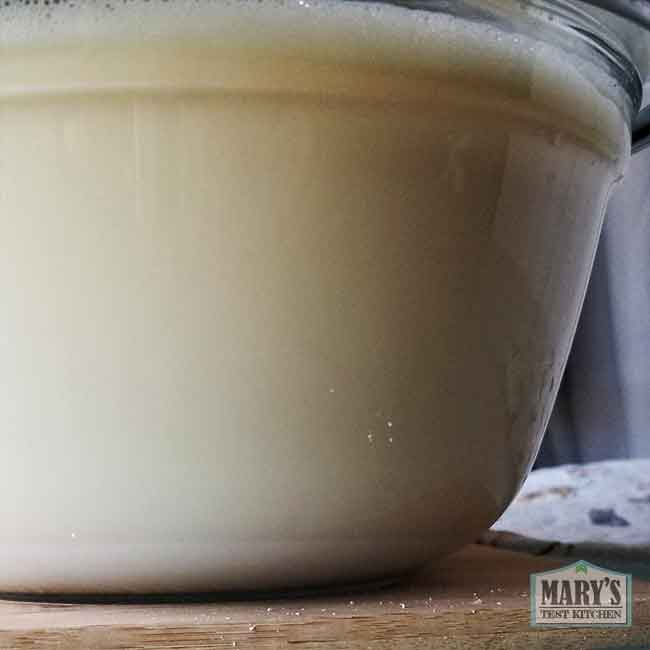
Afterwards, you can gently scoop the milk into your cooking pot. Be gentle and try not to disturb the starch layer at the bottom. When you get near the end of the milk, you may see loose starch in it. Just leave these tailings behind. Better to lose a bit of milk than to get starch into your pot.
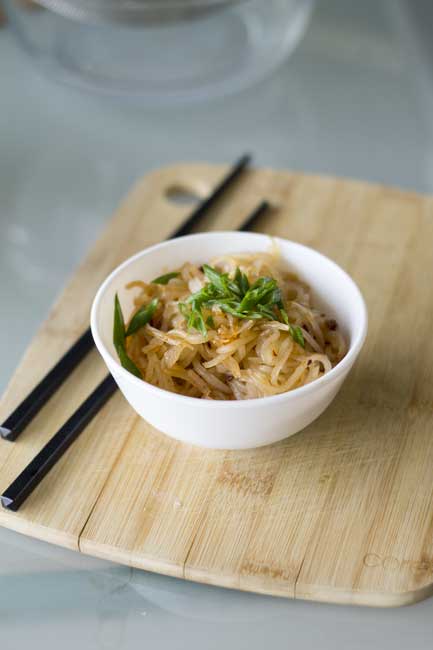
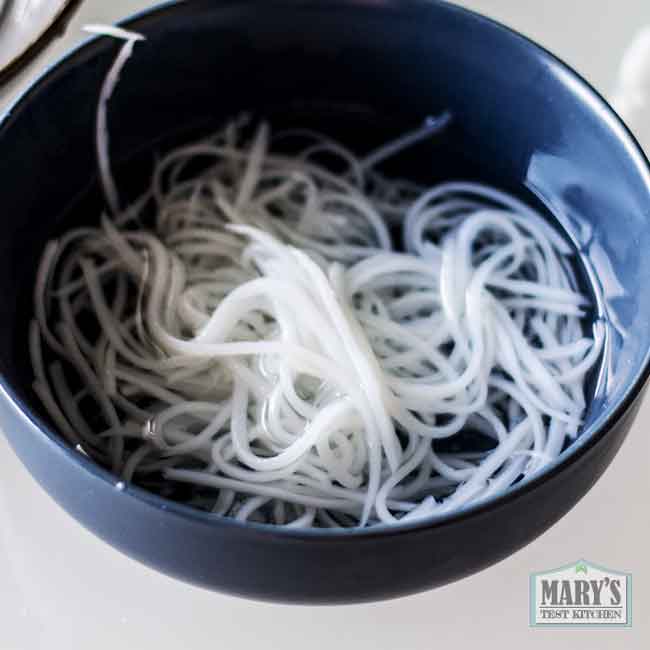
By the way, this starch can be refrigerated and saved. You can use it place of cornstarch for thickening sauces, soups and stews or for using in a frying batter. Or use it to make Chickpea Starch Noodles!
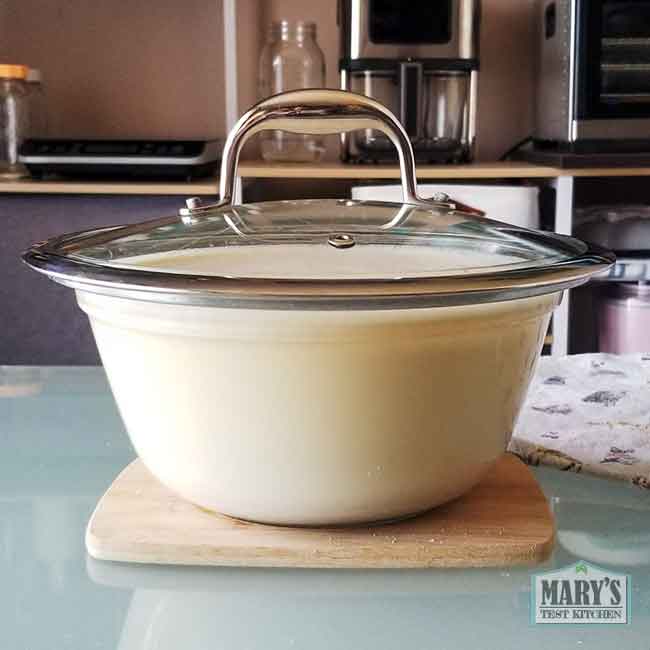
 3. Cook the milk
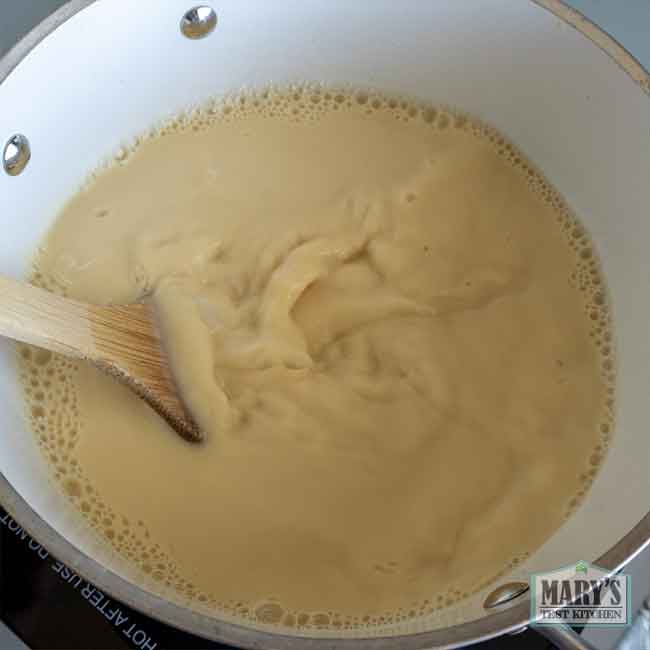
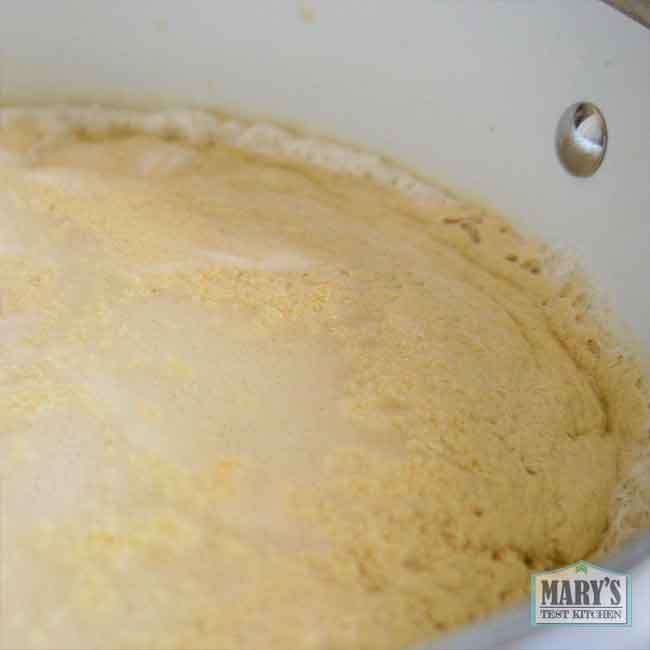
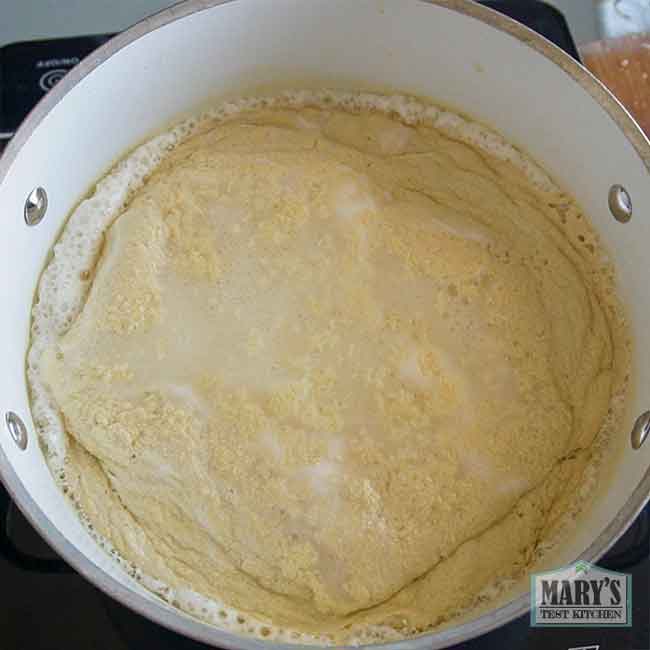
Then, over medium-high heat, cook the raw chickpea milk until it comes to a simmer. Like soy milk, a film can form easily around the sides and bottom of the pot so stir regularly. But unlike soy milk, chickpea milk starts to curdle as it approaches that simmer! No coagulant needed.
Control the heat to let it gently simmer about 10 minutes to make sure the chickpea curds are completely cooked through.
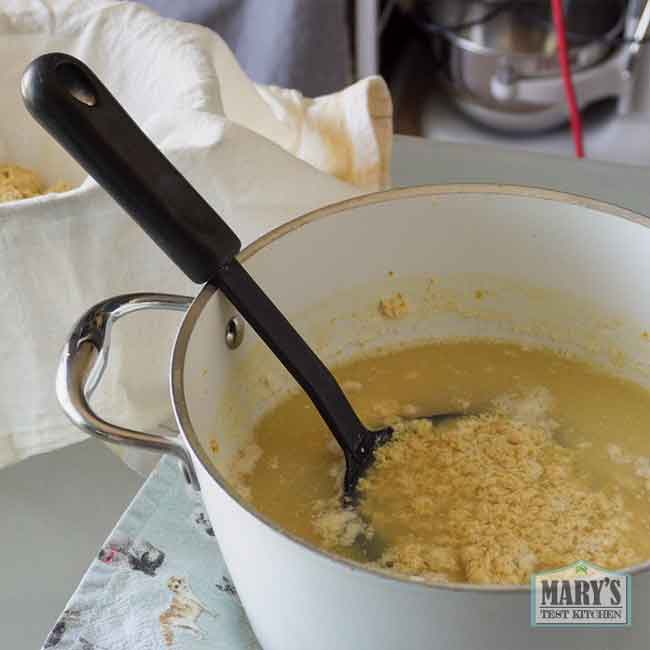
4. Let Cool
After the 10 minutes, turn off the heat, and let the curds and whey cool for a while. If your tofu press is plastic like mine, you may not want to put super hot curds in it right away. I like to let it cool until the curds are comfortable to the touch.
5. Press curds
Use a slotted spoon to transfer the curds into a cloth-lined tofu mold. Or to make it a bit easier and less messy, you might set up a mesh sieve lined with fine cheesecloth over a bowl. Then ladle the curds and whey into the sieve, letting the whey drain through into the bowl.
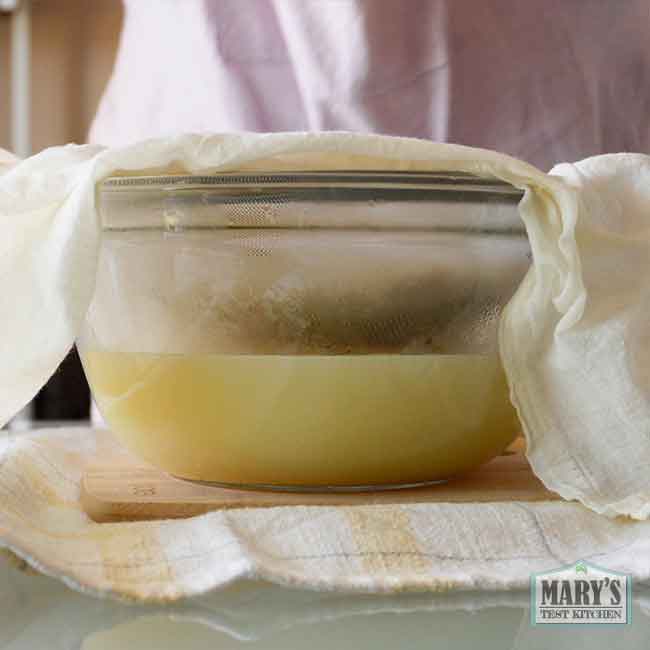
The chickpea whey is deliciously savory and can be reserved to use in place of vegetable broth for soups and sauces.
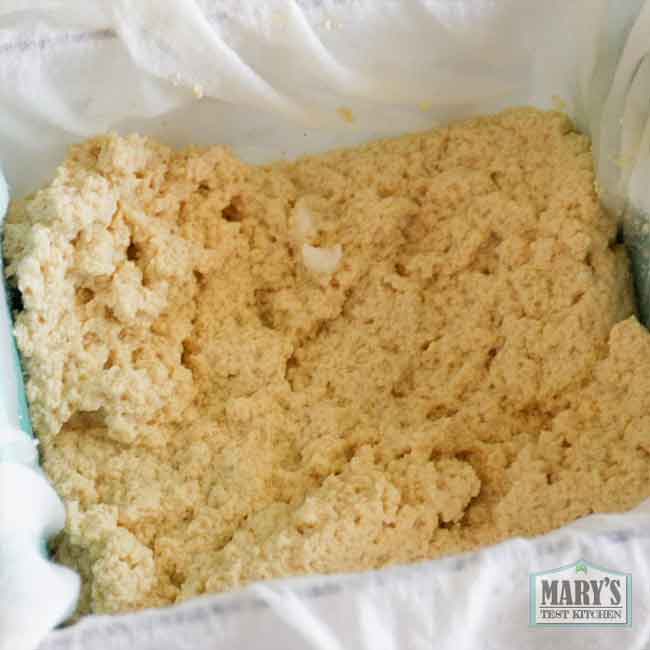
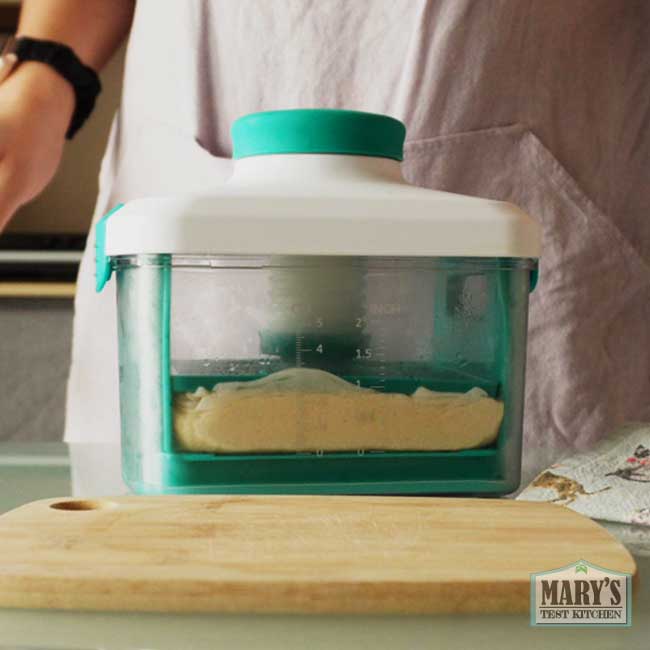
When enough whey has drained, it will be easier to transfer the curds into your tofu press. Gently arrange the curds they they sit evenly in the mold. Fold the cloth neatly over the tofu and add your pressing lid.

If using my preferred tofu mold, just twist the knob until it stops; do not force it. Pour off excess water using the vents. Please in fridge to cool overnight. If using weights, use about 5 lbs of weight, pour off excess water and place in fridge. The next day, gently unmold and your high protein chickpea tofu is ready to use!
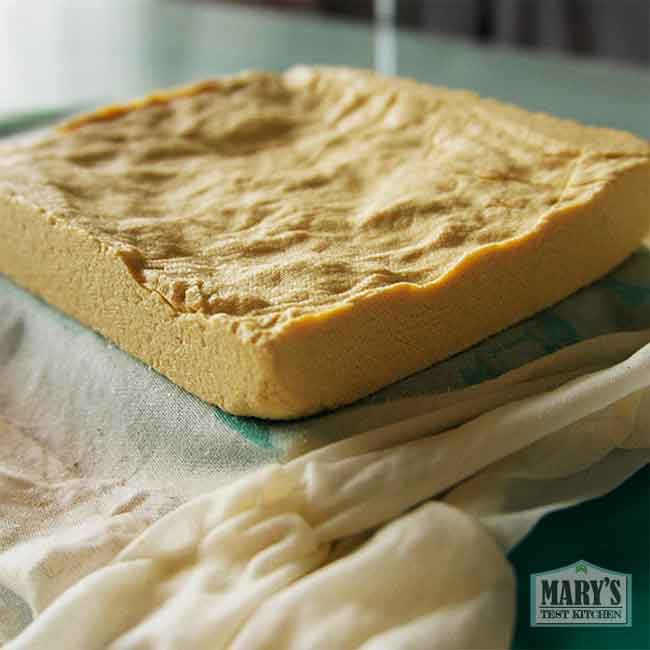
Results
With this method, you should get about 260 grams (9.3oz) of extra firm chickpea tofu from 1lb of dried chickpeas. If you didn’t use the maximum pressure in my recommended tofu press or you used a manual pressing method, your tofu will probably retain more water and it not be as firm as mine and will weigh more.
If you prefer a softer, more water-rich tofu, just apply less pressure in the last step. Just keep in mind that the more water is retained in the tofu, the more delicate it will be to handle. But it will be delicious! If you like the taste of chickpeas, you will LOVE this high protein chickpea tofu.
Troubleshooting Chickpea Tofu
Since writing this recipe, I’ve replicated my results several times with chickpeas of different sources without difficulty of any kind. However, a couple people have commented that they their chickpea milk did not coagulate as expected. In addition, the same problems that can arise with making regular soy tofu may also happen in making high protein chickpea tofu.
Chickpea Milk not coagulating fully (or at all)
If the chickpea milk is not coagulating at all there is either a variation with your chickpeas that is not allowing for self-coagulation OR there’s a issue with your process in making the milk.
You did not heat the milk enough
This is most likely NOT your issue when it comes to chickpea milk because it starts to show signs of curdling even before it comes to a simmer. However, if you have not tried taking your chickpea milk to a rolling boil yet, try it first!
Try adding a coagulant
The next thing to try is to add a coagulant. You probably have some kind of acid in the kitchen such as lemon juice or vinegar. These add a flavour to the tofu so it’s not my first choice, but it might be all you have on hand so give it a try! Use 2 tsp of lemon juice or vinegar diluted in 1/2 cup of room temperature water and stir it into the simmering chickpea milk. Turn off the heat, cover and wait 15 minutes. Afterwards, it should be coagulated.
My preferred method is using food grade gypsum. If you happen to have calcium sulphate (food-grade gypsum) on hand from your other tofu-making adventures, mix up 1 1/2 tsp with 1/2 cup of room temperature water and stir that into the simmering chickpea milk. Turn off the heat, cover and see what you get after 15 minutes. It should be fully coagulated.
If you tried adding a coagulant and it did not curdle, you have a problem with the chickpea milk itself.
Look at your chickpea pulp
A problem with the chickpea milk could be that you rushed the blending step or the milking step.
You’ll know you haven’t blended your beans enough if your chickpea pulp is chunky. It should be really fine, pretty dry after milking, but sticks together like play-doh. I divide the batch into two parts when blending as my containers are not that big. And this takes about 30 seconds using my Vitamix on the highest setting or 2 minutes using my regular-powered Oster Blender on the Liquefy setting.
Similar to that, if your soy pulp is the right consistency but quite wet, you’ve got to squeeze it some more! Get all that protein extracted; put some elbow grease into it and strengthen your forearms at the same time!
Homemade Chickpea Tofu is falling apart!
This is mainly because of how you wrap and press the chickpea curds. I use this tofu press because it provides even pressure and you can put the whole thing in the fridge to chill.
If you don’t have a tofu press however, you can replicate the effect with homemade supplies but be very particular about how you wrap and press your tofu. The cheesecloth should have some tension that keeps the shape and try to keep the weight even. This will make the consistency of the tofu …well, consistent. And therefore, the tofu becomes a solid block. If you don’t wrap it well, some parts of your soy curds will get higher pressure than others and it will fall apart.
The other reason may be that you skipped or rushed the final step of chilling the tofu completely. The temperature change makes the soy curds shrink which helps the tofu become denser and the curds interlock with each other, helping it stay together.
Printable Recipe for High Protein Chickpea Tofu
High Protein Chickpea Tofu
This high protein, low carb Chickpea Tofu is made in the traditional soy-tofu method with one extra (but easy) step.
Ingredients
- 1 pound dried chickpeas (454g)
- water
Instructions
- Soak split chickpeas in plenty of cold water overnight in the fridge. Rinse and drain chickpeas. Then, transfer HALF to your blender along with about double their volume of fresh water. Blend on high for 30 seconds. Over a large bowl or pot (prefer glass bowl to see through), strain through soy/nut milk bag until pulp is very dry. Repeat with other half of peas.
- Rest the milk for 60-90 minutes to allow the starch to settle to the bottom of the bowl or pot. Then, use a cup to gently scoop only the milk while avoiding disturbing the starchy layer below. You will have to leave some of the milk behind as it won't be possible to get it all without starch contamination.
- Transfer milk to large cooking pot. Turn heat up to medium high or high and bring milk to a simmer. During this time, the milk will start to coagulate. As it does, stir gently to prevent anything sticking to the bottom or sides of the pot. When a gentle simmer is achieved, control the heat and keep cooking for 10 minutes.
- Afterwards, check on how it coagulated. If it is completely curdled, move on draining the curds. Set up a large bowl with mesh sieve on top. Line with fine reusable cheesecloth (or several layers of regular cheesecloth). Spoon the curds and whey in, letting the whey drain into the bowl. You may let this cool a while before filling your tofu mold.
- Transfer the cloth with curds carefully into your tofu mold, Try to spread the curds in evenly. Then add the top and secure. If using my preferred tofu mold, just twist the knob until it stops; do not force it. Pour off excess water using the vents. Please in fridge to cool overnight. If using weights, use about 5 lbs of weight, pour off excess water and place in fridge. The next day, gently unmold and your high protein, soy-free chickpea tofu is ready to use!
Use the Leftover Chickpea Pulp and Starch!
After making your glorious chickpea tofu, why not try making Chickpea Fiber Buns using the leftover pulp?
 You can also use the leftover starch to make Chickpea Starch Noodles.
Thank you for all your recipes! I just wanted to comment that I let them soak for 3-4 days, and they wouldn’t curd even when a coagulant was added. I don’t know how long did you let them on the fridge the first time, but even 3-4 days is to long! Follow the recipe everyone! I will try again soon. Cheers cc:
Hi Alejo,
I’m sorry to hear that your chickpea milk didn’t coagulate after soaking the chickpeas too long. I know the feeling all too well! Hopefully it will go much better for you next time.
Best,
Mary
Soak time is a hour? Or 1 day? Overnight? Video I think states initially for overnight but were left till the next day. Recipe states soak time is 1 hour?? Help!! 🤪 Thanks for all your hard work! I’ve had 2 fails. Want to try again.
I didn’t wait long enough for the starch to settle, and my curds didn’t separate from whey. I had a thick creamy mass to which I added more and more coagulant – I poured it all back into the nut milk bag to try to drain into a bowl set in my fridge – not sure I’ll be able to salvage this.
If not, you’ll have chickpea soup? You’ll get it next time, Donna!
-Mary
Hi Mary. My wife and I have a lot of black-eyed peas at home, and we are wondering if we can make tofu out of them. The black-eyed peas have about as much protein as chickpeas, so we are hoping that they would work for tofu.
I have tried twice now but my tofu does not have the rubbery bouncy texture of tofu. It’s more a creamy, spreadable type texture! I am thinking I am not getting all the starch out but I let it sit for a while and then scoop the milk and then let that sit again then scoop again, but same problem!! Any suggestions or tips welcome!!
Hi Leah,
I’m sorry you’ve been having a some bad luck with the starch separation step. You might try letting it sit in the fridge overnight. Then you’ll have maximum separation for sure. You might even mark the starch line before starting to scoop so you’ll know if you’ve accidentally mixed it up or not.
Hope that helps! Please let me know how it goes next time.
Cheers,
Mary
Thank you very much! I think I will try the overnight settling in the fridge! I’ll report back.
This was such a fun and yummy thing to make. I love that you get tofu, buns and noodles from the recipe. Amazing!
I only had 12 oz of chickpeas so I added lentils for the rest and it was perfect
Worked perfectly for me! I try to find where you indicated the percentage of protein but dont remember (think it was a video). May I ask you this here?
I made this over the weekend and it turned out great! I let the starch settle a few times, just to be on the safe side. It wasn’t curdling after a good amount of boiling so I was afraid it wasn’t working out. I added some coagulant and it curdled pretty much right away! Had it tonight for dinner—excellent! The flavor and texture are not really much different from soy tofu.
Yay! I’m glad you made it for you, Jacinta. It’s interesting that not everyone’s chickpea milk is coagulating the same way but it still is making delicious soy-free tofu 🙂 Thanks so much for sharing your experience
-Mary
I made 10 times maybe. I was really disappointed almost give up. But I found your video and I will try it again. I’m from Burma I didn’t know I should have learned making tofu there because I didn’t know in US no cheackpea tofu here. Life is lesson to learn when we live in different countries.
Can we use white dried peas to make this tofu without using coagulant?
Hi Purvi,
Thanks for the question but I don’t have an answer. I haven’t seen white peas in Canada (unless they go by a different name here). Please let me know if you give it a try 🙂
Cheers,
Mary
hy mary
I just came across you youtube page few dats ago, lookinf for soya free alternative, as my son dont eat legumes as a normal dish ( in pieces)
I denfently will try the seed versions 😱 youre a ginius! you should open a little company and sell this diffrent type of tofu!!!
All over reading your posts to understand how it works i never hered about colucant before.
I wonder for chickpeas , lentice and other legumes,
what makes the diffrent of using the tratitional way of tofu making and the easy way of mixing everything and stir it for 35 minutes until its very thick but it in the frige and ready?
Is the taste changing or is it as you mentioned to have less starch and sugars in the end product ?
Hi Iris,
Thanks for your comment. Those whole legume “tofu” are different because of the reasons you mentioned. The taste, nutrition and texture are different from the coagulated and pressed style of traditional soy tofu. They also fall apart when you try to marinate, stew or braise them. So they aren’t going to be good substitutes in those cases.
Hope that clears things up.
Cheers,
Mary
Hi Mary,
I’m really excited to try to make this chickpea tofu. I saw that a coagulant is not necessary, but if needed, will vinegar (white or apple cider) work? I have that at home and don’t really want to look for calcium sulfate.
Hi PG, based on my recent tests using all different coagulants on soy tofu, yes, I believe you could use vinegar as a coagulant in that case. I would use the same amount as in the video (2 tablespoons diluted in 1/2 cup room temperature water). Hope that helps!
Cheers,
Mary
Hi,
I’ve made my tofu with chickpea flour and it turned out great and firm. My question is, should I store the finished tofu in cold water as we do with normal tofu?
Thanks in advance
Hi Ahmet,
If you made this style of high protein chickpea tofu, then you can store it in water if you want. Just like with regular soy tofu, it’s not necessary. If you made Burmese-style chickpea tofu, do not store it in water.
Hope that helps!
-Mary
Hi Mary! Thank you for helping me bring tofu back into my life. I’m allergic to soy and missed tofu a lot! I’ve made the chickpea tofu a few times, and also the split faba bean and pumpkin seed tofu.
I’m wondering though — I never get as much tofu as you seem to get, I’ve double checked against the goals for each stage, and can’t figure out where I’m going wrong. Well-blended in Vitamix – check! Pressed until meal is playdough-like – check! No chunks of chickpeas left – check! Fully coagulated – check! Any suggestions would be very much appreciated. And once again, thank you!
Hi Corbet! Thanks for the kind words. I’m so glad you can have tofu again!
I wonder if you are simply pressing the tofu with more pressure than I do. That would reduce the size of your tofu.
Other than that, perhaps try to find another brand of dry ingredients. I have found, especially with chickpeas, that the yield can vary.
Good luck!
Mary
Hello again! I’m plotting my next batch but had a question: Do you think it would be possible to make this starting with cooked chickpeas? I’d love to magically get aquafaba, tofu, and some extra chickpeas for the freezer all from the same time in the kitchen. Just wondering if you’ve tried this? Thanks!
Hi Corbet,
I haven’t tried it because I don’t think it will work. Once starch is cooked, it gels. This would make it difficult to “milk”.
Cheers,
Mary
Hello. Do you have any idea if removing the starches removes the lectins as well? Or would you have to pressure cook it, in this case rendering it not usable, unlike how it seems you’d be able to make homemade tofu from soybeans pressure cooked? Thank you, Hiroshi
I have no idea, Hiroshi. As far as I know, any harmful effects are removed when you cook the chickpea milk.
Thank you so much for the chickpea tofu recipe. PLUS the nutritional Estimates. I have missed tofu while following a “technically” keto lifestyle for years. NOW I can make this wonderful, versatile addition to my food program. At 70, I am thrilled to learn this new skillset.
I’m so happy this is helpful for you, Pamela! Really wonderful to hear!
Cheers,
Mary
Hi Mary, thanks for the great recipe and your Will It Tofu series! I had a lot of fun making this recipe. My yield was kind of sad though. I used about 450g dry chickpeas and only got about 160g of finished tofu (which tasted great!). I don’t have a powerful blender (I let it blend for 45sec), so I think it just didn’t extract enough protein. Would love if you or anyone has tips to increase yield. Thank you!
Hi Andy,
You’re on the right track! Definitely blend for longer. When I was using my old $40 Oster blender, I had to blend about 2 minutes to make soy milk. I would imagine it would be similar with Chickpeas. Please let me know how to goes next time.
Cheers,
Mary
Hi Mary,
Thanks again for this great info, and for all of your research and for being willing to share so openly!
I have tried twice with the chickpea tofu, once unsuccessfully and once OK but not great… I am beginning to wonder if elevation has to do with it, since we are at 7,000 feet.
The first time I used old chickpeas and sprouted them first, so I wrote that off as a failed experiment (didn’t coagulate even with lemon juice). The second time I got new chickpeas and followed directions and everything seemed good… my okara was fine and dry, like putty made from fine sawdust. My starch settled out enough that I was able to make a good amount of very nice chickpea starch nooodles. I cooked milk a little higher than you said (to try to overcome any altitude issues). I let it rolling boil a bit while stirring diligently, and kept it at a simmer or higher for about 15 minutes. It did coagulate, but more like the way you describe sunflower seeds coagulating… fine little clumps. It did tofu, but like a very delicate silken that started to disintegrate when I tried to store it in water (after being pressed overnight). It did make a great base for a sauce.
I will keep trying some of the others — really hoping to find a solid extra-firm style “cotton” soy free tofu for my hubby since I can easily find organic reasonably priced tofu that works for me!
I will say that I LOVE all of your work on “waste” materials — we’ve used all of the broth, okara, starch in various ways. Chickpea okara + sunflower seed okara + a dollop of chickpea starch + a couple tablespoons of flax meal made delicious and delicately crispy crackers. Yum!
…and one more note on this too-long comment: I wish you had a pay wall for getting an ad-free experience… I don’t get many subscriptions, but I know I will be coming back often to your website, and in our remote location the ad bandwidth has overcome my computer a few times while cooking… it would be worth a few bucks for ad-free access 😀
Thanks again!!
Has anyone tried using a juicer to make this. The kind that has two exit chutes: one for the milk and one for the meal
I have tried. I found that the “juice” still had to go through a nut milk bag. Even though most of the pulp was removed, not all.
I’m sure different juicers may have a better/worse time of it. But with mine, I found it just created more work.
Best,
Mary
Thank you. Seeing self-coagulation is quite magical. But how do you know when the coagulation has finished i.e. at what point do you move the curds to the colander? And what do you do with the whey? My frugality is kicking it.
Great question, Kate! The curds are maxed out when the whey is no longer milky looking. It will be clear yellow.
You can use the whey as a veggie broth replacement. It has a nice savory flavor.
Cheers,
Mary
I stumbled onto your YT video last week and decided I had to give it a try. To that end I ordered a tofu press and some cheese cloth, and bought a 1 lb bag of dried chickpeas at Walmart. After soaking them overnight I made my first batch of tofu yesterday. Everything unfolded just as in the video and this web page, and last night we cut up the block of tofu into our salad. Everybody raved over how good it was and now we have a ready supply of soy-free tofu, which we have never seen for sale. (One family member can’t eat soy products.) We’re looking forward to trying your other bean curd recipes, so thank you for your trailblazing work!
Way to go, Carlos! That’s great to hear 🙂
Cheers,
Mary
Thanks for a wonderful recipe, worked like a dream! Just wondering the rough nutritional info if you have it pleaese Thanks again