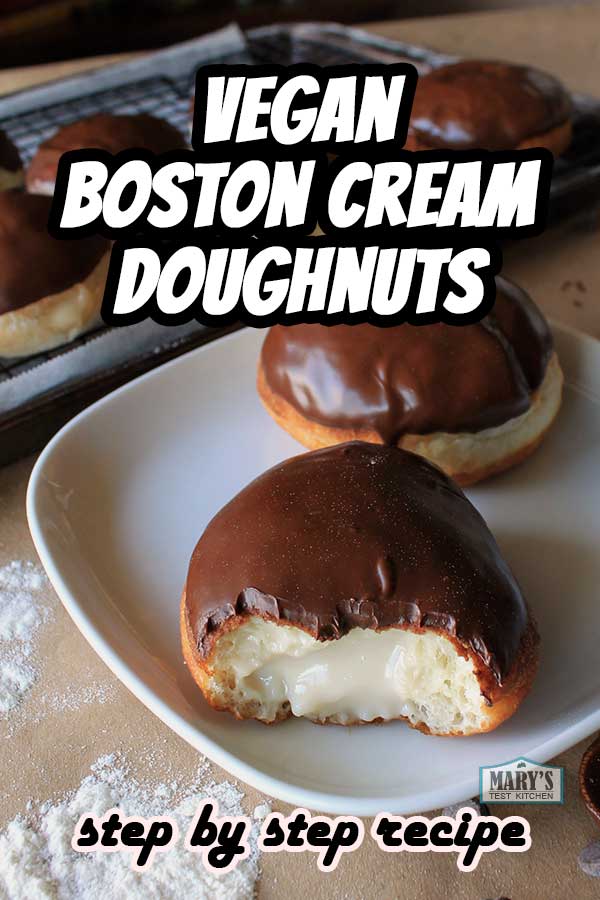
The time has come to make Vegan Boston Cream Doughnuts! It’s been years since I last had one from Timmy’s but I still remember those soft puffy donuts, covered with chocolaty glaze and filled with smooth vanilla pastry cream. It was one of my favourites. I’m not about living life without Boston Cream doughnuts, are you? I didn’t think so. Luckily, they’re not that difficult to make vegan from scratch. The most donut-y of donuts are deep-fried, but I’ll also show you the baked option AND show you how they do in an air fryer too.Click here to skip to the printable recipe. Or PIN this for later.
Video tutorial for Vegan Boston Cream Doughnuts
How to make Vegan Boston Cream Doughnuts
Don’t be intimidated! Making vegan Boston Cream Doughnuts at home is not difficult. But it does take time and patience. Here are the basic components that we’ll make, then assemble:
- vegan pastry cream (super easy!)
- yeast doughnut dough
- chocolate glaze
You can either deep fry, air fry, or bake them. Of course, deep-fried yeast doughnuts are the best but the air fried and baked versions are still really delicious.
Vegan Pastry Cream
First, make the pastry cream since it needs to chill before you can use it to fill your doughnuts. It’s really easy to make vegan pastry cream. Simply combine a quarter cup of flour, the same volume of sugar, a couple tablespoons of a neutral oil like canola, a little vanilla extract, lemon juice, and a cup of your favourite plain or vanilla plant milk. I like using soy milk as it’s the thickest and makes the creamiest pastry cream but I’ve tried almond milk and it works fine too.
Then heat it up until it’s thick and pudding-like. You can do this over the stove or in the microwave. This can be made ahead and stored in the fridge for up to 3 days.
Measuring Flour Properly
Start your dough by measuring out your flour properly. I showed you in my jackfruit Bao recipe video how to do the fluff, scoop, and level method. But many bakers swear by the spoon and level method. You still need to fluff your flour first. Then scoop it spoon by spoon into your measuring cup, while taking care not to pack it in. Then level off with a straight edge.
For me, the two methods are equally good if you know what you’re doing. The spooning, though, is rather annoying and I’m lazy. So I’d rather use my trusty ol’ kitchen scale for accuracy and less effort. On the less effort note, I’m using my blender’s food processor with dough attachment for this recipe. You can use a mixer or do it by hand like in my last donut recipe tutorial. Whatever you like.
Make the Doughnut Dough
Since I don’t keep bread flour in my pantry (why, I don’t know), I’m also adding extra gluten flour, AKA vital wheat gluten, to give the dough more bounce and strength. It’s not 100% essential but I think it improves the quality of your final product. Plus a tablespoon of ground flax. It also improves the texture of the final product but if you don’t have it, just leave it out and replace with a tablespoon of regular flour.
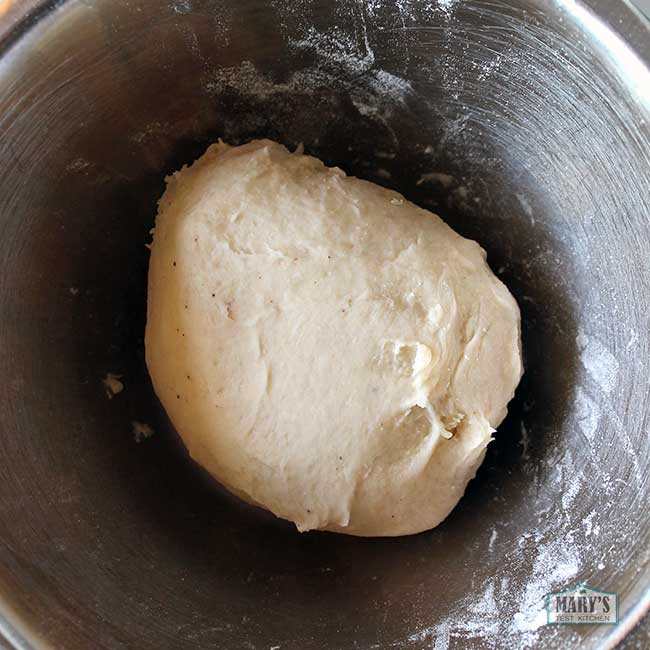
Next in, instant yeast. If you have traditional yeast, you can use it too but you’ll have to mix it with warm water first before you add it. Give that a quick mix before adding the rest of the dough ingredients. Process or stir until a soft, sticky dough forms. Then process it for a minute more before covering up and letting the dough rise until it’s doubled in size; about an hour.
Before anyone asks, do not use gluten-free flour for this recipe. It’s usually not a good idea to sub gluten-free flour straight for regular flour in a yeasted dough recipe. One day I’ll make a doughnut recipe just for my gluten-free viewers but today is not that day.
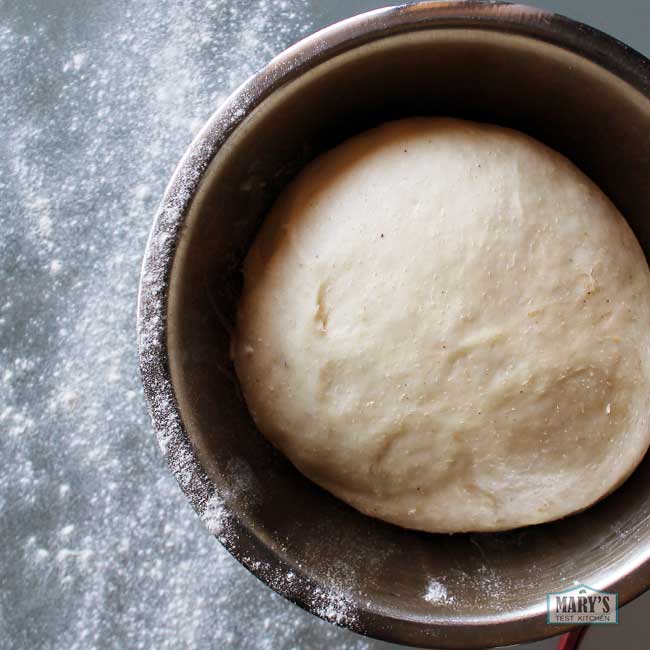
This is the dough after it’s risen.
When your dough has risen, you can take it out of the bowl and on to a lightly floured work surface. Knead it a few times to break down the big air bubbles that have formed in there. The dough will get elastic and bouncy again so we’ll give it a rest for 15 minutes.
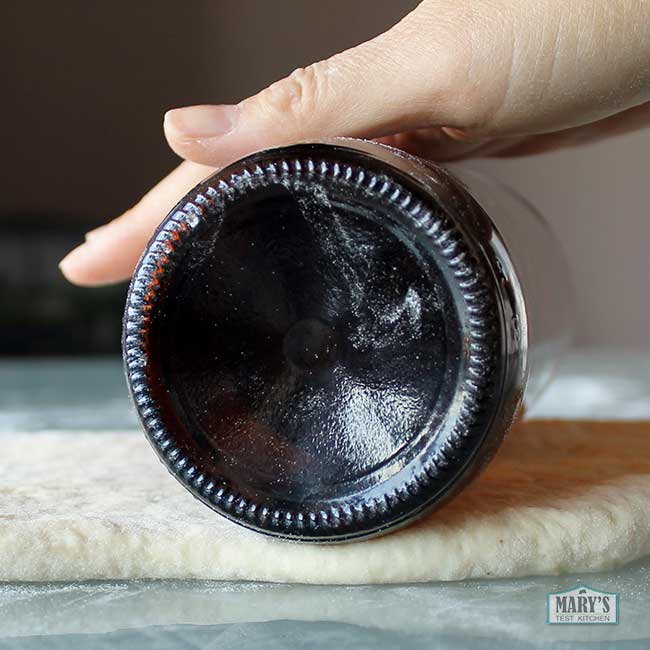
It’s not entirely necessary but I like to make things easier on my hands so I wait for the gluten to relax a bit before rolling the dough out. I use my handy dandy beer bottle rolling pin, you use whatever you like. The dough should be fairly soft and easy to roll out. Roll it to about half an inch or a little thinner; I use the width of my fingers as a guide.
Then cut out your doughnut shapes. You could use a proper dough cutter, I’m using a cup. For my last doughnut recipe, I used a large mason jar ring but since these are filled doughnuts without holes, I figure these don’t need to be as large.
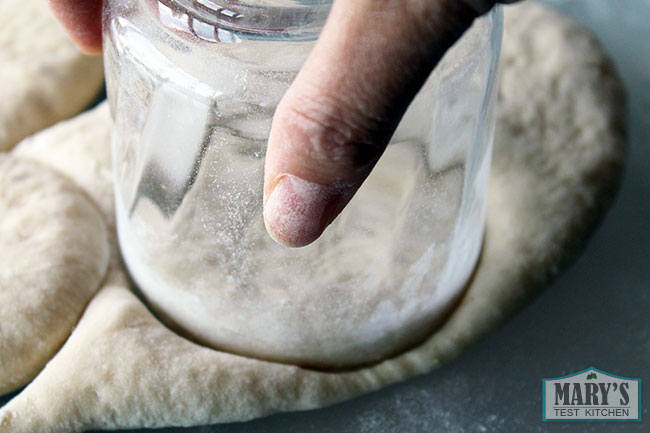
Put your cut doughnuts on to a well-floured baking sheet, or one that’s lined with parchment paper and just a little dusting of flour. Make sure to space them out so they have room to expand.
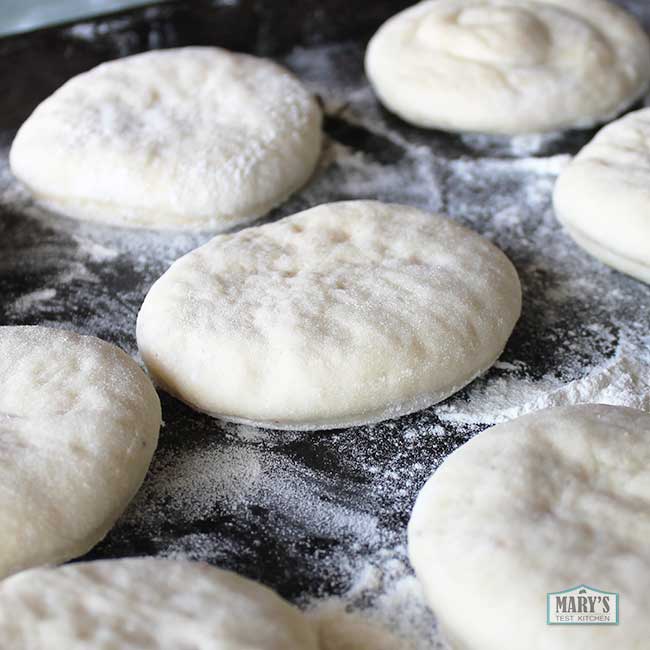
When you’ve cut out as many doughnuts as you can, squish the scraps together and roll out again to cut more doughnuts. Then cover your doughnuts up with something that won’t stick and let them rise again. About 45 minutes to an hour.
Deep-frying Doughnuts
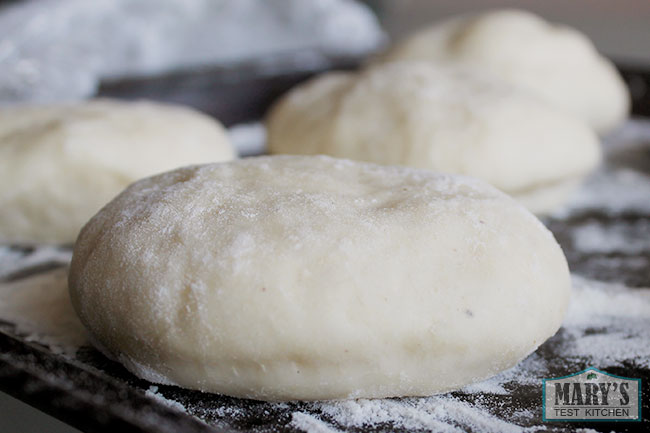
When the doughnuts have doubled in size, it’s time to cook them. If you’re deep frying, heat up an inch or two of canola or other neutral high smoke point oil in a deep heavy bottomed pan for even heat distribution. You want your oil at 350 Fahrenheit or 176 Celsius.
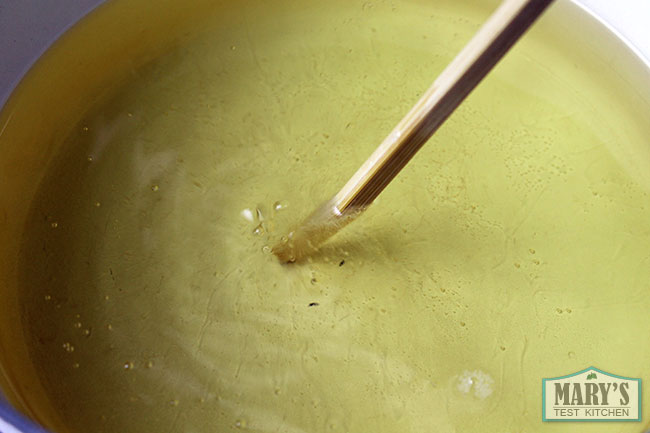
The digital thermometer I usually use stopped working so today I’m relying on visual cues. I use a chopstick and stick it in. If bubbles form around it, it’s hot enough for frying. But if the stream of bubbles is so intense that it seems to mist up, it’s a bit too hot. It’s not precise and it’s not the best method but we use what we have!
When you lower the doughnut in, the oil will bubble up around it. Be super careful. If you’re new to deep frying on the stove, please do only one at a time. In about 45 seconds, the bottom should be golden brown and you can flip it. After about 30 to 45 seconds on that side, you can remove it, let the excess oil drip off, then place it on a paper towel lined rack. Maybe use more than what I have there. That was my last piece of paper towel.
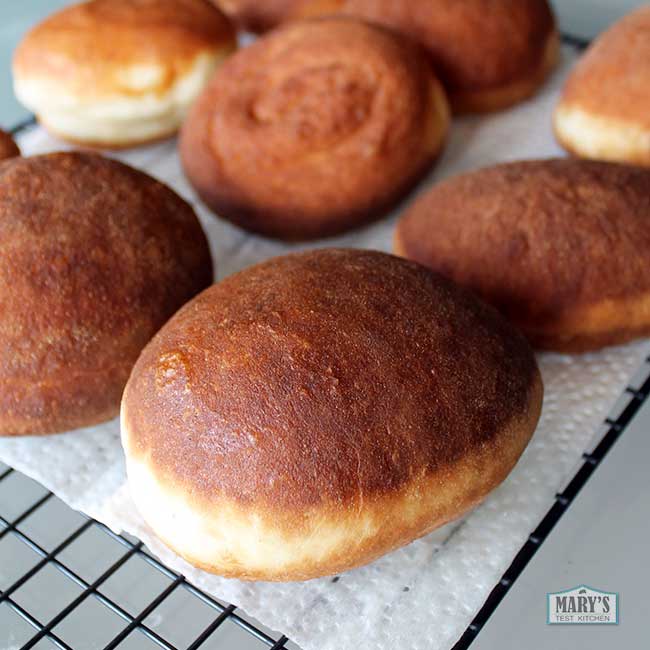
Sometimes, the oil will get too hot and you’ll need to lower the temperature. If your donut puffs up like crazy right away, chances are the oil is a bit too hot. It’s not a big problem but you’ll have some wonky looking doughnuts with a huge air bubble in the middle that will make for a messy cream doughnut later but to me, homemade doesn’t need to be perfect.
When all the doughnuts are done, let them cool down to room temperature before filling and glazing. Let the oil cool down too and when it’s at room temperature, you can strain it and save the oil for another deep frying session. Just keep it in a cool dark place to prevent it from going rancid prematurely.
Deep fried donuts are the standard but baking or air frying is easier, quicker, probably safer, and way lower in fat. They come out pretty darn delicious too so even though they aren’t the same as the deep fried version, they are still worth it.
Baking or Air Frying Doughnuts
To bake, preheat your oven to 350 degrees Fahrenheit or 175 degrees Celsius and when the oven has reach temperature, bake for 10 minutes and not a second more. You just want to cook the doughnuts but not brown them. Just like with frying, set them on a wire rack to cool before filling and glazing.
If you’re using an air fryer, preheat it a few minutes or according to the manufacturer’s instructions. I set mine to 375 this time but 360 or a little lower could do it too. While that’s going on, lightly oil the pan and set your dough in. My pan fits two at a time.
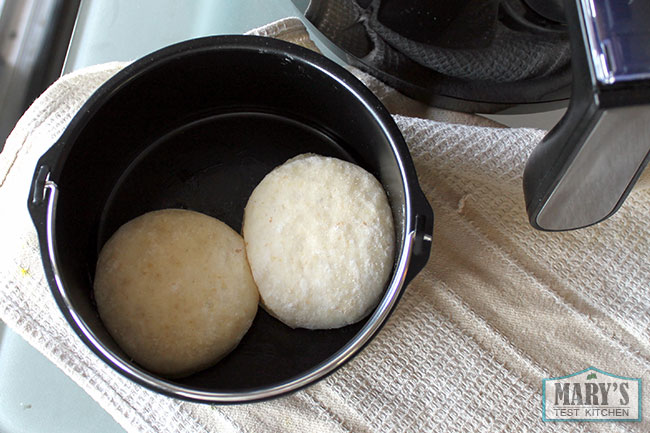
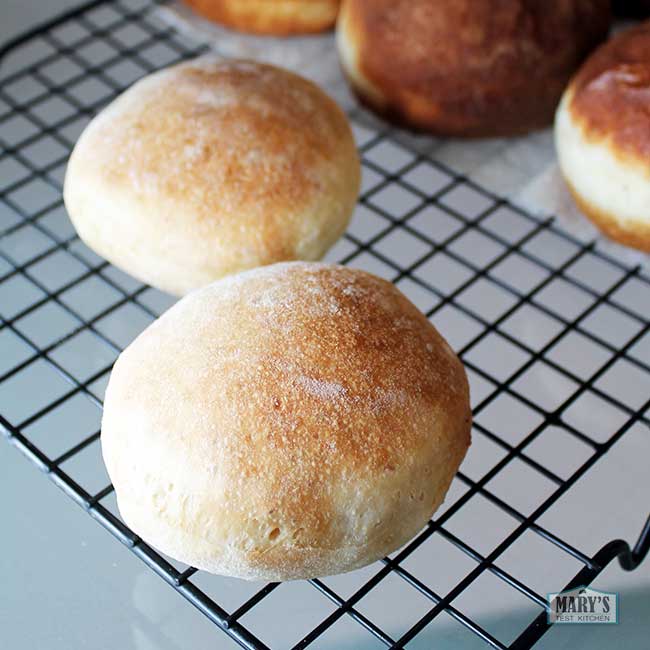
Then pop them in, set a timer for 4 or 5 minutes and let it cook. They come out a little golden on top and really look more like buns than doughnuts. But they will get donut-iter later. Just wait and see!
Assembling Vegan Boston Cream Doughnuts
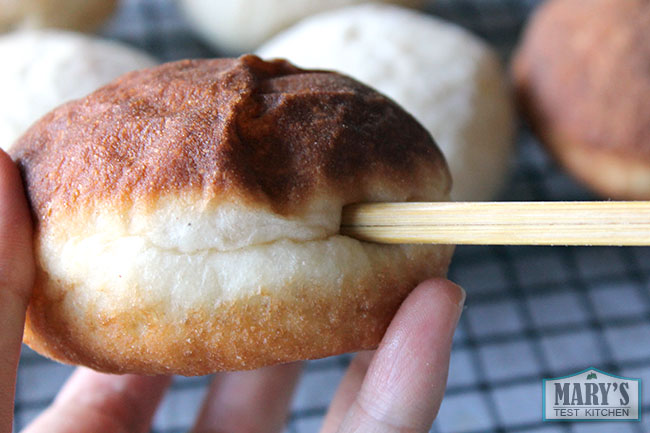
When the cooked doughnuts have cooled to room temperature, we can fill them. First, prep the doughnuts by poking them with a chopstick. Move the stick around a little to create a pocket for the pastry cream.
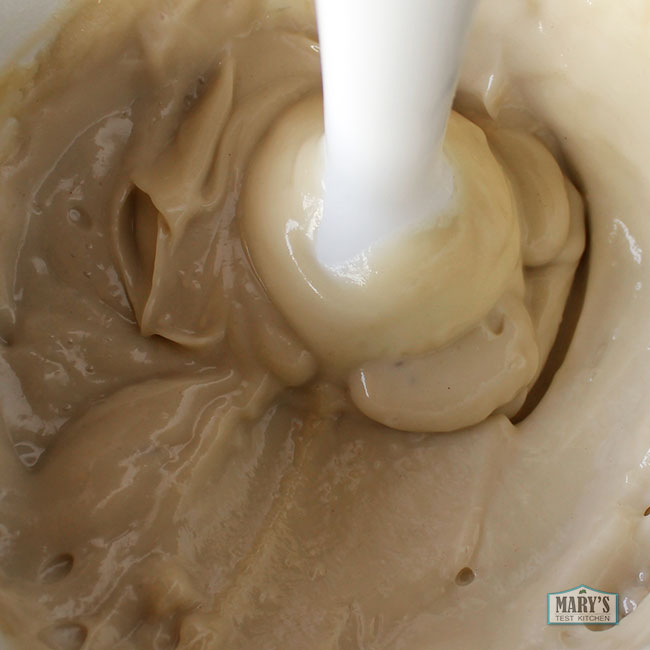
Your pastry cream is probably quite stiff from being in the fridge so loosen it up with a whisk or use an immersion blender like me. Also, as it sat in the fridge, it may have gotten some dried up bits so blending helps to eliminate that. Otherwise, you might push the cream through a mesh sieve to make it really smooth.
You’ll need a piping bag for this next part. I’ve tried using plastic bags with a corner snipped off but that’s way messier so I really recommend a piping bag of some kind. Fill the bag, then insert the tip into the hole you already made, squeeze, applying even pressure and fill ’em up! Bakeries weigh their doughnuts to make sure they get filled evenly. I’m just going by feel. And sure, you may get some doughnuts spilling their guts, but it’s kind of half the fun.
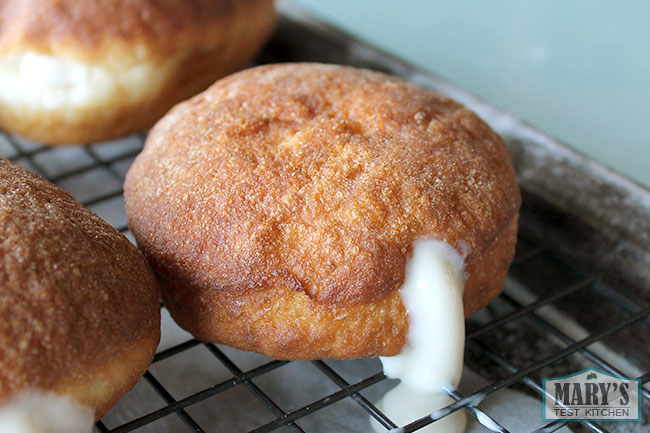
Now we have a whole bunch of cream filled doughnuts, let’s get the chocolate glaze on. I’m simply using a cup of semi-sweet chocolate chips that happen to be vegan-friendly and microwaving at 30 second intervals until they are melted. They will still hold their shape so they might not look completely melted but they’re ready.
Add a teaspoon of refined coconut oil and stir. Carefully dip a doughnut in, let the excess chocolate drip off, then back on to a wire rack. Repeat with the rest.
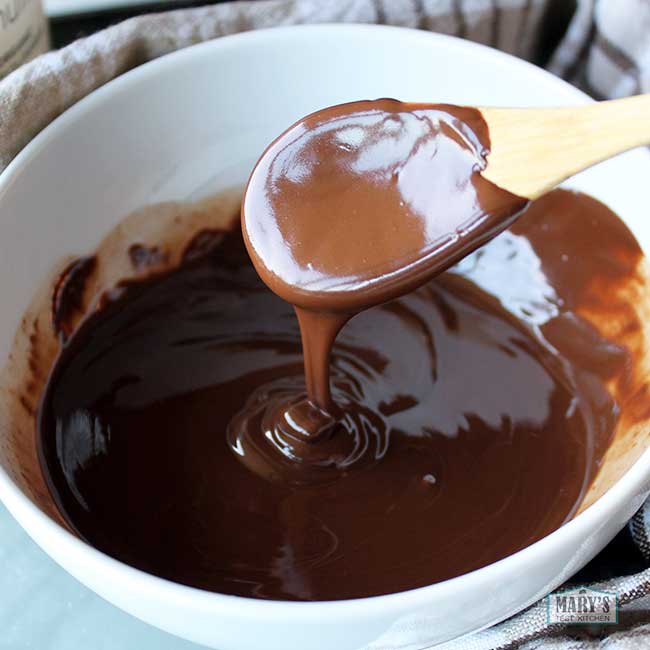
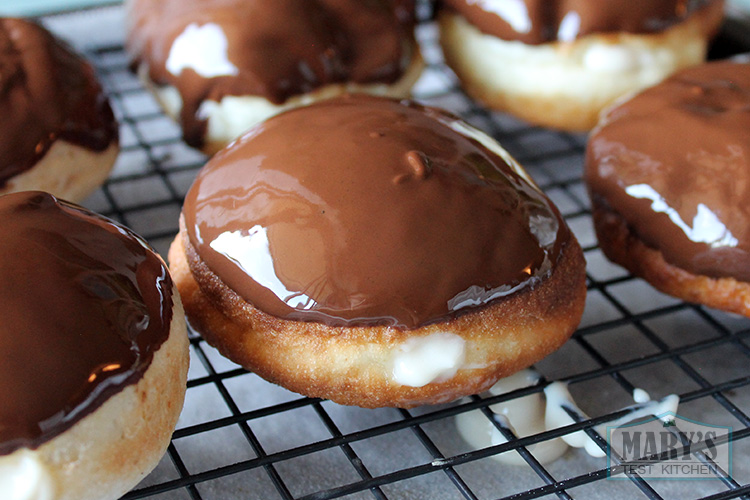
Beautiful shiny chocolaty perfection. But they’re taunting you. Unless you want a super messy situation, let them sit until they are set. Takes about a half an hour to an hour, depending on the room temperature.
I’m sure some of you live in super hot places where this would take forever and it would be better to refrigerate. Lucky for me, I filmed this on a very reasonable 26 degree Celsius day and it only took about half an hour.
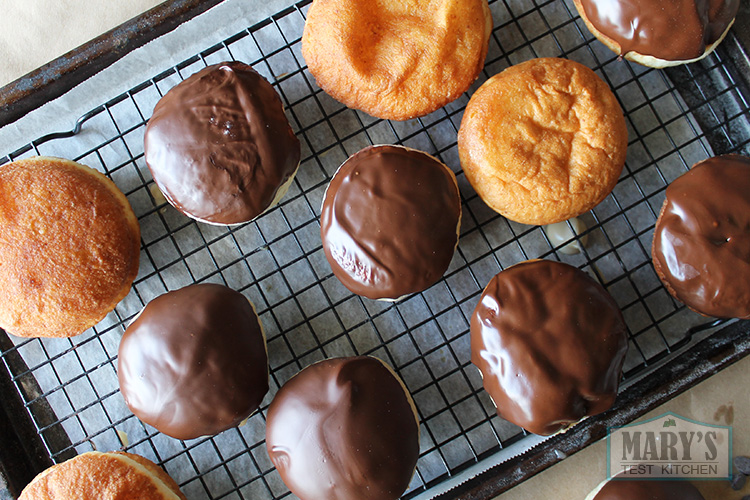
Homemade Boston Cream doughnuts require patience. And they are so worth it. These deep fried doughnuts are so legit. Plus, you’re in charge of the pastry cream so you don’t get those doughnuts where there’s one bite of cream and the rest is basically bread.
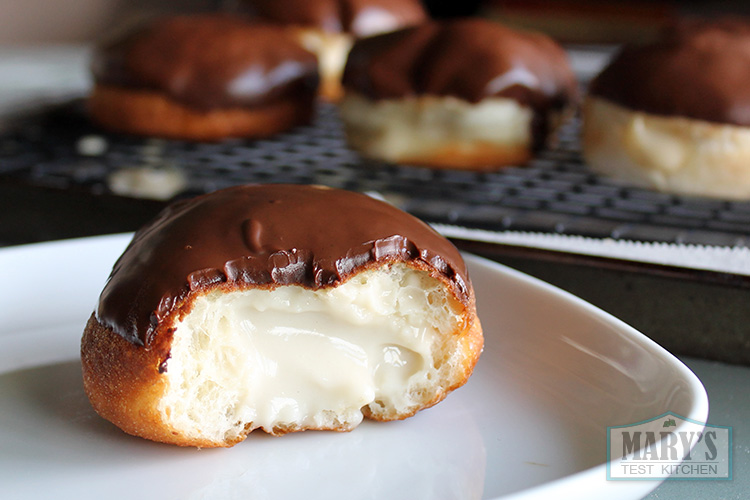
Speaking of basically bread, the baked version is also pretty darn good. The texture is not as donut-y as the fried version, but with that perfect coat of dark chocolate and smooth vanilla cream filling, they really hit the spot.
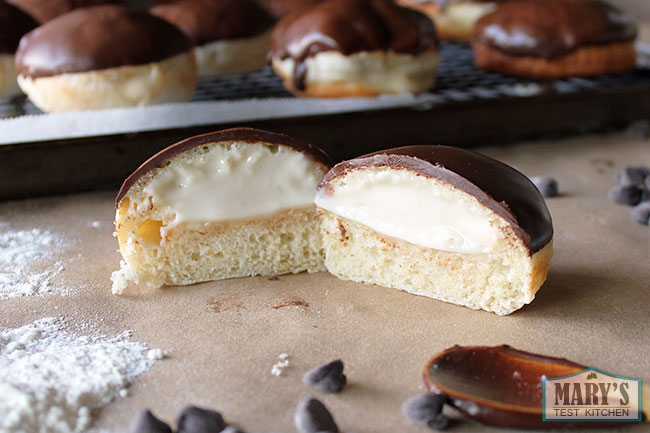
Baked Boston Cream Doughnut
But the air-fried one is probably the one I’ll make most of the time. The texture is somewhere between the deep-fried version and the baked version and the method is much less work and safer for an accident prone person such as myself.
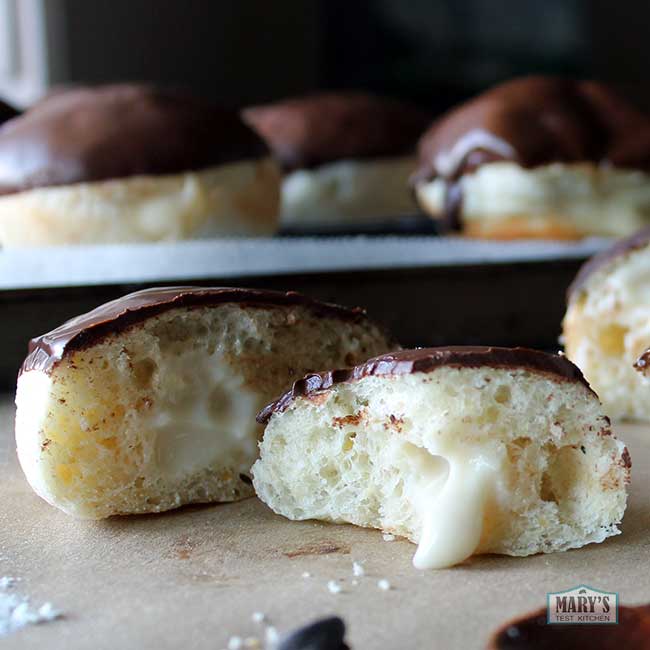
Air Fried Boston Cream Doughnut
All versions of these Vegan Boston Cream Doughnuts are best eaten the same day but as long as they not warm at all, you can put them in an air-tight container lined with paper towel in the fridge to eat the next day. Remember, you can make the pastry cream and dough ahead of time so there’s really no reason not to serve them fresh. But it’s your donut-making reputation on the line. You do what YOU want!
Thanks so much for reading, my friends. If you liked this recipe, please give it a like/heart and share it on Facebook, Twitter, Reddit, or where ever you hang out online. You would really be helping me out if you did. And sign up for email updates (form in the sidebar) so you don’t miss any posts!
Printable Recipe for Vegan Boston Cream Doughnuts
Vegan Boston Cream Doughnuts
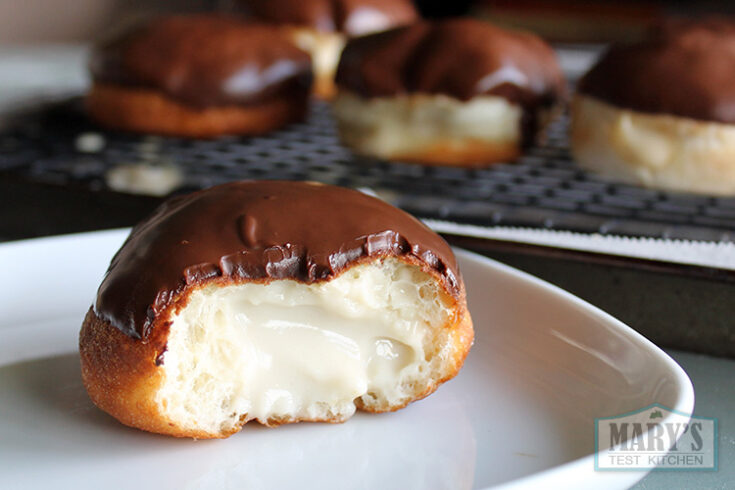
This vegan Boston Cream Doughnut recipe makes soft, puffy donuts, covered with rich chocolate glaze and filled with smooth vanilla pastry cream. Deep fry them for the most authentic result or bake them or use your air fryer for a lower fat option that's quicker to make and easier to clean up afterwards.
Makes 9 small donuts, about 2.5" diameter.
Ingredients
For Pastry Cream
- 1 cup soy milk or your choice of plant milk (235ml)
- 1/4 cup all-purpose flour (30g)
- 1/4 cup sugar (50g)
- 2 tablespoons canola oil or neutral oil of your choice (30ml)
- 1 tablespoon lemon juice
- 1 teaspoon vanilla extract
For Dough
- 1 1/4 cup all-purpose flour (5.3oz / 150g)
- 1 tablespoon ground flax/chia seed*
- 2 teaspoons vital wheat gluten**
- 1 teaspoon instant yeast
- 1/2 teaspoon baking powder (for baked version)
- 3 tablespoons refined coconut oil
- 2 tablespoons sugar
- 1/8 teaspoon vanilla extract
- dash of nutmeg, optional
- 1/2 cup of warm water (105-110°F)
For Chocolate Glaze
- 1 cup semi-sweet chocolate chips
- 1 teaspoon refined coconut oil
Instructions
Prepare the pastry cream
- Whisk all the pastry cream ingredients together in a small sauce pan. Heat over medium high heat while stirring until the mixture becomes thick and bubbly. Lower the heat to medium low and continue stirring for a minute while the mixture thickens into a pudding-like consistency, then remove from heat.
- Alternatively, you can actually do this in the microwave too. Just zap it for about 2 minutes, stirring every 30 seconds so it cooks evenly and doesn't bubble over.
- When cool enough to put in the fridge, cover it with plastic wrap right against the surface, minimizing any air pockets. You can make this ahead and store in the fridge for up to 3 days.
Prepare the Dough
- Combine the flour, ground flax/chia seed, vital wheat gluten, and instant yeast in a mixer, food processor, or large mixing bowl. If you'll be baking these donuts, also add baking powder for extra leavening power. Process/whisk for a few seconds.
- Add refined coconut oil, sugar, vanilla extract and, optionally, ground nutmeg. Add the warm water. Process/mix until a soft, sticky dough comes together. Process/mix a minute more, then cover and let rise in a warm location for 1 hour or until the dough doubles in size.
- If you are making this dough ahead, you can skip the first rise, cover it the dough with plastic wrap and store in the fridge for up to two days. Allow the dough to warm up to room temperature before continuing.
- Lightly flour your clean work surface and transfer the dough to it. Knead the dough for a minute; it will become more elastic and bouncy. Cover it again and let rest for 15 minutes to allow the gluten to relax and making rolling out easier.
- Roll the dough out to 1.25cm thickness (I used the width of my index finger as a guide). Use a round cutter 7cm in diameter, cut out the doughnut shapes (I used the rim of a cup for this). When you run out of dough, gather the scraps into a ball and roll out to cut more out. This recipe will make 9 x 7cm diameter rounds.
- If you are frying (or air-frying) your doughnuts, place the rounds on a parchment lined baking sheet dusted lightly with flour. Or if you don't have parchment paper, generously dust a baking sheet with flour and use that. Either way, leave room between the rounds so they can double in size without touching. If you are baking the doughnuts, place the rounds directly on a parchment lined baking sheet. Cover the rounds with plastic wrap dusted with flour (flour side down) or a damp lint-free cloth and let rise in a warm location for 45 minutes to an hour or until doubled in size.
To deep-fry
- Heat an inch or two of a neutral flavoured oil, like canola, in a heavy bottomed pot over high heat to 350°F (180°C). See video for visual cues that the oil is hot enough.
- Use a slotted spoon or spatula to gently lift a doughnut off the baking sheet, brush off excess flour, and carefully lower into the oil oil. Cook for 45 seconds or until the bottom is golden brown. Flip and cook for 30-45 seconds longer or until that side is also golden brown. Transfer to a paper-towel lined wire rack to cool. Repeat with all the donuts, frying one or two at a time. Keep an eye on the temperature and adjust as needed to keep it at 350°F (180°C). The the oil temperature is too cool, the doughnuts will cook more slowly and be more greasy at the end. If the oil temperature is too hot, the doughnuts may puff up too much, creating a large air pocket that makes for a messy cream situation.
- Let the cooked doughnuts cool to room temperature before filling and glazing.
To bake
- Preheat oven to 350°F (180°C). When the oven reaches temperature, bake doughnuts for 10 minutes. Remove from oven immediately. The doughnuts should be just cooked through, white on top and slightly browned on the bottom.
- Transfer to a wire rack and let cool to room temperature before filling and glazing.
To air-fry
- Preheat air fryer for a few minutes to 350°F (180°C) or according to manufacturer's instructions. Meanwhile, lightly oil the bottom of the pan and place two doughnuts in. They should fit without overlapping.
- When the air fryer is preheated, pop the pan in and air fry for 4-5 minutes. The doughnuts will come out lightly golden on top, resembling dinner buns more than deep-fried donuts. But once finished with cream and glaze, they will be excellent healthier Boston Creams!
- Transfer to a wire rack immediately and let cool to room temperature before filling and glazing.
To fill the donuts
- Use a chopstick to poke a hole into the side of each doughnut. Wiggle it around a bit to create a pocket for the cream.
- Loosen the pastry cream blending it thoroughly with an immersion blender. Or you can whisk it by hand. In that case, I recommend passing the cream through a sieve to make it super smooth.
- Fill a piping bag with a suitable tip with the pastry cream. I used a #230. Pipe the filling into each doughnut evenly.
For the Chocolate Glaze
- In a heat-proof bowl, microwave chocolate chips at 30 second intervals for 1 1/2 to 2 minutes or until the chocolate chips are melted. They will look shiny but may hold their shape; this is fine. Do not over heat! Alternatively, you can melt the chocolate in a double boiler. Do not let any water touch the chocolate!
- Add a teaspoon of refined coconut oil and stir until well combined and very smooth.
- Dip each doughnut into the glaze carefully, allow the excess chocolate to drip off, then place back on to the wire rack to let the chocolate set. The chocolate should set between half an hour to an hour; depending on the temperature of your kitchen. On extremely hot summer days, this can take longer so it may be better to set in the fridge for 20 minutes or so.
- These vegan Boston Cream Doughnuts are best eaten on the same day as cooking. Enjoy!
Notes
- Make sure to measure the flour correctly. Using much flour will make this dough too tough. When in doubt, start with less flour and add more as you knead it.
- *Ground flax/chia seed is used as an egg replacer and improves the texture of the final product. If you can't get it, you can leave this ingredient out and replace with the same amount of all-purpose flour, though your final result will be a bit different.
- **Vital wheat gluten, also known as pure gluten flour, adds more protein to the all-purpose flour and gives the dough more elasticity and strength. You can substitute the all-purpose flour for bread flour and leave the extra gluten out. If you can't get bread flour or vital wheat gluten, just ignore this ingredient. Your final result will be a bit different, but still good!
- I used Instant Dry Active Yeast (aka quick rise) for this recipe. If you are using regular dry active yeast (aka Traditional), dissolve it in the warm water before adding to the rest of the dough ingredients. If you're using yeast envelopes, use half an envelope for one batch of this recipe.
- Semi-sweet chocolate chips are often vegan-friendly; just look out for milk ingredients in some brands. Or choose the vegan chocolate chips of your choice.
- Looking for regular fried sugar glazed donuts? Try my original vegan doughnut recipe!
Nutrition Information:
Yield:
9Serving Size:
1Amount Per Serving: Calories: 329Total Fat: 17gSaturated Fat: 8gTrans Fat: 0gUnsaturated Fat: 8gCholesterol: 2mgSodium: 59mgCarbohydrates: 40gFiber: 3gSugar: 20gProtein: 6g
Nutritional Information automatically calculated by a plugin and may not be correct.
-
Skip to Recipe
[…] Boston Cream […]
[…] Boston Cream doughnuts (fried, baked or air-fried) […]
[…] Boston Cream doughnuts (fried, baked or air-fried) […]
[…] Vegan Boston Cream Doughnuts (with baked & air-fryer options) […]
[…] Vegan Boston Cream Doughnuts (with baked & air-fryer options) […]
[…] my Vegan Boston Cream Doughnuts or Classic Yeast […]
Leave a Comment


Talk about a craving. These look absolutely positively incredible! MUST try them soon!
Thanks, Karly! <3 Let me know how they go for you 🙂
Hey Mary. My dough keeps coming out too wet. I tried vegetable oil, and thought because the coconut oil was in solid form, I should try butter. Tried butter and still way too sticky. It’s actually a thick runny consistency. I use the amount of water you said. I tried 4 times. What’s wrong ?
Hi Racquel,
Just add more flour until you get the dough consistency that you see in the video. Good luck!
Cheers,
Mary
You are the best recipe ever!!!
Thank you so much, Amanda!
Mary, why is the sugar in ml? Or chia seeds? Is it correct or you missed something? (I mean the diameter)
Hi Sophie,
The measurements in ml are volume metric measurements; 5ml = 1 metric teaspoon, 15ml = 1 metric tablespoon. I don’t have the weight in grams for these. If you’re looking for measurements in spoons/cups, click the link in the recipe description for US measurements. 🙂
You say to use refined coconut oil for the glaze. I use organic unrefined coconut oil. Will that suffice, and can you tell me the difference between using the two, either nutritionally or from a purely “magic of cooking standpoint” is one form of oil preferred over the other?
I am very new to the Vegan lifestyle, still in diapers actually, and have been researching as many recipe videos on YouTube and ALL of the Food/Health/Animal/Vegan documentaries Netflix has to offer over the last two weeks. And the movie “Okja” :-).
I am doing this alone, my family is angry I have made this choice. I have felt guilty and hypocritical for years (I am 55, first tried veganisim at age 17). I know I will prevail with the help of this marvelous online community. You have a beautifully designed, professional site. It is going to help me tremendously in my journey. <3
Hi Susan,
The main difference between refined and unrefined coconut oil is just the aroma. Unrefined coconut oil smells like coconuts; refined coconut oil has been processed to eliminate that aroma. You can use either or; no difference to the end product except for that coconut-y flavour.
Good luck on your vegan journey! I hope your family comes around and realizes that you must do what feels right to you. We all must; otherwise, we can’t find our peace and happiness! <3 Best wishes to you <3
Mary, your answer was very helpful to me, and your blessing means the world to me. Thank-you <3
Is it okay to substitute the coconut oil in the dough recipe for margarine?
That should be fine although I haven’t tested that combination.
Can I use dry active yeast?
Hi Karl,
Yes, you can use regular dry active yeast. Just dissolve it in the warm water first and let it bloom before adding to dry ingredients.
Cheers,
Mary
Hi just starting to make this recipe. Why don’t you put salt in your yeast rising recipes?
It’s unnecessary. I only add salt when I feel it enhances the final result. 🙂
Great recipe! Just did it 😉
For a First time It came out really Nice! Although they seemed a little handicaped hahaha
Frying is really hard o.o, most of them got too Brown and they weren’t so fluffy and dry as I remember eating at the store when I wasn’t vegan.
Loved the texture of the pastry cream, but I messed up adding peanut milk to it hahaha It got awkward hehe
Thanks for sharing your experience, Hellan! <3 I kinda like the idea of peanut milk though. Sounds like it could be really delicious with the chocolate! Frying can be difficult, especially the first time. Oil is such a great heat conductor…almost too great sometimes! I'm sure you'll get the hang of it 🙂
This recipe looks amazing. I love how you made it work using less traditional kitchen props like a rolling pin, thermometer, and a cup. When I’m craving donuts, aint nothin stopping me!! Haha, saving this one for later for sure 🙂
YES! I love your attitude! 🙂 Ain’t nothing stopping you! woot! <3
Hi Mary,
Your receipes are so good.
Can you tell me the name of the flour you use?
Mine doesn’t come out so soft like yours.
Hi Sakshi! I’m using no name brand all purpose unbleached flour. If your dough is tough, that usually means you have added too much flour. Good luck!
Looks sooo good. Can’t wait to try them!! Could you please add a Pinterest button?
Thanks! I’ll have to figure out how to do that. But good idea!
I made the dough last night, but it didn’t rise. It is currently out of the fridge and waiting to reach room temp. Will it rise during that time? Thanks!
The dough will rise at room temperature; more quickly if it is quite warm. Did you let it rise once? Or did you put it directly in the fridge?
If you did let it sit at room temperature before putting it in the fridge and it did not rise that time, that indicates that the yeast was not active and your dough will not rise. If you had put it directly in the fridge, it may still rise after it reaches room temperature.
I put it directly into the fridge. I ended up being too late to make them yesterday. The dough is trying to reach room temp as I type. I have my fingers crossed and will let you know how it turns out. Thanks!
Hi Mary I was wondering if gluten free flour mix might work? I’m not celiac but am gluten intolerant (Dr words) just wondering . thanks ?
Hi Mish,
Sorry, this recipe will not work with gluten-free flour.
-Mary
They came out fantastic! They dough didn’t rise after it reached room temp and rested for 15 minutes after I kneaded it, though. Thanks for the recipe.
YAY! What a relief! haha 🙂 So happy that they turned out fantastic for you! <3 Thanks for sharing your experience!
Hi, these look great! Planning to try them tomorrow and testing both deep fried version and air fried version. I recently bought an air fryer so I’m in the stage of wanting to air fry EVERYTHING. If air frying, should the dough include baking powder or not?
thanks!
Wonderful! Yes, add the baking powder for air fried and oven baked. I’ll need to make that clear in the printable recipe. Thanks for the question, Katherine!
Mine didn’t turn out that great 🙁 they were a bit flat (I think my yeast isn’t that good) and didn’t really brown at all when I deep fried them
Do you have any advice on how to fix this?
Thanks 🙂
P.S.: I’m also very average when it comes to any sort of baking so I’m sure it’s not the recipe, i just need a bit of help haha
Hi Clara,
Test your yeast! Put it in warm water. Wait 10 minutes. Is it foamy? Is there some bubbly action? Then it is still active. If not, get new yeast.
Don’t roll the dough out too thin either.
If they didn’t brown, your oil was not hot enough. Wait longer for your oil to preheat. If you put in the doughnut dough already and you can tell that oil isn’t cooking it fast enough (meaning not hot enough), cook for longer until the colour is achieved.
Good luck for next time!
Hey Mary, I am sorry to say that when trying this recipe today it didn’t work out very well and I can’t find the mistake!
My donuts didn’t even think about rising even though I followed the instructions (time, covering, warm place). Do you have any idea what I can do to do get a decent result next time?
I would be grateful for your help ?
Love from Elle
Hi Elle, I’m sorry to hear that. It sounds like the problem was with the yeast. Either it was stale and too much of the yeast was dead already or the water may have been too hot, which would kill the yeast. To check the yeast, combine the yeast with the warm water and wait for 10-15 minutes. If it’s alive, the mixture will foam and you’ll see gases moving around in there. If it doesn’t really do anything, you’ll know it’s dead and you’ll need to buy new yeast.
Good luck! – Mary
You are an amazing person! Ive been vegan for 2 years now and until last night have not had a donut! Thank you so much for this amazing recipe! Making more today to give to my vegan buddy at work!
Thanks for the kind words, Tab! I’m so glad you liked them 🙂
Do you have an air fryer you can recommend? I would love to try this without all the extra oil from frying!
There is nothing more delicious than a freshly homemade food!! I love doughnuts and thanks to you now I know how to prepare it by myself at home!! Thanks, Mary!
Is it possible to make them gluten free?
THANK YOU for this recipe! I made these today, they took some time to make and no time to eat haha, they are delicious!! I found the taste of my canola oil to be too strong for the custard type cream, will go for a completely flavourless oil next time! Maybe it’s a good thing that it takes time to make these, because I could definitely eat them every day! Thanks for all your amazing recipes, me and my bf have gone vegan this summer and we’re really enjoying eating lots of yummy food!
Hi, could i use whole wheat flour instead?
Hi Kate,
Yes but whole wheat flour will give these doughnuts a much different texture. I personally wouldn’t.
If you do go ahead with whole wheat though, remember whole wheat flour absorbs more water so use less flour. Start with 3/4 the amount called for and increase from there if the dough is still too wet.
Cheers,
Mary
These are amazing! I will absolutely be trying more of your recipes!!
im really sad that mine did not rise
Looks positively scrumptious. Ex long term vegan here but looking to go back and recipes like this make it easy. Thanks!
I made extra filling – do you know how long it is good for in the fridge?
Hi Elisabeth,
It should be fine for a few days in the fridge. I’d say no more than 3 to 5 days.
Cheers,
Mary
Hello, but I’m still learning how to bake and I don’t have several ingredients, so can you please answer the following questions;
– If we do not have any yeast or gluten flour, what are there substitutes?
– Instead of canola oil can we use coconut oil for the cream?
– I do not like chia seeds and you can see them in the doughnuts so what can I use instead?
– Referring back to the Chia seeds are we supposed to soak them in water then ground them?
– Is the dough supposed to be for one doughnut only, if not how big are they supposed to be?
I tried this recipe once and it didn’t work to well so nothing is going to stop me from achieving the perfect doughnut.
Hi Jaggy,
Sorry, this recipe requires yeast. There are no substitutes. As for the pure gluten flour (aka vital wheat gluten), you can skip it. Ideally you would substitute bread flour for the all-purpose if you leave out the extra gluten flour.
Yes, you could use coconut oil for the cream.
If you use ground golden flax seeds, you will not see them in the final product.
You do not soak the seeds before grinding them.
The dough makes 9 donuts.
Hope that helps! You can do it! Good luck 🙂
Cheers,
Mary
These doughnuts are making me so hungry.
Oh Dedria, that just means you are meant to have them 🙂 Either to make yourself or send the recipe to someone who owes you a favor 😉
Thanks for the comment.
Cheers,
Mary
Hello! these look amazing
Could I substitute white or whole spelt flour for the wheat flour? Thanks!
Sorry I haven’t tried spelt. Please let me know if you do!
Cheers,
Mary
Hi can I sub out the coconut oil in the dough for olive oil or some type of neutral oil like that. Trying to watch my sat fat content and coconut oil is loaded with sat fat sadly
Hi Kelsey,
I would avoid olive oil because of the flavour but you can use something like canola if you like. However, the texture using liquid oils in this recipe isn’t as good as when using refined coconut oil.
Cheers,
Mary