Can we make REAL-TASTING cheese with PEANUTS? This is the first installment of my new series, Will it Cheese?! I’ll be applying traditional methods of making dairy cheese to non-dairy ingredients to see what happens. Along the way, I aim to find out what plant-based ingredients make the best tasting non-dairy cheese, what textures can be achieved and which methods work best.
VIDEO: Will Peanuts Cheese?!
This video was published on March 30, 2025.
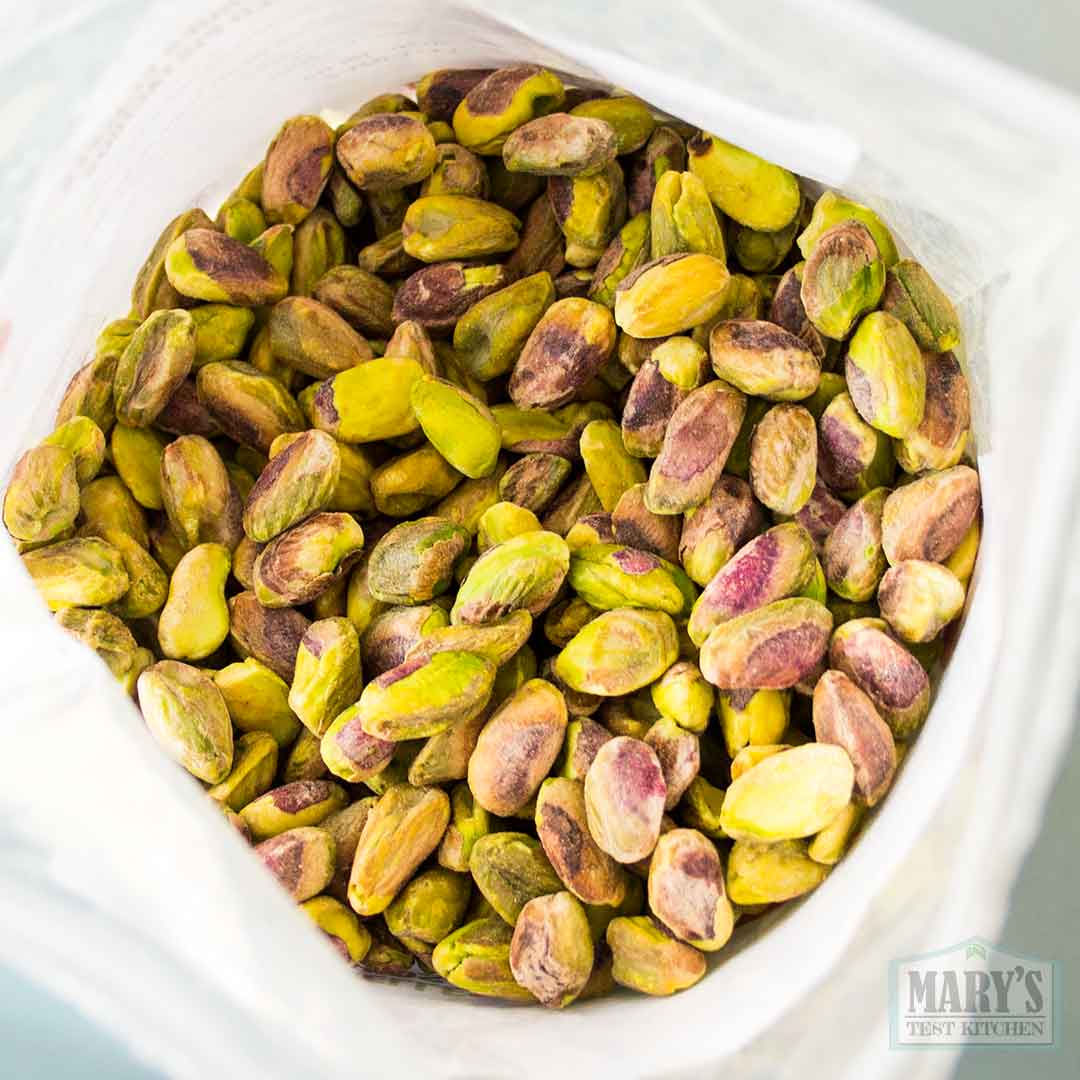
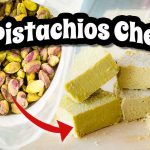
Next, check out Will PISTACHIOS Cheese?!
Why Peanuts?
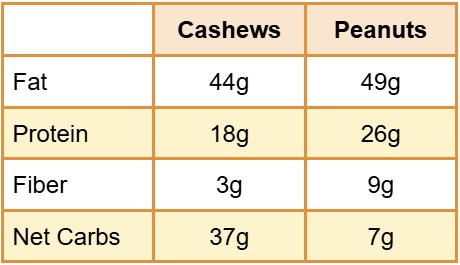
Cashews are the dairy-free darling of the vegan cheese-making community but in this economy? I wanted to pick something more affordable for this first episode. Peanuts were a natural choice. On this popular dry ingredient shop, raw cashews are $12.25 per pound while comparable blanched peanuts are only $5.22 per pound. Also, peanuts have a similar amount of fat but even more protein. See breakdown of the macros in the table below.
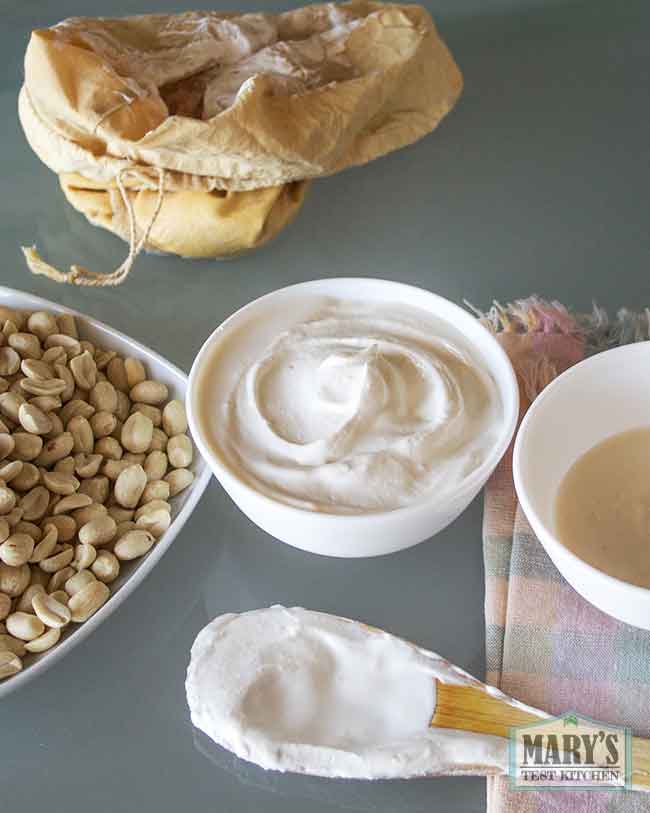
They don’t taste the same though. Cashews are naturally sweeter and have a lovely flavor even when unroasted. If you’ve followed my previous experiments with peanut yogurt (pictured below) or peanut tofu, you’ll already know that raw peanuts don’t taste like peanut butter. They’re quite bland but high in protein and fat which makes them a perfect canvas for some fermented funk. In theory.
My main goal for this trial is to make firm, delicious cultured peanut cheese that tastes amazing. And is safe to eat. haha
Day 1: Making Raw Peanut Milk & Starting Fermentation
A: Soaking & First Taste
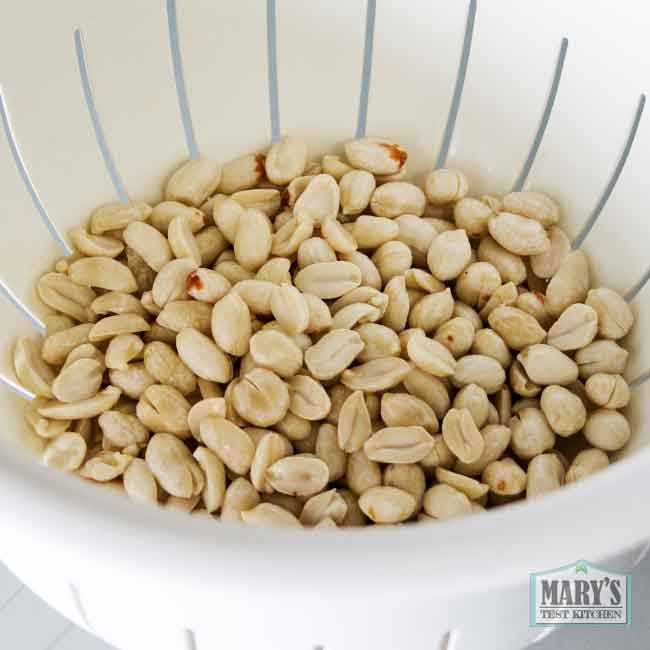
After soaking 1lb (454g) of raw peanuts overnight, I drained, rinsed and tasted them. Very bland, mild peanut flavor with a hint of wood. Surprisingly crunchy!
Out of curiosity, I also noted how much water they absorbed (225ml). Then it was time to blend.
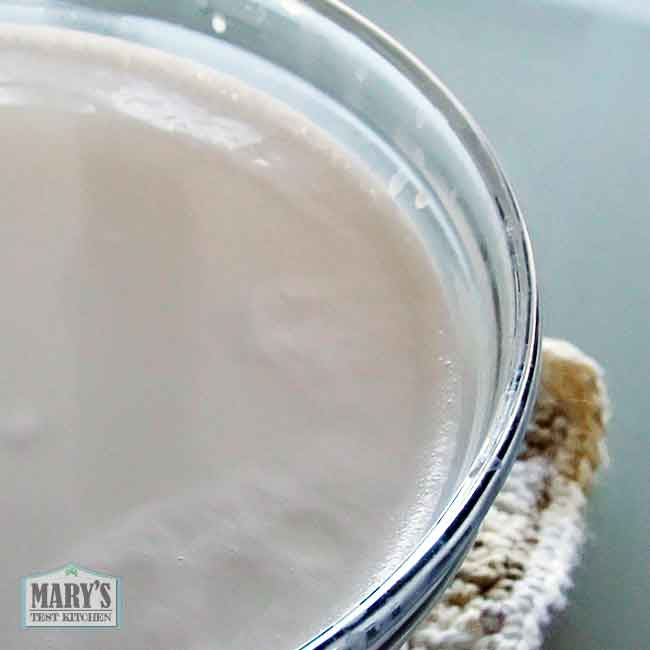
B: Making Raw Peanut Milk
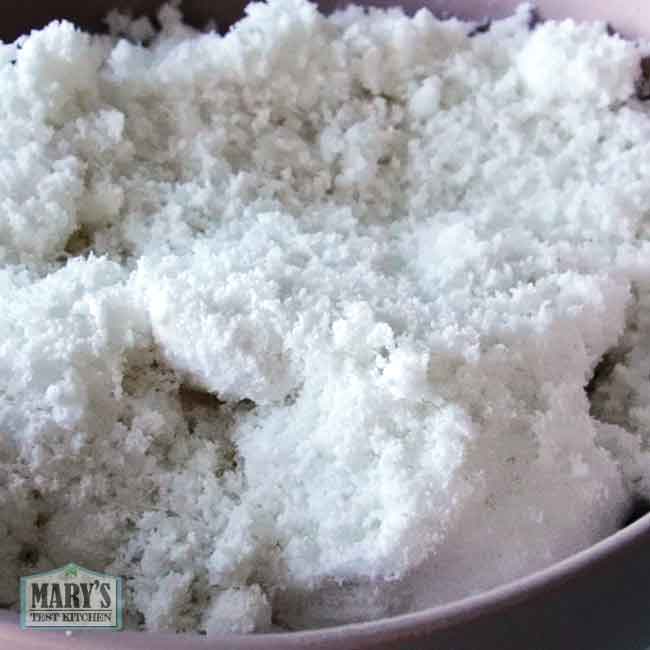
Working in half batches at a time, I blended the rehydrated peanuts with double their volume in soaking water at high speed for 30 seconds. Then strained everything through a nut milk bag to make silky raw peanut milk. Of all the different nuts, seeds, and legumes I’ve milked before, peanut is the easiest.
The leftover peanut pulp was fluffy—very similar to coconut pulp—and absolutely worth saving. I’ve been using it like coconut flour in baking experiments (vegan keto cookies, muffins, etc.). Nothing share-worthy yet, but fingers crossed.
C: Pasteurizing (Because Safety First)
I debated keeping the milk raw, but for extra safety in home fermentation—and because thousands of people might be watching—I decided to cook the peanut milk first. As the milk heated, the natural starches gelatinized and made the milk much thicker. I let the milk come to a simmer for a few minutes.
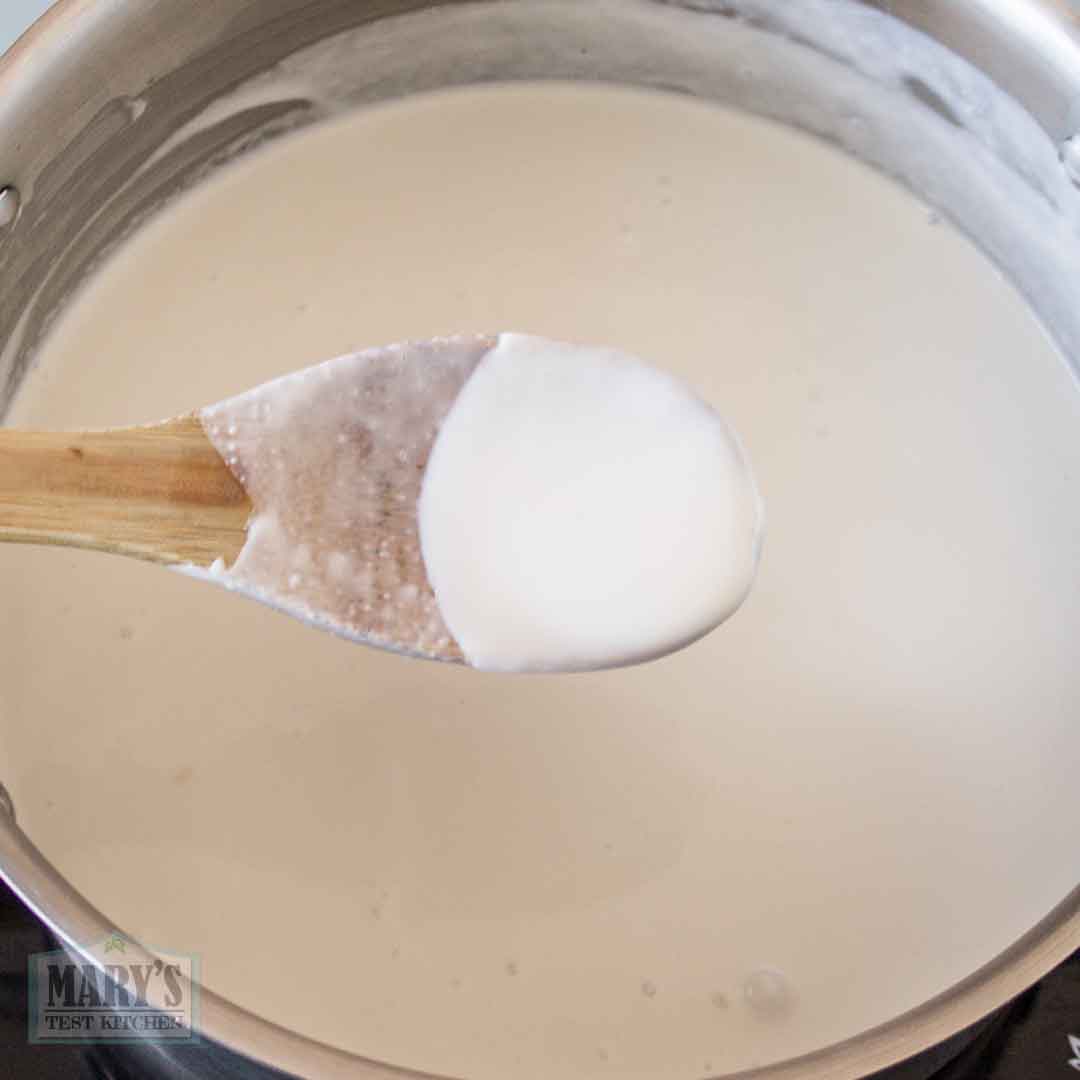
Afterwards, I let it cool to under 110°F. The milk became even thicker; like a pudding.
D: Fermentation Begins
To ferment the peanut milk, I added a vegan probiotic capsule with 50 billion CFU’s and stirred well.
You can also use:
- Store-bought vegan yogurt with live cultures (my favorite is Yoggu! coconut-based yogurt)
- A bit of yogurt from a previous batch
- Homemade cultures like rejuvelac
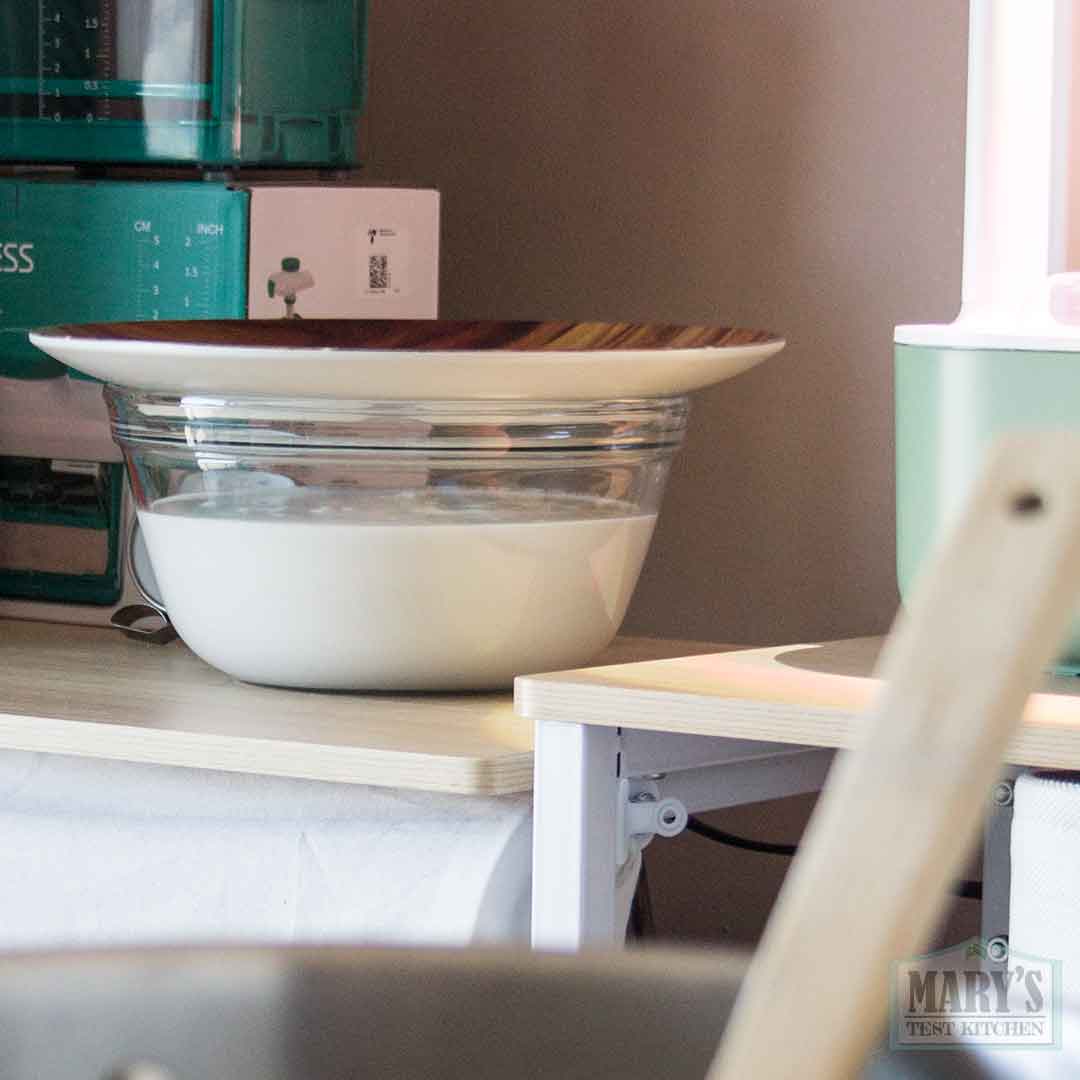
Then I covered the pot and let it sit at room temperature.
Day 2: Tang Appears 👀
After 24 hours, some clear whey had separated on top.
I tasted it fully expecting very little… but surprise—it was already tangy. There was still some raw peanut flavor, but lactic acid was clearly doing its thing.
I wanted it tangier, so I let it continue to sit a room temperature until that same evening. At that point, it was very tangy so I put it in the fridge overnight until the next morning; about 44 hours total.
Day 3: Curds & Whey
On day 3, I took the bowl of peanut curds and whey out of the fridge to inspect. The whey is a little more tangy than the night before; pleasant to sip too. The curds are thicker with a creamy mouthfeel and mild background of unroasted peanut flavor.
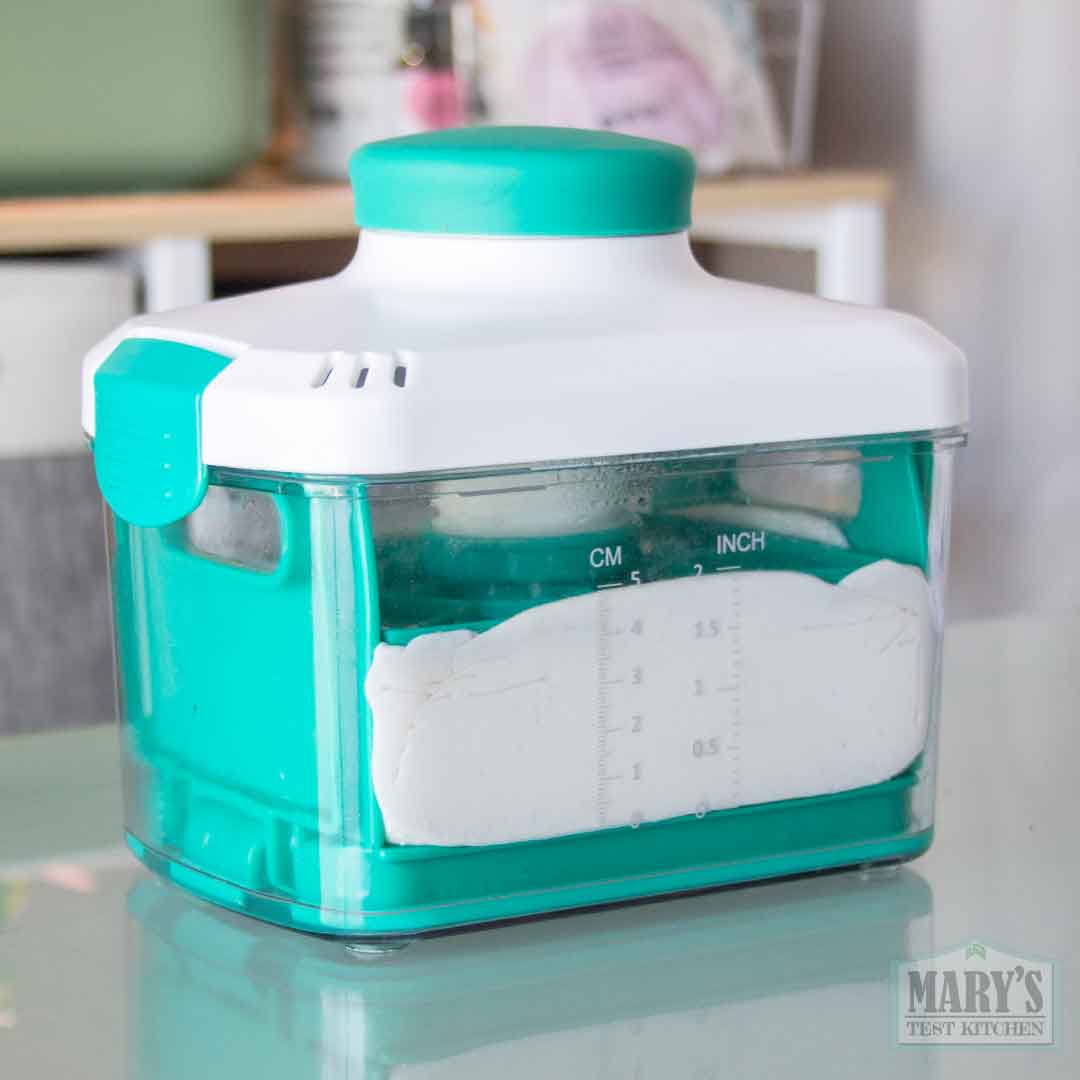
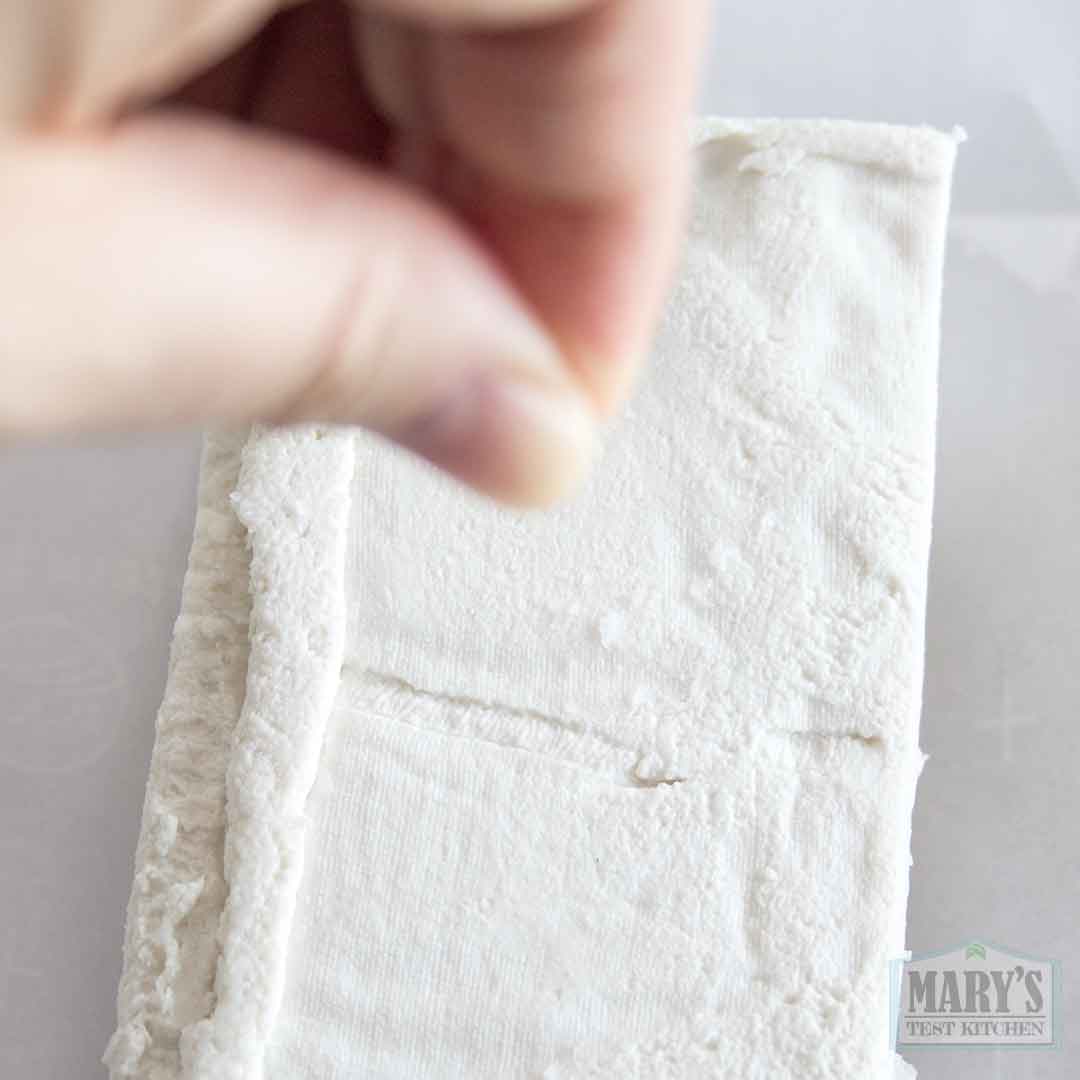
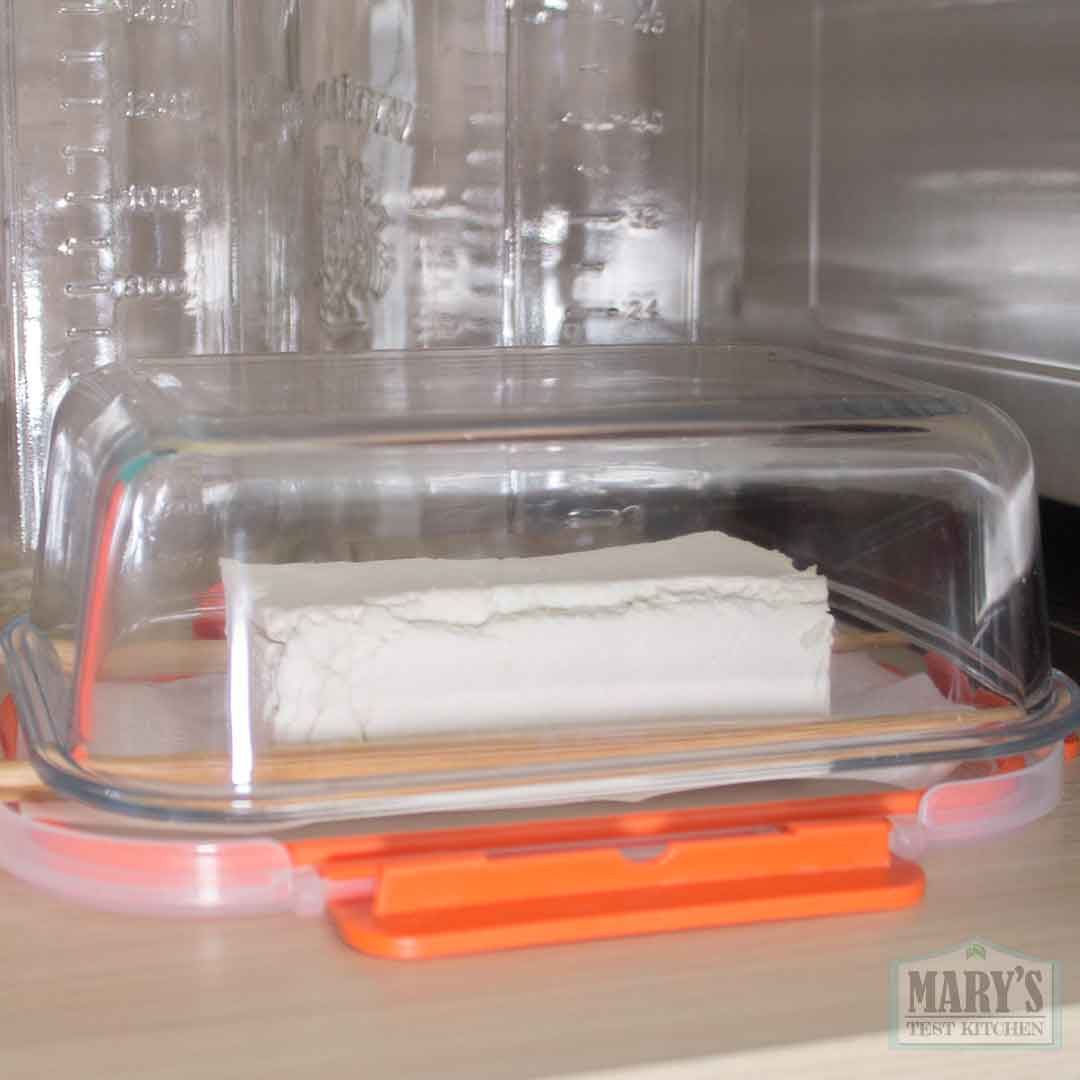
Naturally the next step was to press the thick curds into a block. I sterilized my tools and cheesecloth in boiling water and let them dry. The tofu press was not sterilized this way because it’s plastic. Instead I just tried to clean it very well with soap and hot water and let it dry before using.
Pressing the Cultured Peanut Curds
I transferred the curds to my sterilized cheesecloth-lined tofu press and applied pressure overnight in the fridge. There was also some whey that came out which I saved as well. The whey was tangy and pleasant.
The Bonus Experiment: Stretchy Peanut Olive Cheese
Not all the curds fit in the tofu press though so I decided to experiment further.
📝Melty Peanut Cheese Sauce Ingredients
- 1/2 cup sour peanut curds
- 1/2 cup sour peanut whey
- 4 tbsp glutinous rice
- 1 heaping tsp sliced green olives in brine
- 1 tsp nutritional yeast powder (use 1.5-2 tsp for flakes)
- 1 tsp salt
- 1 tsp agar agar powder
- 2 tbsp canola oil
I blended everything together (all the ingredients except oil first, then the oil) and then cooked it over medium heat until the raw rice flavour was gone.
Midway through, I was concerned that the rice wasn’t getting cooked completely because of how hard it was to stir the thickening mass of peanut cheese. So I used the immersion blender to help.
A few minutes later, it raw flavor was gone and the texture was thick and stretchy. Then poured it into a container to set.
Day 4: Two Peanut Cheeses Revealed!
On day 4, we have three things to try: the Peanut Olive Cheese, Pressed Peanut Curds, and leftover Cultured Peanut Whey.
The Cultured Peanut Whey
It wasn’t as sour as I had anticipated; perhaps because it was chilled and the colder temperature dulls the taste. It also has less peanut flavor and reminds me of quinoa rejuvelac; bright flavour with a hint of funk.
Stretchy Peanut Olive Cheese
After cooling in the fridge overnight, the stretchy peanut cheese didn’t set completely. It was still a thick liquid; gooey with an impressive amount of stretch!
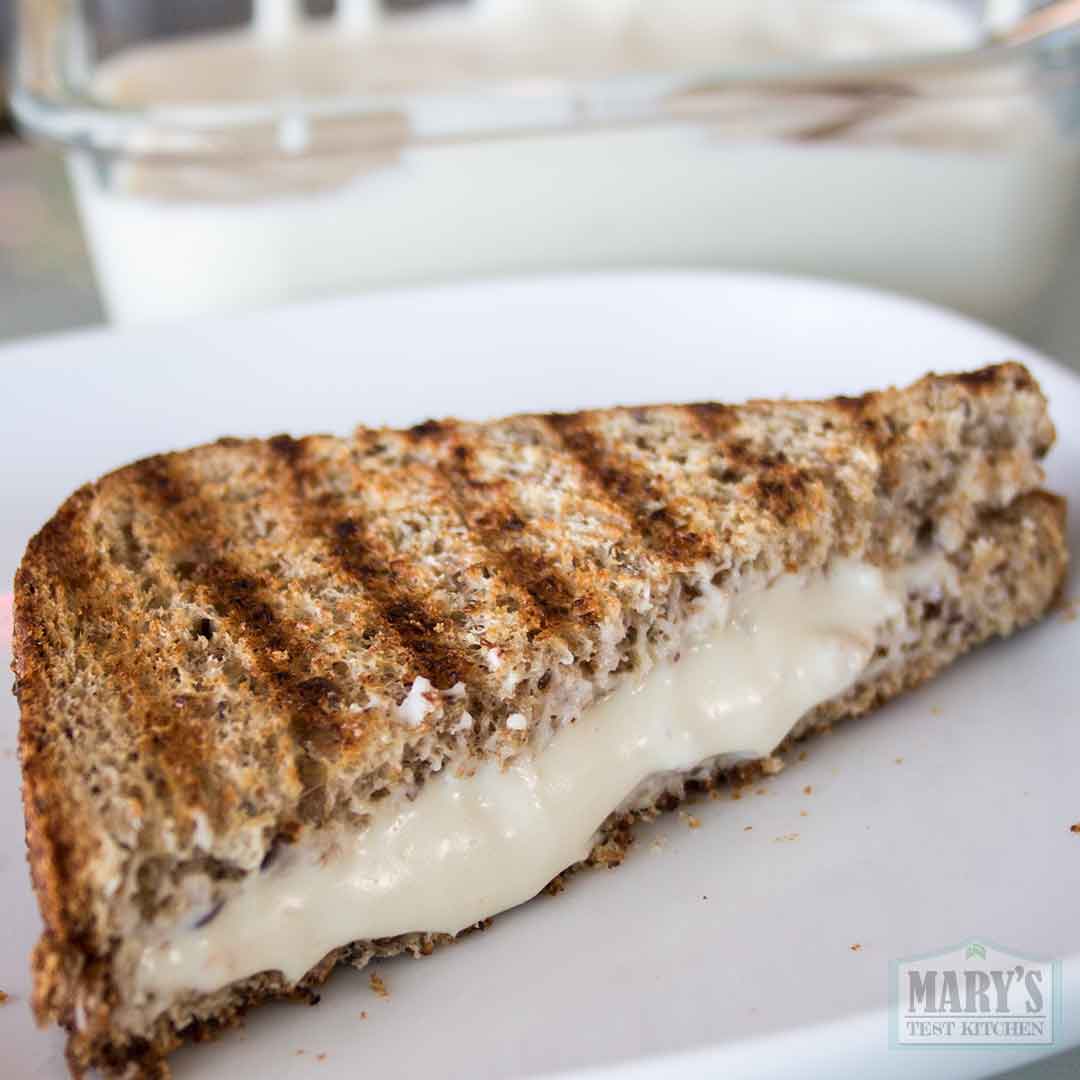
I was aiming to make a sliceable block but this really was a happy accident! The gooey texture and funky flavour made it perfect for grilled cheese. I could see it working amazingly on pizza as well.
That said, I want to try something similar again but add more agar agar to see if it will set when cooled but melt when heated.
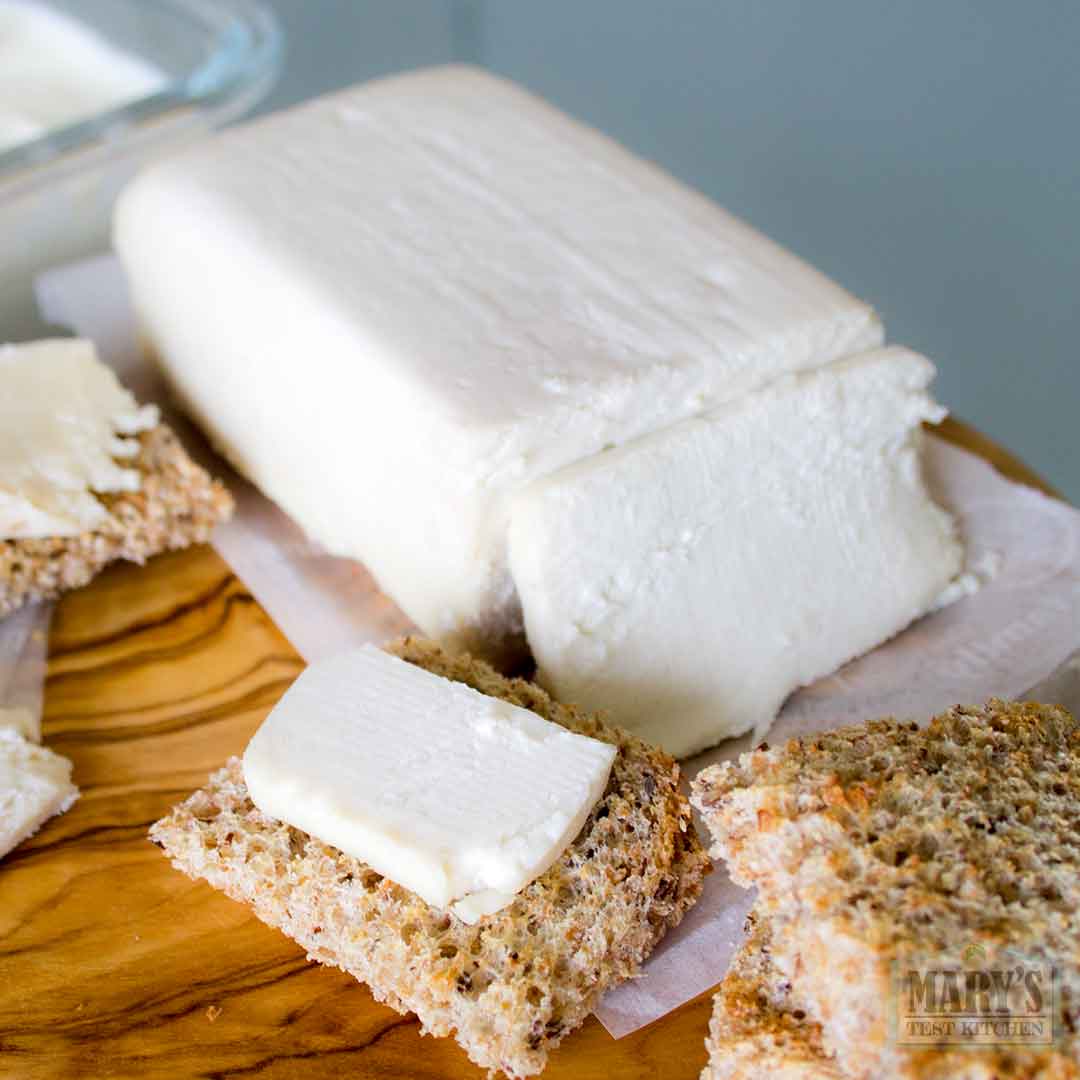
Pressed Cultured Peanut Curds
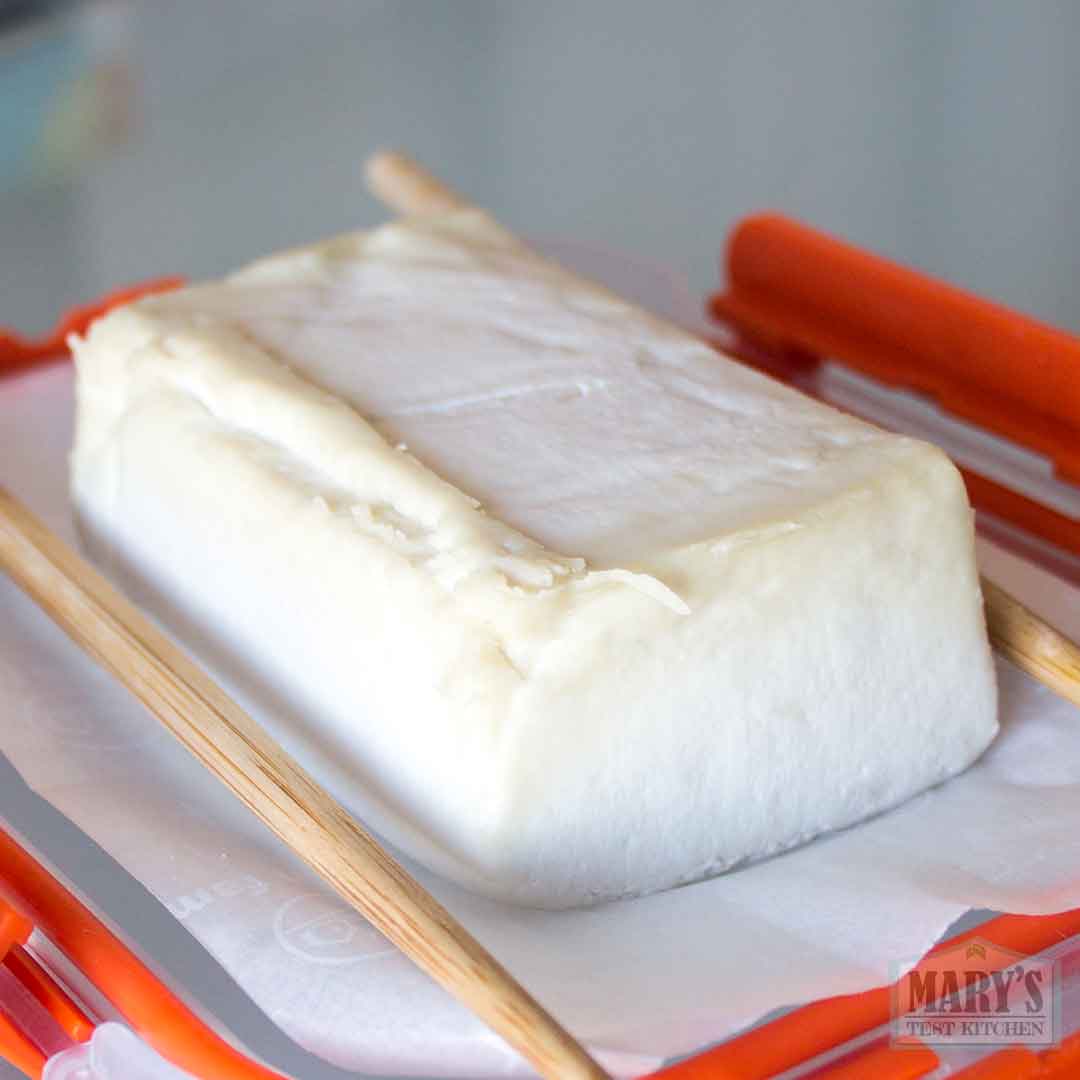
I removed the pressed cultured peanut curds from the tofu press and unwrapped this beautiful gift.
The block was delicate but firm enough to handle. When I sliced it down the middle, the cheese stuck to the knife so I had to work a bit carefully.
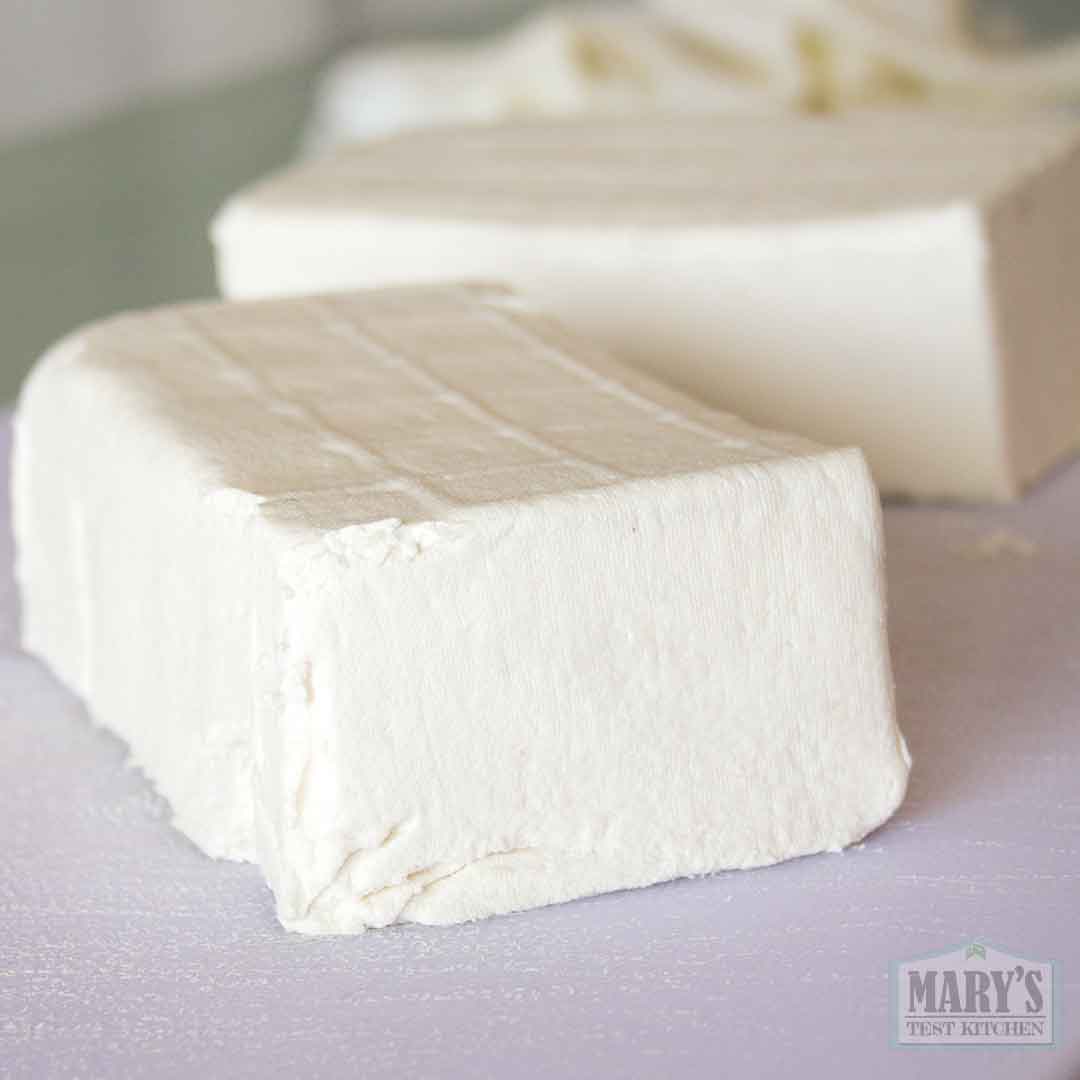
It reminded me of Peanut Tofu which was made from raw peanut milk, coagulated with calcium sulfate. But the texture was denser and a bit more firm to the touch. The mouthfeel and mild tang reminded me of Winnepeg-style cream cheese; rich, buttery but lighter than a block of Philadelphia. But there’s also a distinct woody peanut flavor; not very cheese-like at all.
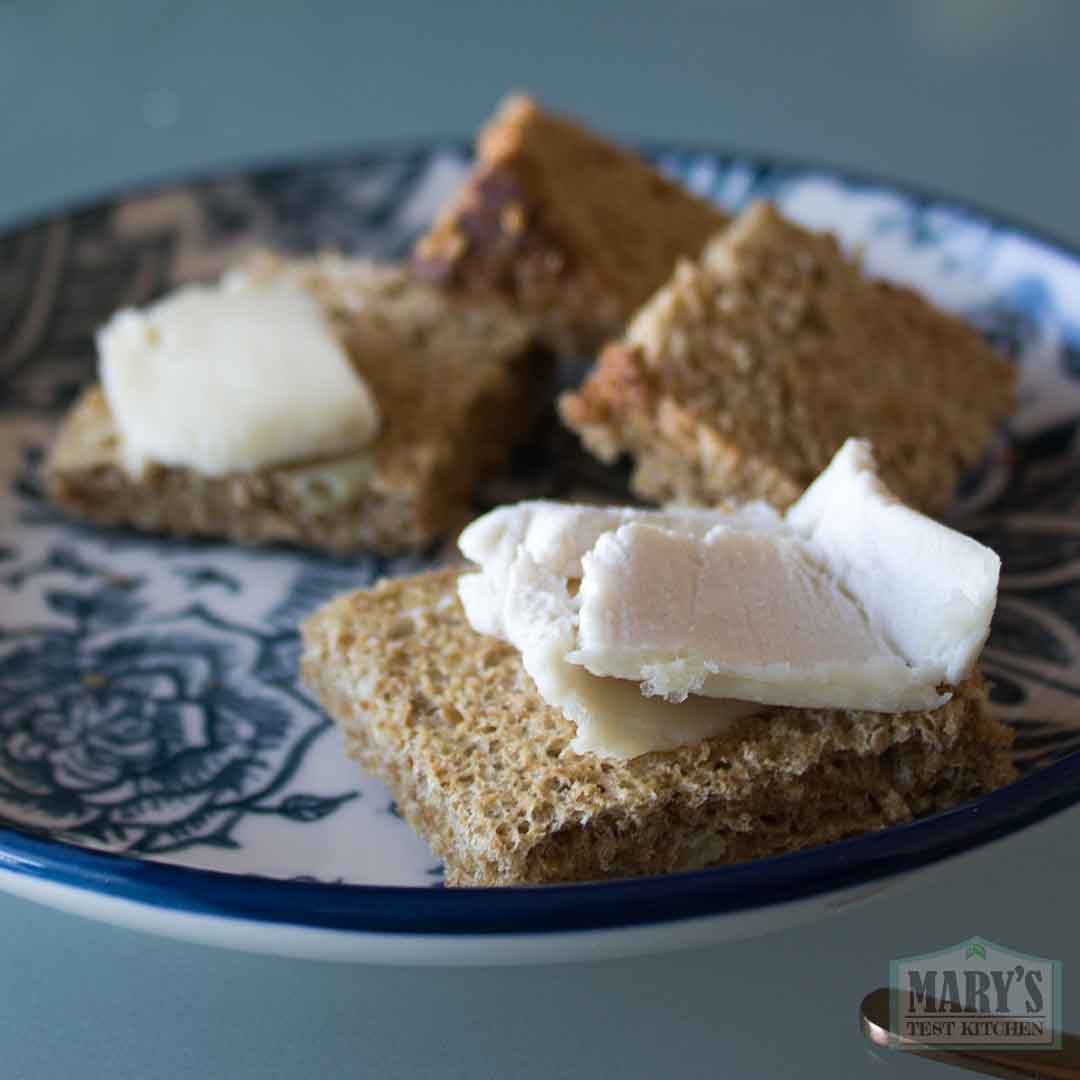
However, with a touch of salt added, the funky flavor and buttery notes were enhanced; much more enjoyable.
It wasn’t salted yet. But even so, it had a rich cream cheese flavor and texture! After trying it on a slice of bread, I was even more convinced!
Peanuts make incredible Vegan Cultured Cream Cheese!
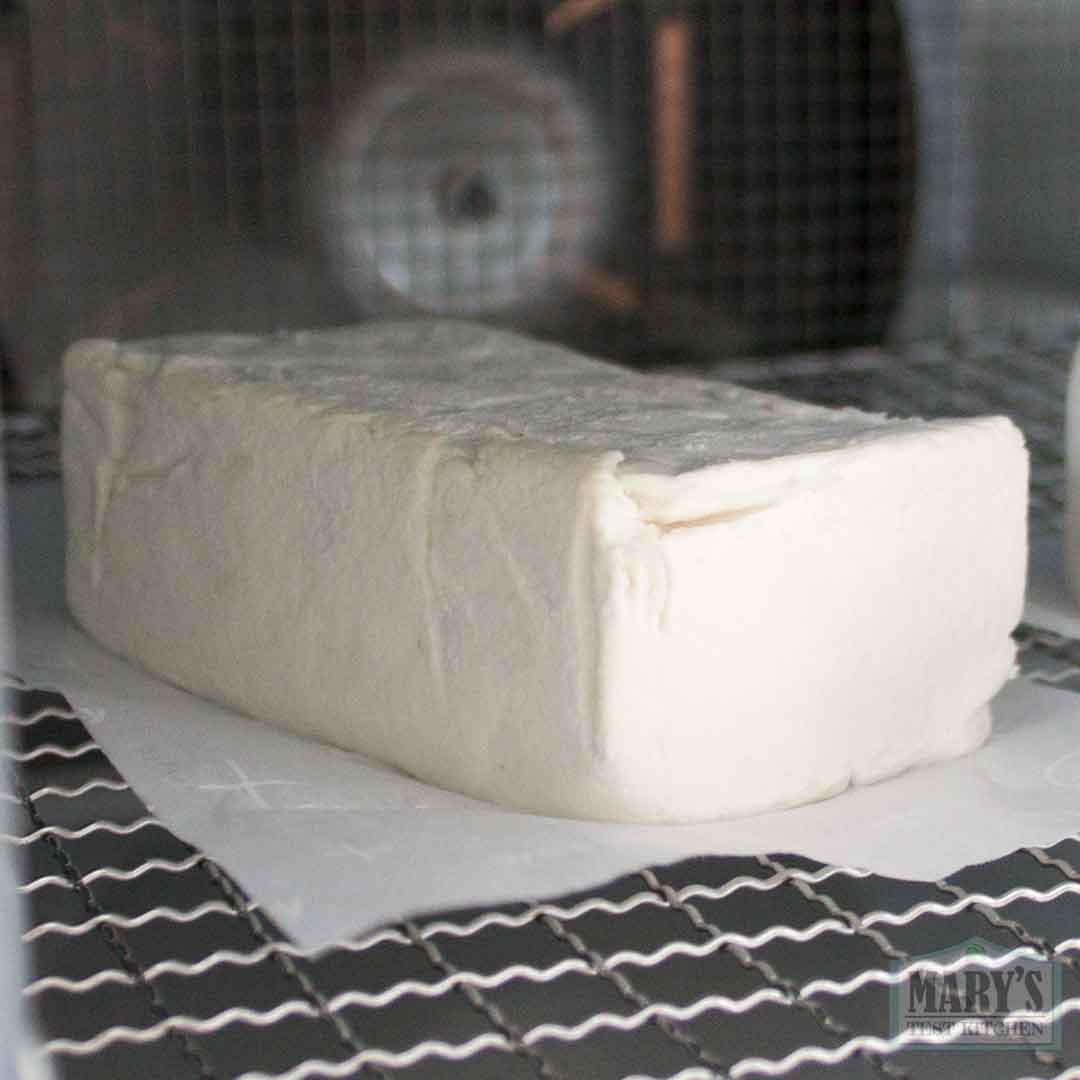
Making Firm Aged Peanut Cheese
Vegan Cream Cheese is great but I wanted something more comparable to firm dairy cheese like cheddar cheese.
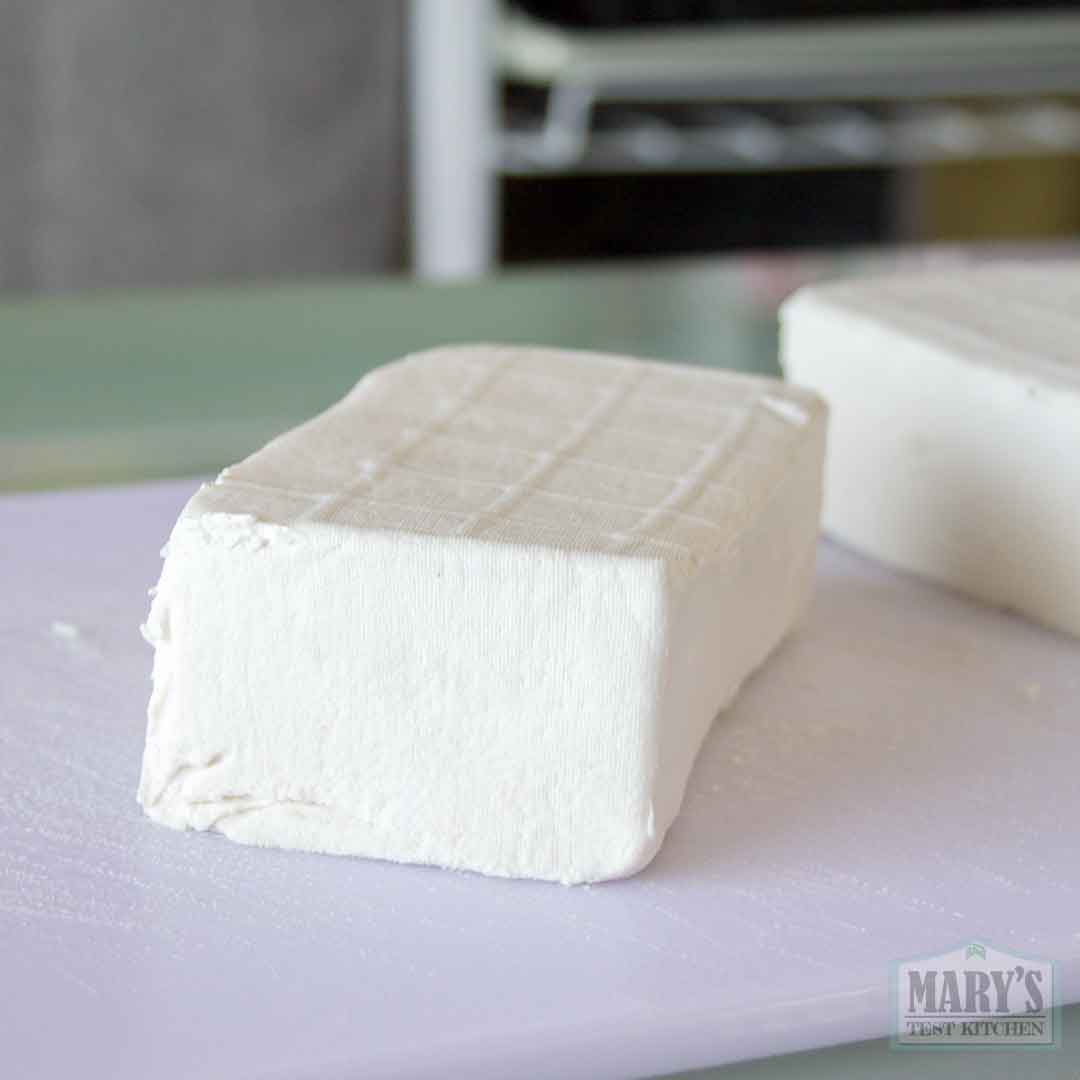
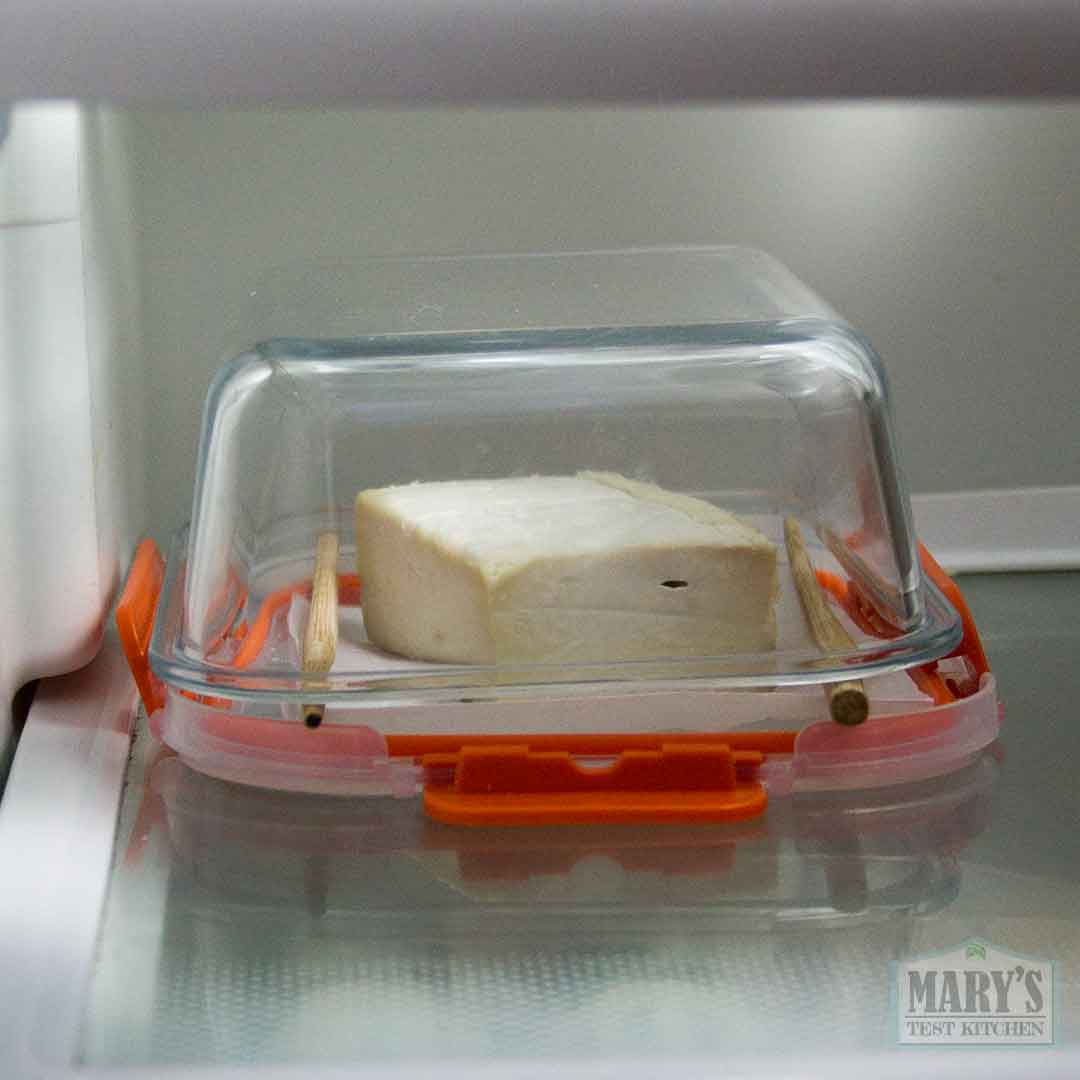
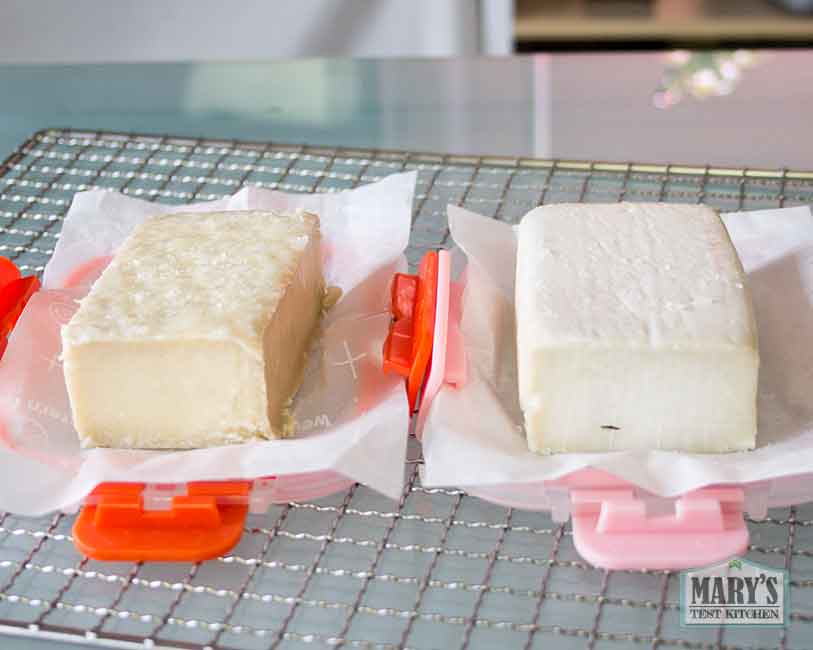
I cut the block in half so we could try two different drying methods. Both were salted on all sides to add flavor and to prevent unwanted mold.
Then I aged them two ways. The first, air-dried at room temperature.
The second, using a dehydrator. I set it at the lowest temperature that it could run (95°F / 35°C)
Day 5-6: Drying Peanut Cheese after 24 & 48hours
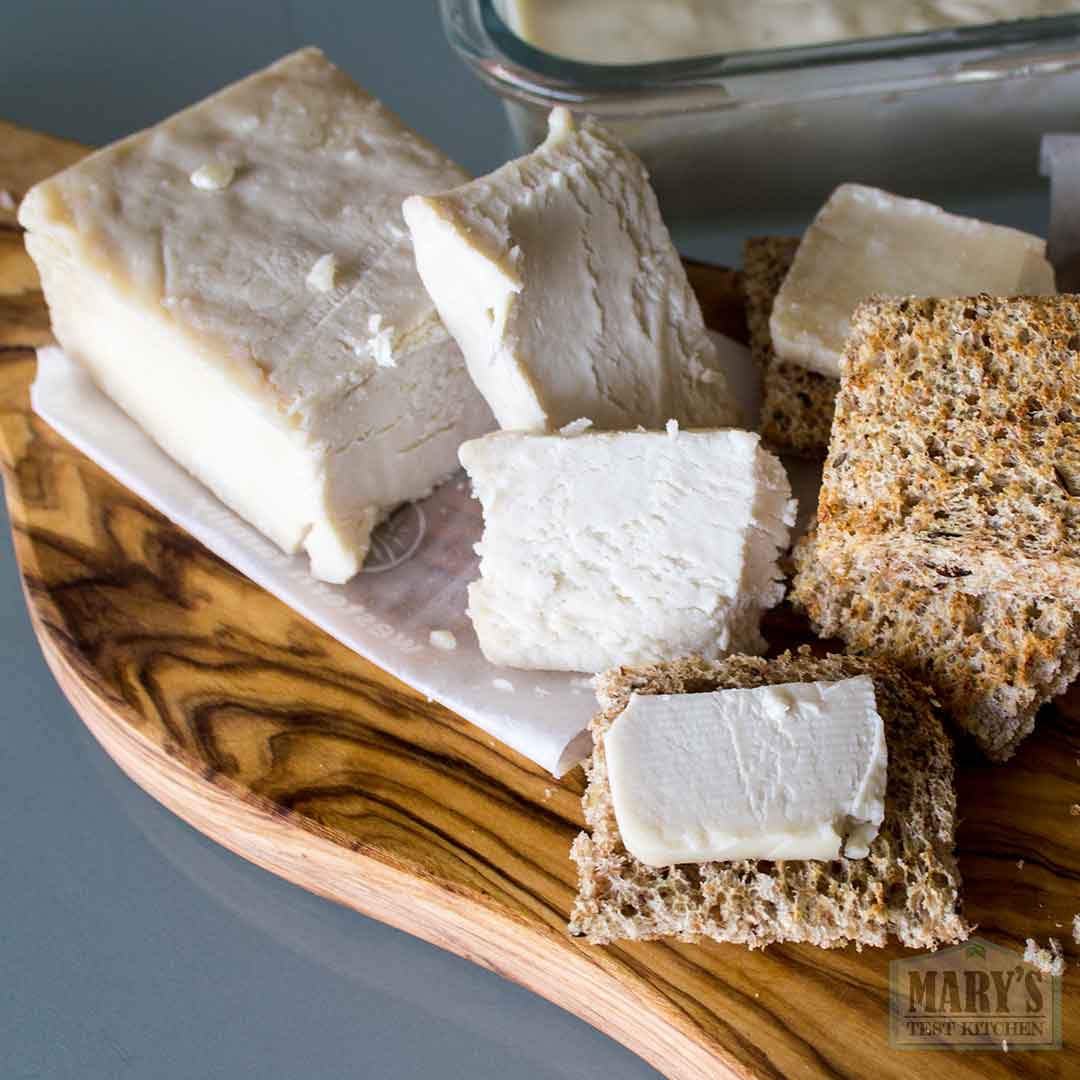
Both blocks had visibly dried surfaces but the dehydrator version was obviously more evenly dried. Both blocks also had some discoloration on one side of the block. I cut those parts off, re-salted all sides and continued to let them dry. But not before I cut off some pieces to taste test.
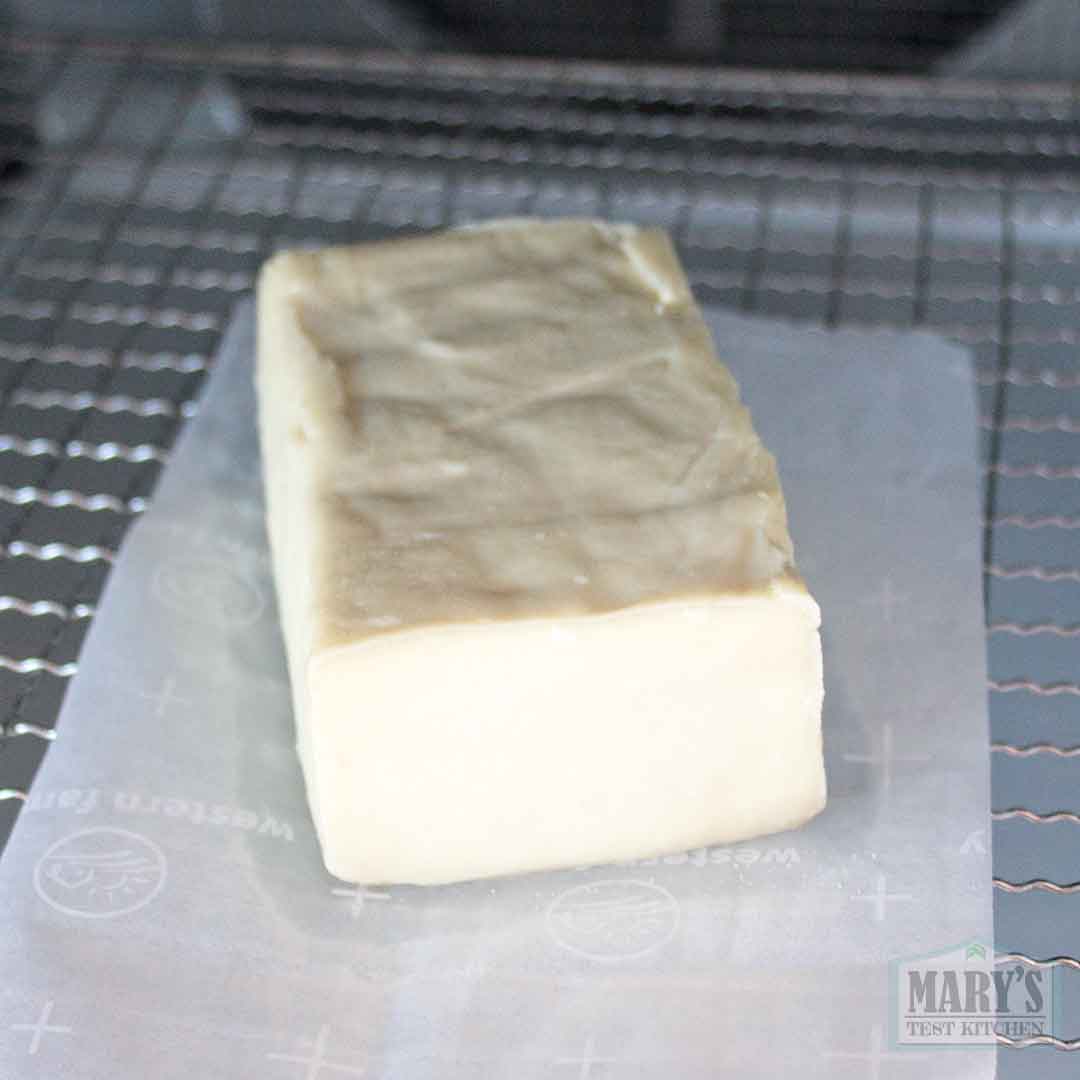
The air-dried version retained the cream cheese quality but denser. And the flavor had mellowed. The woody peanut flavour was less pronounced which allowed the other funky cheesy flavours to come out more.
The dehydrator version was even more dense and the flavour was even better. A bit sharper so it got even closer to the flavor of aged dairy cheese.
I kept the aging and drying process going for two more days (one at room temperature, the other in the dehydrator). Every 12 hours, I’d flip them, salt and occasionally trim off any discoloration.
On Day 6, the dehydrated peanut cheese developed a mouth-watering sharpness and reminding me a bit of old cheddar; very delicious. The air-dried version was the same but not as tangy and not as well dried.
Then I put the air-dried version in the fridge to continue aging while the dehydrator version went back in the dehydrator for just one more day. After that, I placed the dehydrator version in the fridge as well.
The Aged Peanut Cheese Results
After a week of regularly maintaining the cheese for 5 more days, it was time for the moment of truth! Can Aged Peanut Cheese be just as good as firm dairy cheese?
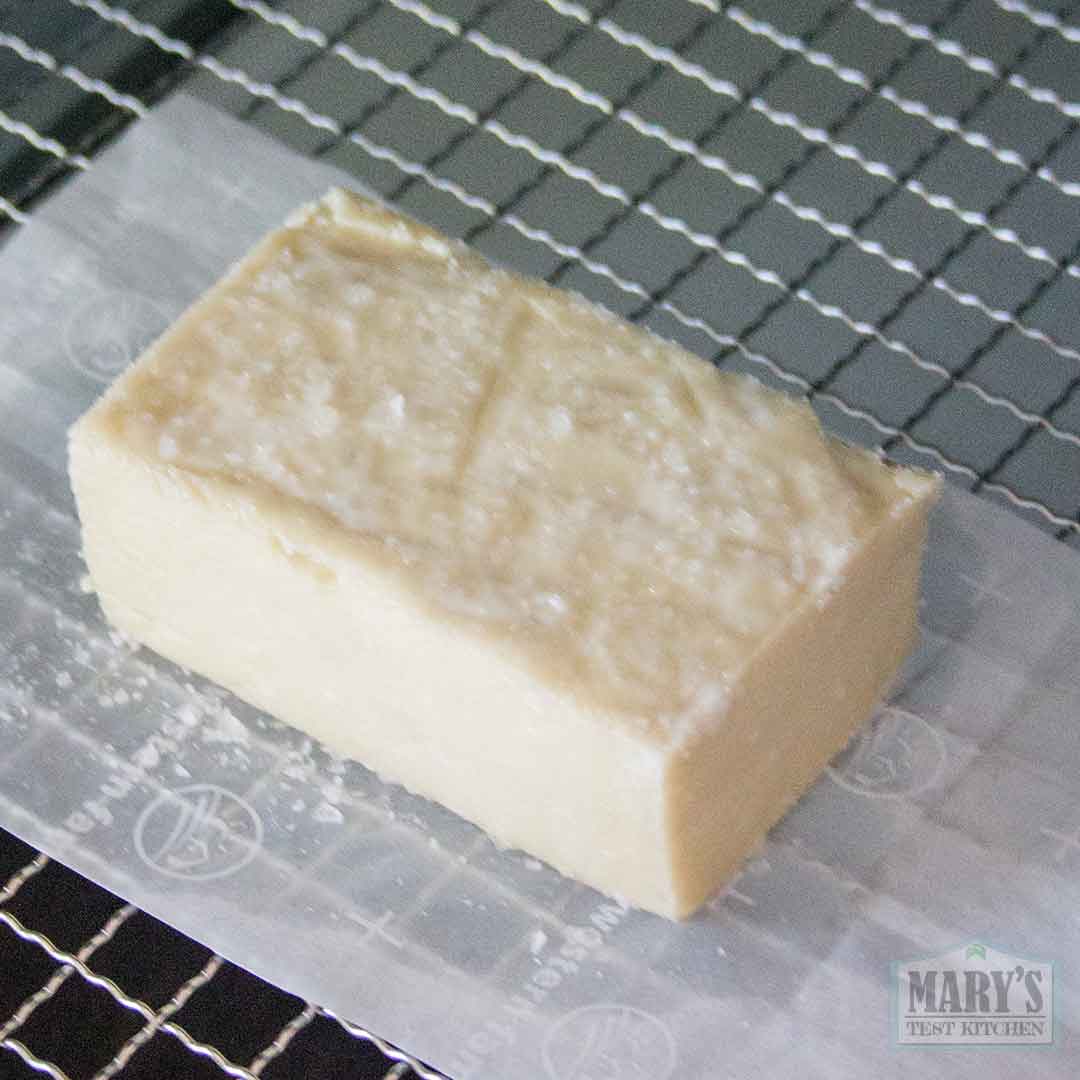
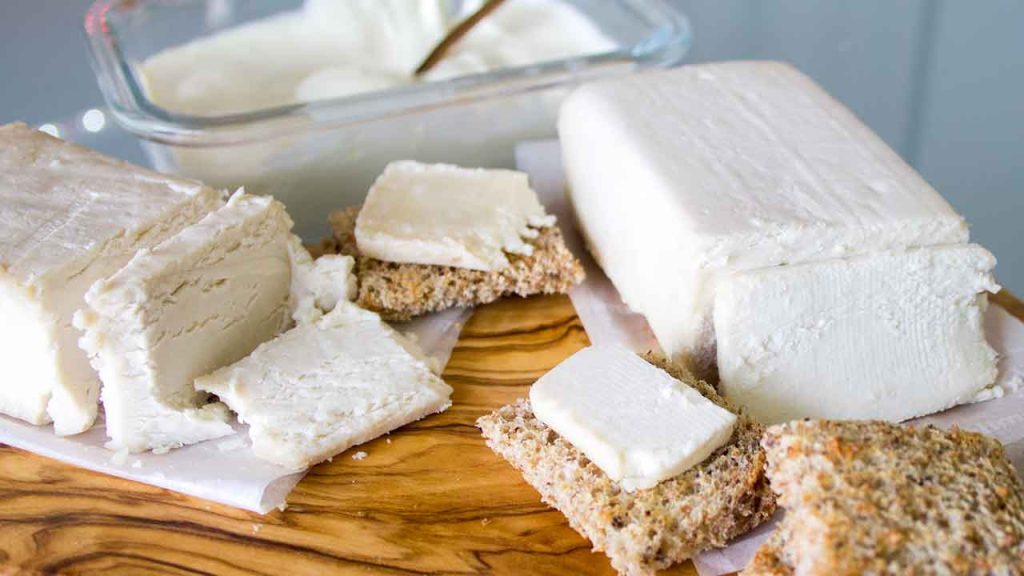
Air-Dried Peanut Cheese – Air-dried at room temperature for 2 days, then refrigerated for 6 days
The block didn’t look a whole lot different from the first day I put it in the refrigerator. But upon first bite, I could tell the difference. It was much denser but slowly melted in the mouth. As it did, the flavor bloomed, revealing complex funky and earthy notes and a sharp cheddar-like tang. But it also had that woody peanut flavor in the background; more pronounced than I would’ve liked.
The middle of the block was less firm, less flavorful. This made me feel like it needed some more time to dry.
Dehydrated Version – Dehydrated for 3 days, then refrigerated for 5 days.
The first thing I noticed was oil had come out from the dehydrated block of aged peanut cheese. It clearly had much less moisture content but still easy to cut into. Perhaps because of the higher temperature that it fermented at, the flavour has developed completely differently. It’s more earthy with a flavor in the direction of earthy Gruyere but still sharp with tang that hits you in the back of the cheeks. And the woody peanut flavor is almost gone completely.
This is the winner for me!
Final Verdict
My friends… peanuts really can cheese.
Not only that—but they can produce:
- Tangy, sharp, cultured cheese
- Complex aged flavors
- Sliceable, meltable results
- At a fraction of the cost of cashews or almonds
If you have a dehydrator, I highly recommend trying this method. Even without one, the air-dried version is absolutely worth making.
What Should Cheese Next? Drop your ideas in the comments, and I’ll start the next batch immediately—because fermentation waits for no one.
Until next time 💛

Very interesting, thank you for experimenting😊
You’re very welcome, Nancy 🙂
-Mary