Yes, you can make tofu out of peanuts! Using the traditional tofu-making process, but with peanuts instead of soy, this peanut tofu (or peanut curd) is luxuriously rich, high in protein, with a creamy silken texture. Note: this is not the same as Jimani Tofu which is set with extra starch.
More soy-free tofu recipes
Video Tutorial for Peanut Tofu
What Does Peanut Tofu Taste Like?
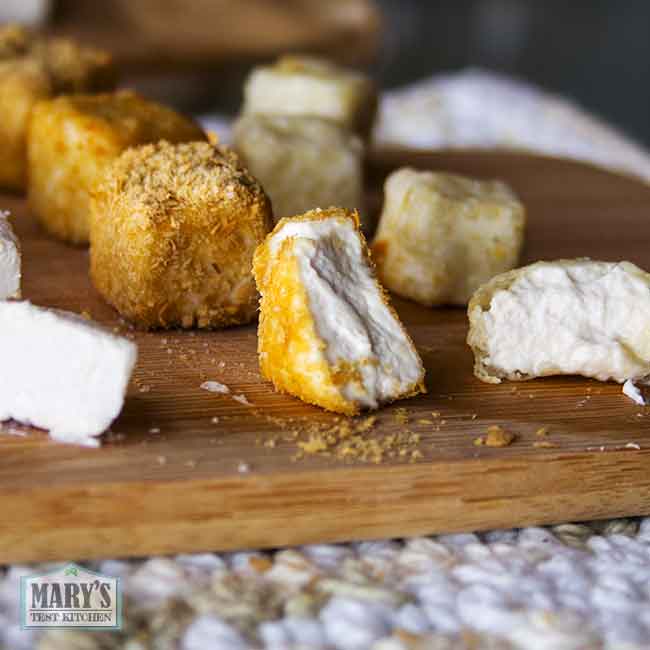
This soy-free tofu is creamy and rich with the mild, nutty taste of peanuts! As you might expect, peanut tofu made from raw peanuts has a milder, more neutral flavor. However, you can still tell there is an underlying peanut flavor.
The texture is very soft and jiggly. It’s easily mixed with flavorings to create a smooth spread. Or whip it up with icing sugar or icing sweetener and vanilla for a incredibly rich peanut frosting for your next baking treat.
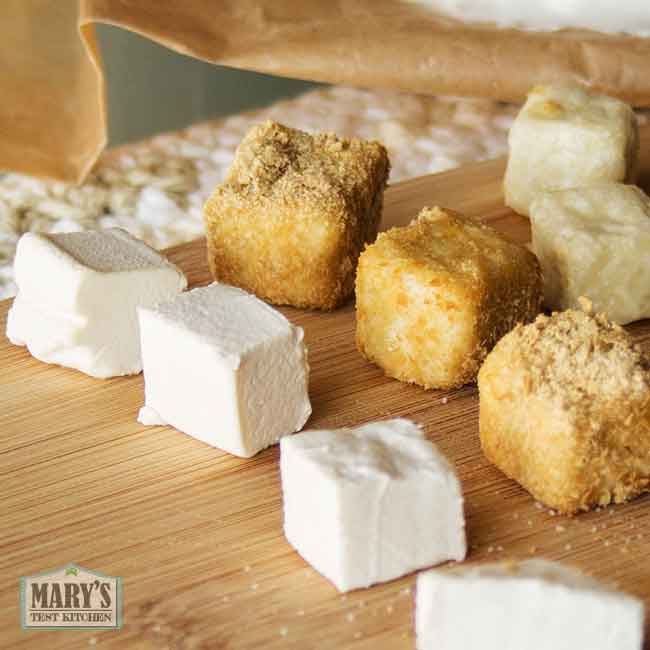
Or, you can carefully slice it into cubes, season and air-fry for a wonderful combination of a textures.
Why make Peanut Tofu
Using affordable peanuts is a fun way to experiment with making soy-free tofu. It’s also a delicious way to get plant-based protein that also comes with healthy plant-based fat. You’ll love this soy-free tofu because:
- it has a fun jiggly texture that’s very unique,
- creamy and luxurious (perfect for making quick vegan cheese),
- high in protein, and
- high in fat making it very filling and satisfying, and
- has the familiar flavor of peanuts!
However, it is not a dupe for regular soy tofu so don’t use it to replace soy tofu in standard recipes. It’s too delicate.
What you’ll need to make Peanut Tofu
The ingredients for making tofu from peanuts include:
- 1 pound of plain raw peanuts. Avoid any peanuts that have anything other than peanuts in the ingredients list. They may be blanched as this means that the brown skins have been removed (ie. not the same meaning as blanched vegetables). If you have trouble finding raw peanuts and don’t want to buy it online, try your local Chinese herbal shop! That’s where I found mine.
- Liquid Nigari like this one from Vancouver Island Sea Salt or food-grade calcium sulfate (gypsum) and water as your coagulant. Other coagulants may also work but I have not tested them.
You might be wondering if roasted peanuts can turn into tofu. The answer is not exactly. Peanut tofu made from raw peanuts turned out very delicate and jiggly like a custard. Continuing with the dessert comparisons, roasted peanut “tofu” was more like cream. The curds did not solidify as well after pressing and was more like a spread.
For equipment, it will be helpful to have:
- a blender (I tested using only my Vitamix but other lower-powered blenders should work fine too),
- a good quality nut-milk bag,
- a large cooking pot,
- a flat-edged spatula for stirring the peanut milk,
- a tofu making mold (I prefer this one),
- fine cheesecloth (if your tofu press didn’t come with one),
- and a way to scoop up fine delicate curds (like a mesh strainer, slotted spoon, etc.)
Please note that these links are Amazon affiliate links. This means if you use them to make your purchases, I will receive a small commission but rest assured there is no extra cost to you.
How to Make Soy-Free Peanut Tofu
Making peanut tofu using the traditional tofu-making method is fairly simple but with one happy difference. Since peanuts don’t have be cooked like soy to be safe, so you don’t need to spend as much time cooking the milk. I’ll get into the details in the step-by-step below.
1. Soak Raw Peanuts
First, soak raw peanuts overnight. In this recipe, use 1 pound of plain raw blanched peanuts (454g). If you use peanuts that still have the skin attached, that’s fine. You’ll just notice some more color in your pulp and tofu.
As you can see from the photo below, I tried doing this with roasted peanuts as well. It just didn’t work out very well. Roasted peanutfu was more like peanut butter than tofu.
Soaking the peanuts will make them super easy to blend so they can release their protein and fat into milk. Afterwards, rinse and drain the plump peanuts very well.

2. Make Raw Peanut Milk
Transfer your drained peanuts to a blender along with about double their volume in water. You might need to do this in two batches depending on the size of your blender jar. If you’re using a high speed blender, blend on high for 30 seconds. If you’re using a conventional blender, you may require a minute or two.
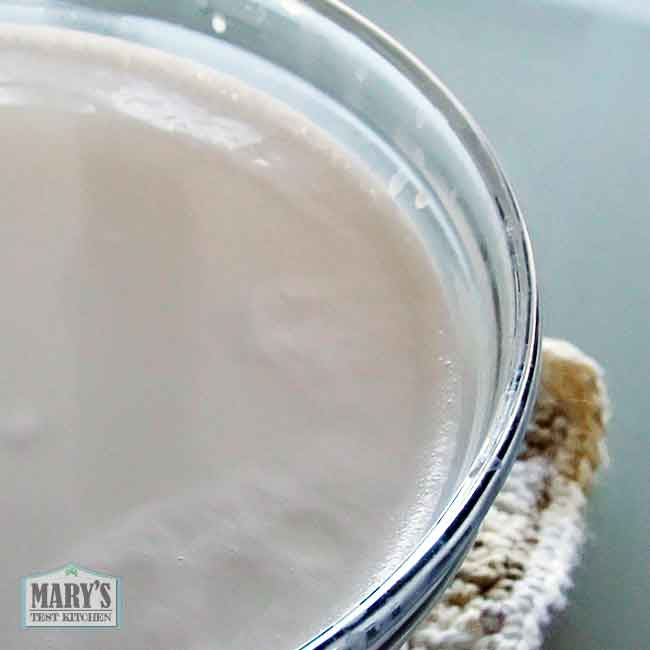
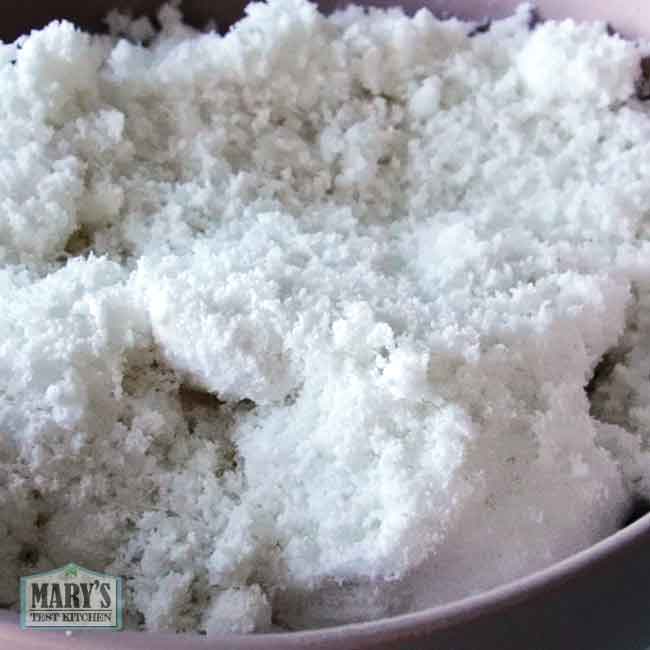
Use a high-quality nut milk bag to strain the fibrous pulp from the creamy raw peanut milk until the pulp is very dry. It will be fluffy and have a similar consistency to coconut flour. In fact, I used it like I would use coconut flour in keto cookies and quick bread. So don’t throw out that pulp! Just look up coconut flour recipes and use that peanut fiber instead.
Peanut milk does have some starch in in. However, when I tried the typical settling step that I’ve used for separating the starch from the milk in previous soy-free tofu experiments, the starch remained suspended in the milk. So for peanutfu, I skip this step.
3. Prepare Coagulant
If you’re using liquid nigari, just have it close by. You will want to shake it up just before adding it to the milk. If you’re using gypsum, mix 1 1/2 teaspoons of food grade gypsum with 1/2 cup of room temperature water and set it aside. You will want to stir it up just before adding it to the milk.
4. Heat Peanut Milk to Coagulation Temperature
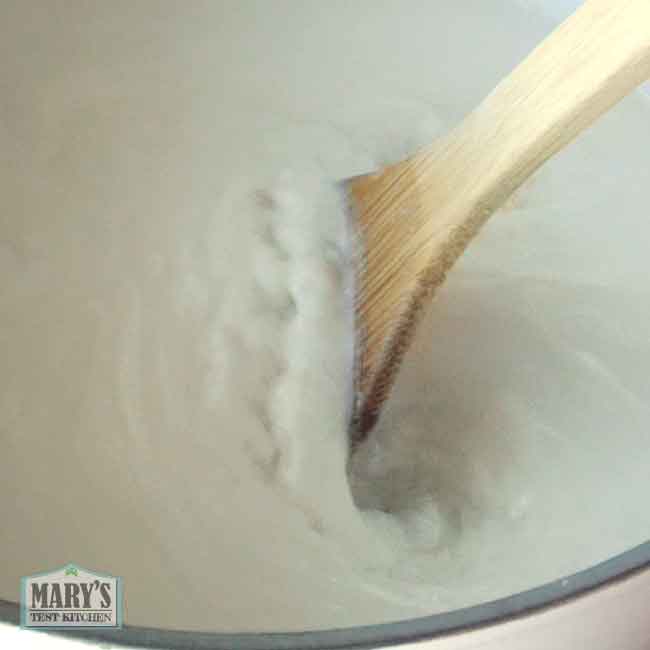
Cook the raw peanut milk in a large pot until it comes to a simmer. You’ll notice the milk becoming more fragrant as it cooks. In contrast to most raw beans, raw peanuts are edible. So you don’t need to simmer it for any extended amont of time.
Note to ensure your cooking pot is large enough to handle the milk foaming up to triple in volume to prevent spillovers. And be sure to monitor it, stirring regularly, and remove from heat if it’s foaming too much.
My target temperature at this point is 180°-190°F. This is above my target coagulation temperature of 165°F since the coagulant will bring the temperature down after it is added.
5. Add Coagulant to Peanut Milk
When the target temperature of 180°-190°F is reached, turn off the heat. Stir up the coagulant mixture so the gypsum is suspended in the water. Then pour it in slowly while stirring the milk. After it’s fully incorporated, stand your spatula upright in the pot to stop the spinning motion. Cover your pot with a lid and let it sit on the warm stovetop for 15 minutes.
In the meantime, grab a large bowl, place a sieve on top as well as your tofu liner (or something fine, durable, and reusable like this one).
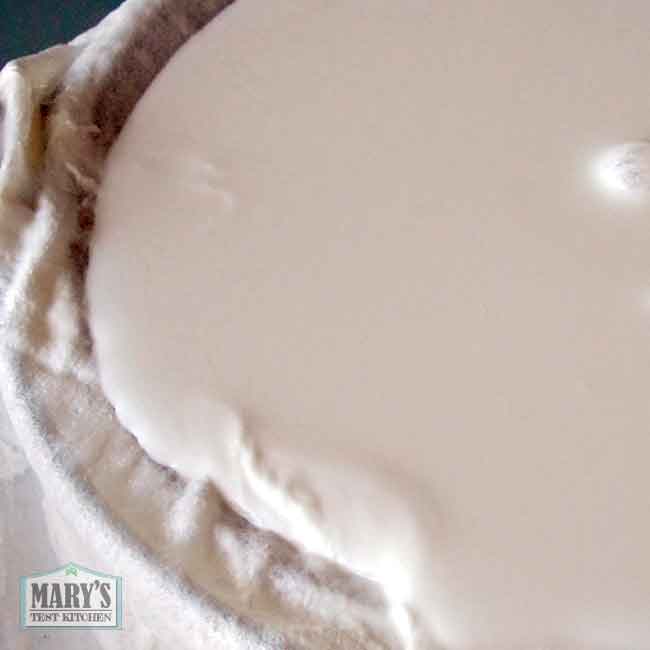
The curds will be too fine to scoop so you will need to pour them into the cloth. Make sure to go slowly so that it doesn’t overflow.
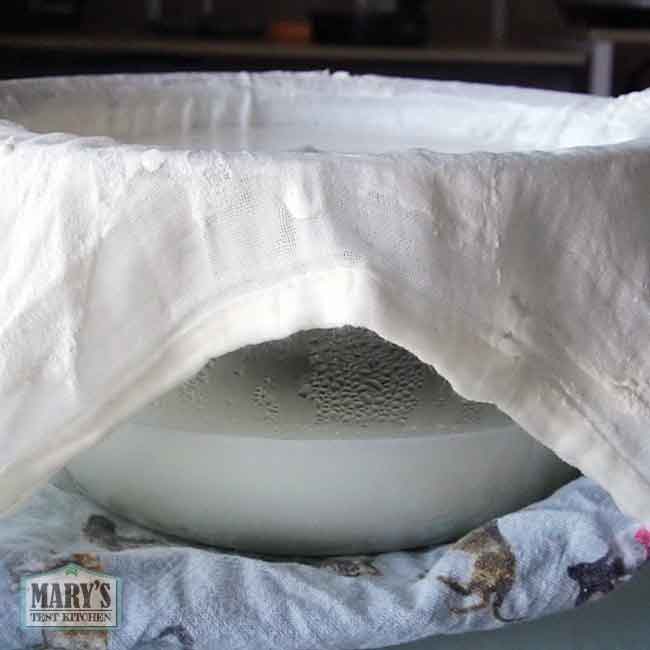
When enough whey has drained, you can lift the cheesecloth and place it into your tofu press. The leftover peanut whey makes a nice savory broth for vegetable soups.
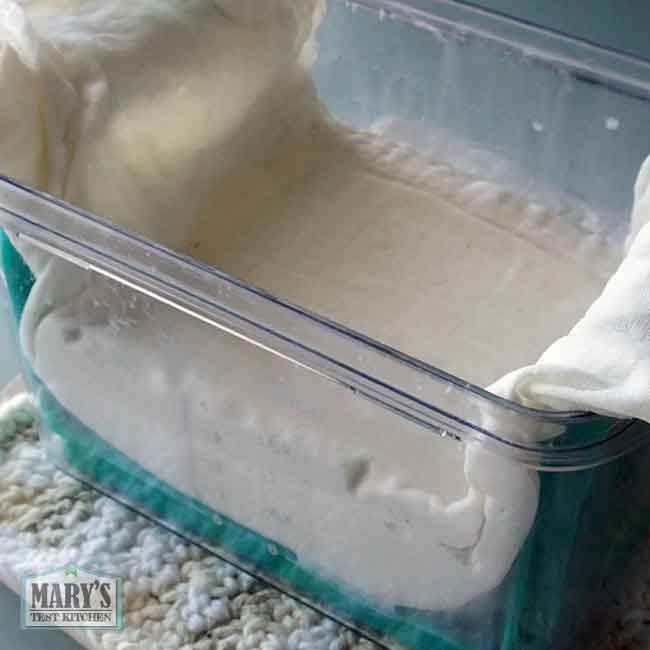
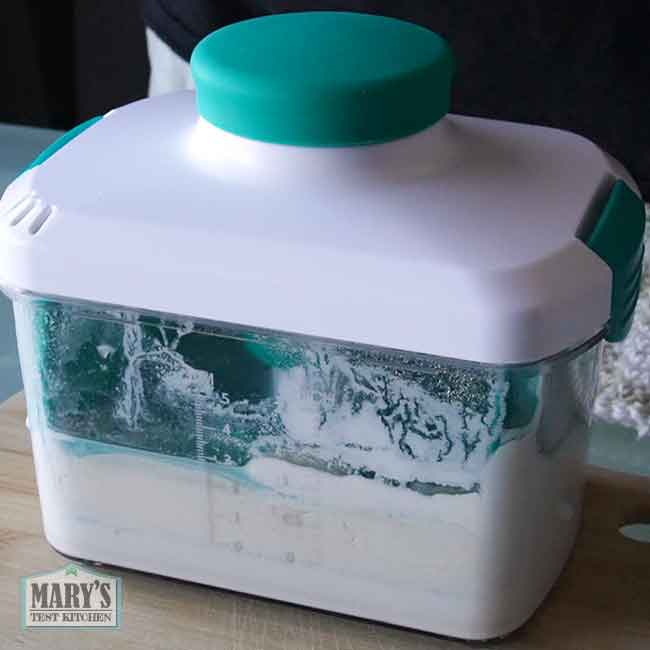
Fold the cloth over your curds, add the pressing top and carefully pour off any excess liquid. If you’re using my favourite tofu press, you can simply turn the knob to increase the pressure, then place in the fridge overnight. If you’re using another press, add as much weight as you can to it, make sure to pour off excess liquid, then chill the entire set-up in the fridge as well.
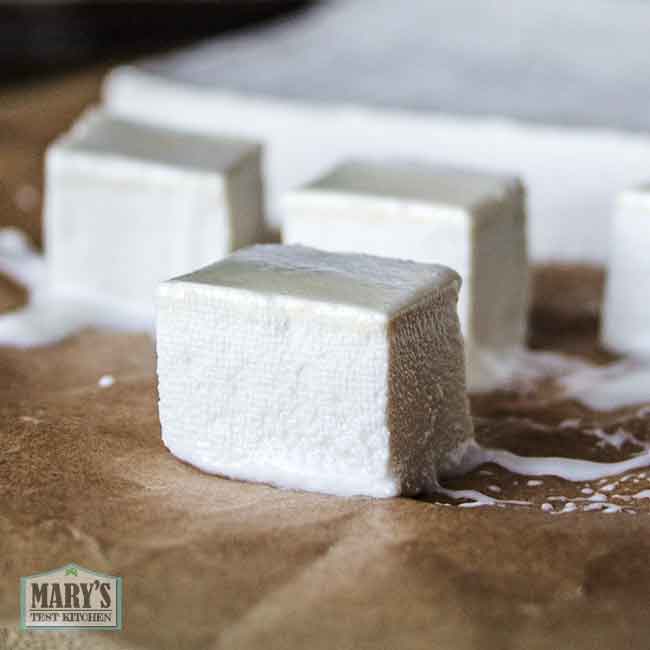
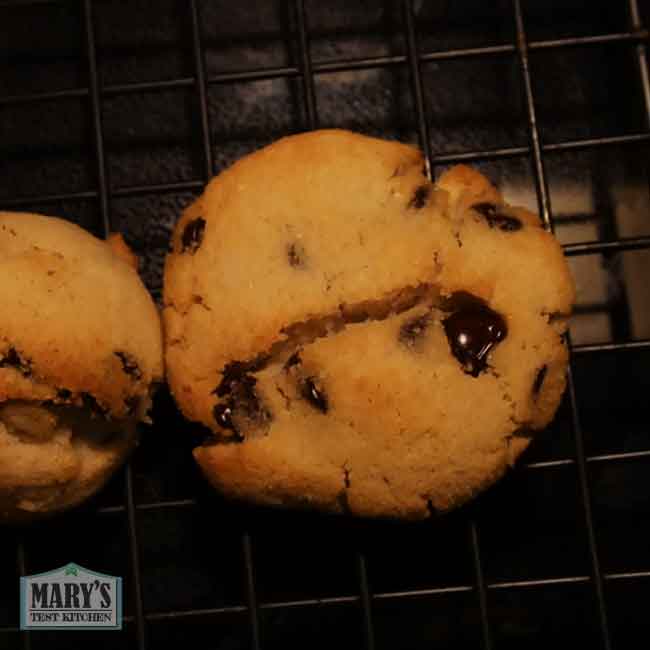
Afterwards, you can carefully remove and unwrap your homemade soy-free peanut tofu! It is quite delicate so handle it gently. You can eat it right away.
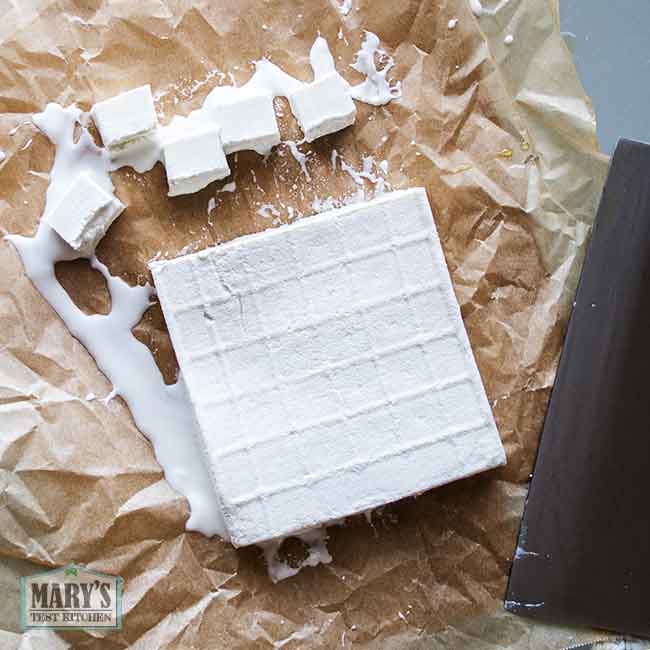
This soy-free tofu is a lot more delicate than regular tofu so treat it more like a silken tofu. It’s quite delicious just sprinkled with some salt.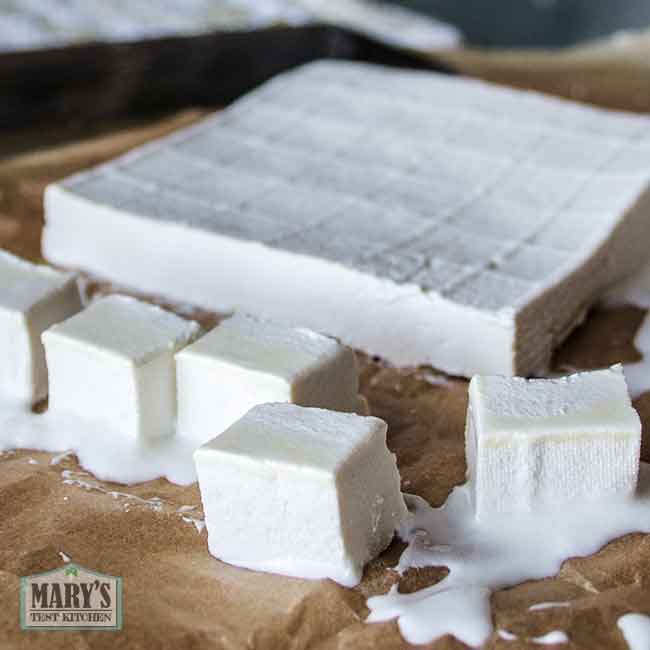
But I also like it air-fried. You can season it first or leave it plain. Both ways are uniquely delicious in their own ways.

It would make a terrific vegan cheese due to it’s high protein, fat content, and smooth creamy texture.
Traditional Soy-based Tofu Recipes
Printable recipe for Soy-Free Peanut Tofu from Scratch
Soy-Free Peanut Tofu from Scratch
Soy-free silky peanut tofu made using the traditional tofu-making method!
Ingredients
- 1lb raw shelled peanuts (454g)
- 2 teaspoons liquid nigari ( or 1 1/2 teaspoons of food-grade gypsum and 1/2 cup room temperature water)
Instructions
- Soak raw peanuts overnight in plenty of water. The next day, rinse and drain very well. Divide into two portions and blend with double the amount of water. High speed for 30 seconds (in high speed blender).
- Using nut milk bag, strain very well until pulp is as dry as you can get it. Reserve pulp to use in other recipes (it makes an excellent alternative for coconut flour in low carb backing recipes).
- Heat the milk to 180°F or just to a gentle simmer. Turn off the heat and add your coagulant of choice. In the video, I used 2 teaspoons of this liquid nigari. See notes for alternatives. Stir it in gently, then cover the pot and let it rest for 15 minutes.
- Remove from heat and let cool slightly while you set up a large bowl with a seive or colander on top and line with a fine cheesecloth. Carefully pour the very fine coagulated curds and whey into the cloth. Let the whey drain out until the curds are condense enough to transfer to your tofu press (I use this press with built in spring and vents).
- Fold the cloth over the mold, secure the top and carefully pour off excess liquid. Adjust the knob or weight to press the tofu as much as you can and put the whole contraption in the fridge to cool overnight.
- Carefully remove wrapped tofu from the mold, unwrap and enjoy! Hint: Use an oiled knife to cut the tofu easily without breaking it.
Notes
You can use other coagulants such as lemon, vinegar, and calcium sulfate. See this post for how to use each (or ask in the comment section).

I made this peanut tofu for the second time yesterday. The first time I made it, it was really difficult to get the water out of the tofu — it took two days, and the resulting block of tofu weighed the same as the starting weight of the peanuts. I suspected that it wasn’t just protein, but also a starch gel holding a lot of excess water. (I had left the milk sitting to let the starch settle, but like you noted, almost none settled out. But peanuts are about 20% starch.
The second time I made it, I tried your amylase trick. I put the peanut milk in my thermomix (temperature-controlled blender), set it to 70C, added 1/8tsp of amylase enzyme and left it for 45 minutes to try to convert the starch to sugars. After 45 minutes it tasted sweeter, and this time the whey drained more easily, giving me a smaller block of tofu (330g). I was hoping it would be a firmer tofu, but it still had the same very delicate texture.
I’ve really loved following this series, and I’ve tried just about all your (successful) tofu recipes. Thanks so much!
Ah thanks for sharing your experience. John! I’m about to film the amylase edition of will peanuts tofu so it’s great to hear your perspective on it.
Cheers,
Mary
This is so unique. A cooking site dedicated to the different types of tofu. Wonderful concept. Learning so much. I cannot use soy so this is a blessing