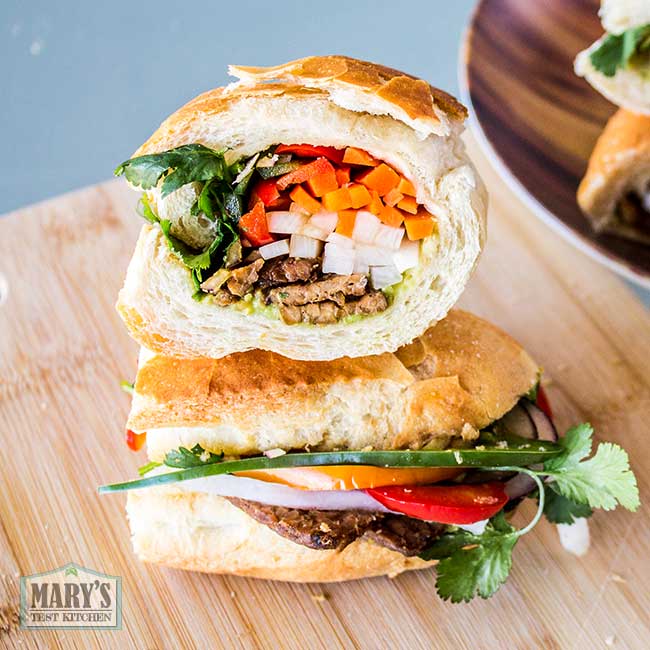
This No Knead Banh Mi recipe makes Vietnamese Baguettes with super crackly, crispy thin crusts and light crumb. This method uses time to develop flavor and texture instead of heavy kneading; no physical effort nor stand mixer required! You’ll love this bread to make Banh Mi Sandwiches (video link) or dip in stews and curries. If you prefer to have your Banh Mi ready TODAY, use my traditional Banh Mi recipe instead.
Video Tutorial for No Knead Banh Mi (24-48hr Vietnamese Baguettes)
Why you’ll love this No Knead Banh Mi Recipe
This No Knead Banh Mi recipe
- only needs you to stir the ingredients together to form the dough, then
- requires NO heavy effort, NO stand mixer,
- uses time instead of kneading,
- makes 6 to 9 perfect Banh Mi rolls depending on the size you want,
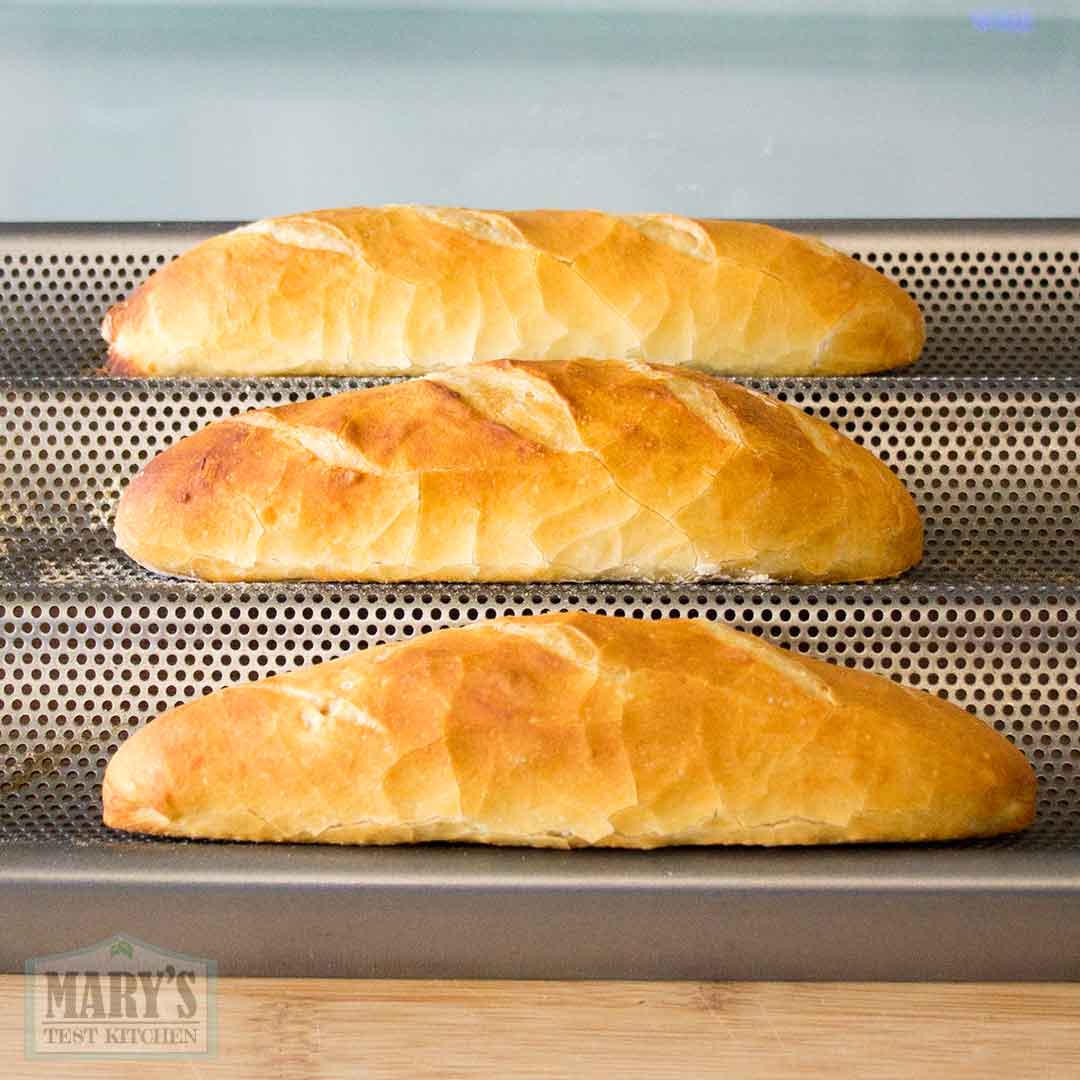
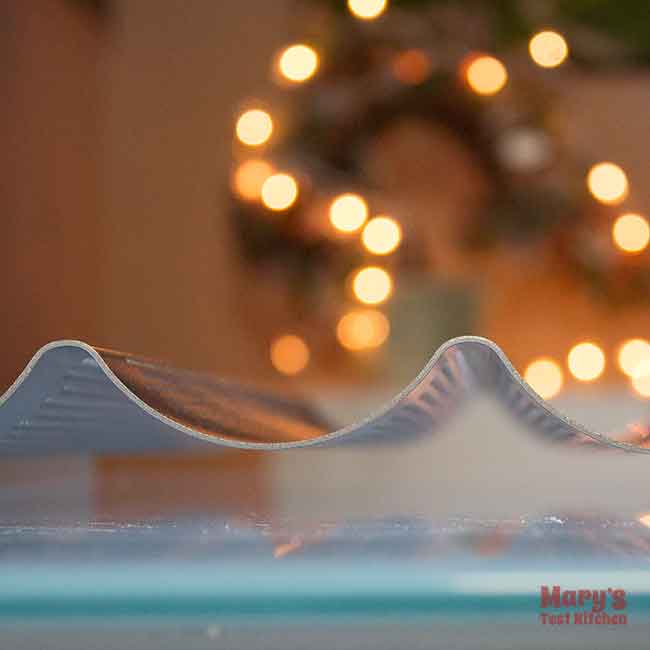
- results in crispy, crackly thin crust,
- has light, fluffy interior crumb,
- and can be stored up to 2 months!
However, if you are in a hurry and want to have fresh Banh Mi TODAY, then you should check out my traditional Banh Mi recipe.
What the difference between Bánh Mì and French Baguettes?
Bánh Mì are the Vietnamese Baguettes that your favorite Vietnamese sandwiches are made of! If you get it from a real Vietnamese sandwich shop, the outside is crisp and crackly but also thin and light at the same time. Inside, the crumb is light and fluffy. Together, these textures make the ideal bread for loading up those traditional quick pickled carrots and daikon, cucumber slices, pate, and proteins.
In contrast, French baguettes have a much heavier, chewier open crumb and have a thicker crunchy crust. The two breads are both wonderful in their own way but they do not make good substitutes for their respective traditional sandwiches.
Why make No Knead Vietnamese Baguettes at home?
Make No Knead Banh Mi bread at home so that you can
- impress your family and friends!
- no longer get turned away when you get to the sandwich shop too late and they’ve already sold out of the banh mi bread
- create banh mi that (dare I say) taste BETTER than the bakery version!
Honestly, if you can get Banh Mi from your Vietnamese bakery or your local sandwich shop, do it! They are usually high quality, affordable, and it’s nice to support local. But it’s not always that accessible. And this method of making Banh Mi is accessible. Plus if you are not in a hurry, you can make it taste even better than the bakery version.
Bakery banh mi is made quick! They are meant to be used for super flavorful sandwich fillings; they don’t need to have a well developed flavor from longer fermentation. So saying homemade can taste better is not a diss on the bakeries at all!
How long does No Knead Vietnamese Baguette keep & how to store
Once your No Knead Banh Mi cool to room temperature, it’s really best to use them right away. But you didn’t just go through that baking process to eat only one day! Stored properly, these no knead baguettes keep for up to 2 months!
If you know you’ll be eating them the next day, there’s no special storage solution required. Just put them in a bread box or container and leave at room temperature.
If you want the loaves to keep for a few days, you can put them in a large zip-top bag and store them in the fridge. They should stay fresh for 3 to 5 days.
If you know you won’t get around to them for longer then a few days, then place them in freezer bags and the baguettes will keep for up to 2 months if properly wrapped up.
How to make day-old Vietnamese Baguette fresh again
To revive your stored bánh mì to their original glory, toast them in the oven or air fryer with steam! If frozen, let them thaw before using these tips.
In an air fryer, pour a couple tablespoons of water into the air fryer liner. Place your baguettes in the basket and air fry at 350°F for 1 to 3 minutes.
In the oven, place a metal baking dish on the bottom rack and add a few tablespoons of hot water, just off the boil. Then place your baguettes on the middle rack and bake at 350°F for 5 to 10 minutes.
The heat from the oven or air fryer warms the bread through and crisps up the crust while the steam helps keep moisture throughout so it doesn’t dry out. In fact, the inside becomes soft and moist again as if it was fresh!
However, if the water runs out the crust can become more hard. So if you want the crust to be more delicately crisp, add more water!
Ingredients for No Knead Banh Mi
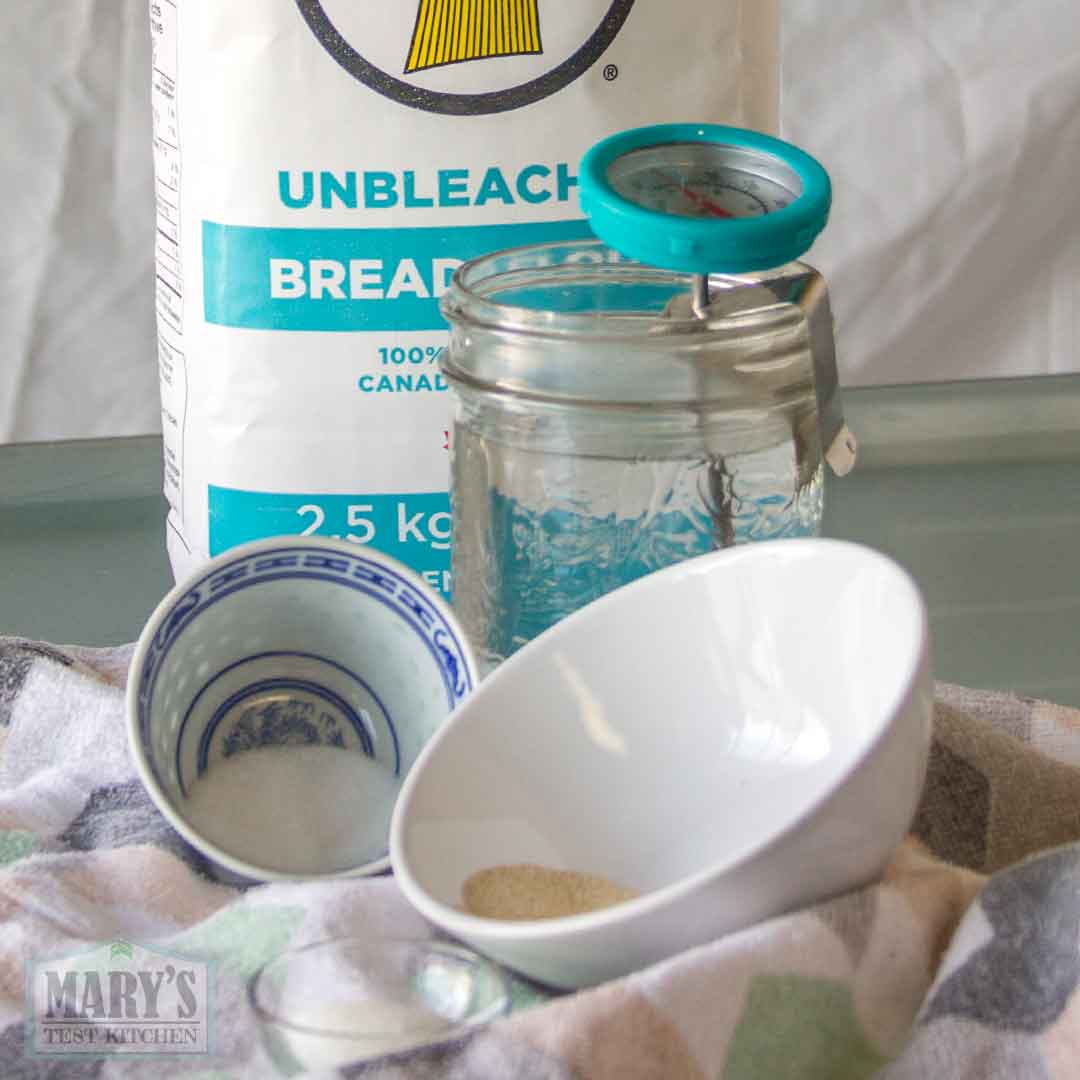
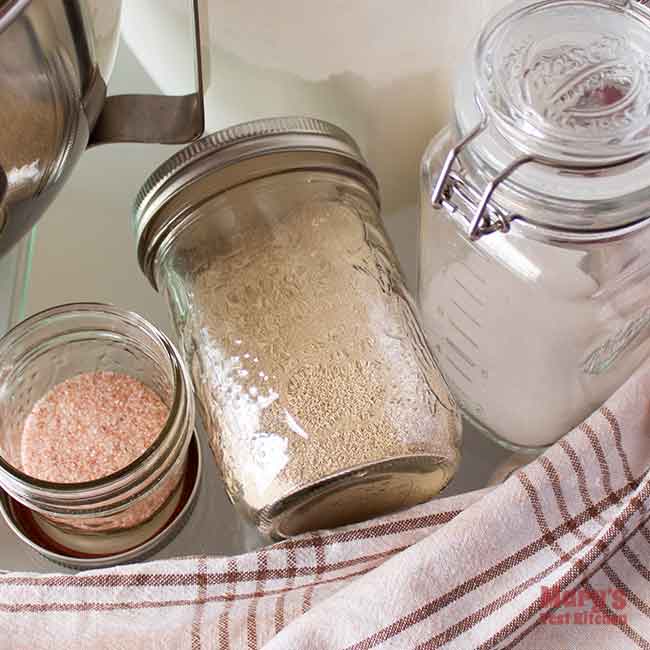
As with my original Banh Mi recipe, the no-knead version requires the basic bread ingredients: bread flour, yeast, a bit of sugar to get the yeast started, water and salt. The main difference in the formula lies in the hydration ratio.
What kind of flour is used for bánh mì dough?
High protein bread flour is the key to achieving incredibly light Banh Mi. Choose high quality bread flour that has at least 13% protein.
Can I use all-purpose flour?
I also tested this recipe using all-purpose flour and the results were pretty good too! However, I was using Robin Hood all-purpose flour and it also shows 13% gluten on the website. Not all all-purpose flours will have such a high gluten content.
To simulate lower gluten AP flour, I mixed some cake flour with bread flour for about 10% gluten content. The result looked pretty good. However, it did not crackle in quite the same way. Plus, the crumb was denser on the inside; not as springy and light.
What about rice flour for banh mi?
You may have heard that banh mi need things like dough conditioners, rice flour, and low gluten flour. These are counter-productive complications, misdirection and downright lies and I’m tired of hearing about them! I’ve tried all these “hacks” while developing my original banh mi recipe before figuring out they were all either unnecessary or down-right sabotage.
Instant VS Traditional Dry Active Yeast
While I use instant yeast in the video tutorial, this recipe actually works with both instant or traditional dry active yeast. Instant yeast is milled finer than traditional dry active yeast. So technically using the same spoon measurements would have you using more instant than traditional. However, this difference is so negligible that different measurements aren’t necessary. Check out my post on baking yeast if you want more details.
If you’re using traditional dry active yeast, simply let your teaspoons be a bit more generous.
One advantage of instant yeast is that you can add it straight in with the flour; there is no need to soak it in water so it blooms first. But I highly suggest following the blooming step anyway. Then you can be sure that your yeast is active, the water not too hot, and it will generate sufficient rising power.
Warm water
The water you use should be between 105°F to 110°F. It’s warm enough to get the yeast active but not so hot that you risk killing the yeast prematurely. It feels a bit warmer than lukewarm. But since feeling for temperature by touch isn’t too accurate, I highly suggest using a thermometer.
After many years of putting off this purchase, I finally got a infrared thermometer gun last year and it’s been so handy in the kitchen for all sorts of cooking and baking. This is an affiliate link you can use to see the brand I got. If you decide to purchase through that link, I will get a small commission at no extra charge to you. So thank you in advance if you decide to support my work in that way.
Salt
I’m using regular table salt but other plain granulated salts will work just as well. Don’t skip it because bread made without salt simply doesn’t taste as good. But rest assured, even with the full measure of salt, your bread will not taste particularly salty; just the way bread should taste!
Equipment for No-Knead Bánh Mì
This is the equipment I used to make my banh mi taste like it came from a Vietnamese bakery (or as close as we can at home). These are:
- a baguette pan (non-stick),
- spray bottle or pastry brush (for water),
- a very sharp non-serrated knife,
- large mixing bowl with lid (a large plate will do)
- metal baking pan (for hot water)
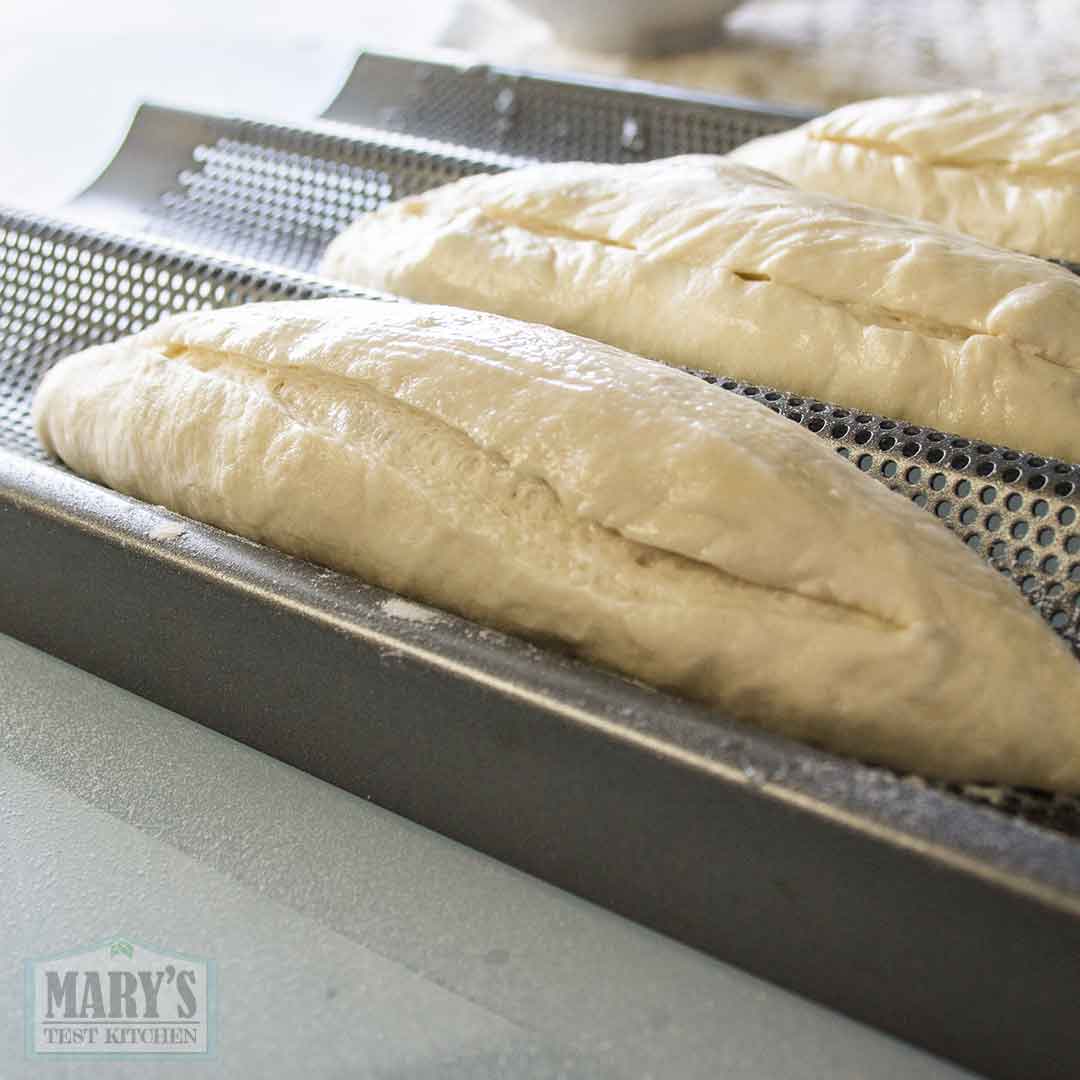
A baguette pan has curved rows so that your baked baguettes have a lovely cylindrical shape. They are also perforated so air can circulate and helps to make a beautiful crust. However, not all are made the same! Don’t make the mistake I did and get one with narrow rows that make your baguettes come out like breadsticks. Or a pan with too few rows so you put in all this effort and can only bake four loaves at a time.
I went through two baguette pans before I landed on my perfect holy grail baguette pan (affiliate link).
No baguette Pan Work-Around However, if you are keen to make these Vietnamese-style baguettes NOW and cannot wait to get a pan, go ahead and use a parchment-lined baking sheet. To help the baguettes stay separate when they are rising, fold your parchment paper to create walls between the three rows of baguettes.
The shape won’t be quite the same and you do lose a bit of the experience BUT your flat-bottomed bánh mì will still taste spectacular. Remember, these are your crispy golden vessels of pillow-y soft perfection and there ARE no rules!
Any spray bottle that can give you an even mist of water will do. You’ll need to mist your risen loaves just before you slash them; this helps the blade slice through easily. And you’ll want to mist them just after you place them in the oven too.
Finally, to easily create slashes that will allow your baguettes the freedom to rise to their full potential in the oven, you’ll need a very sharp blade. You could use a bread lame which is specifically made for that purpose. Or make do with a freshly sharpened chef’s knife, like I do.
24 vs 48 hr versions
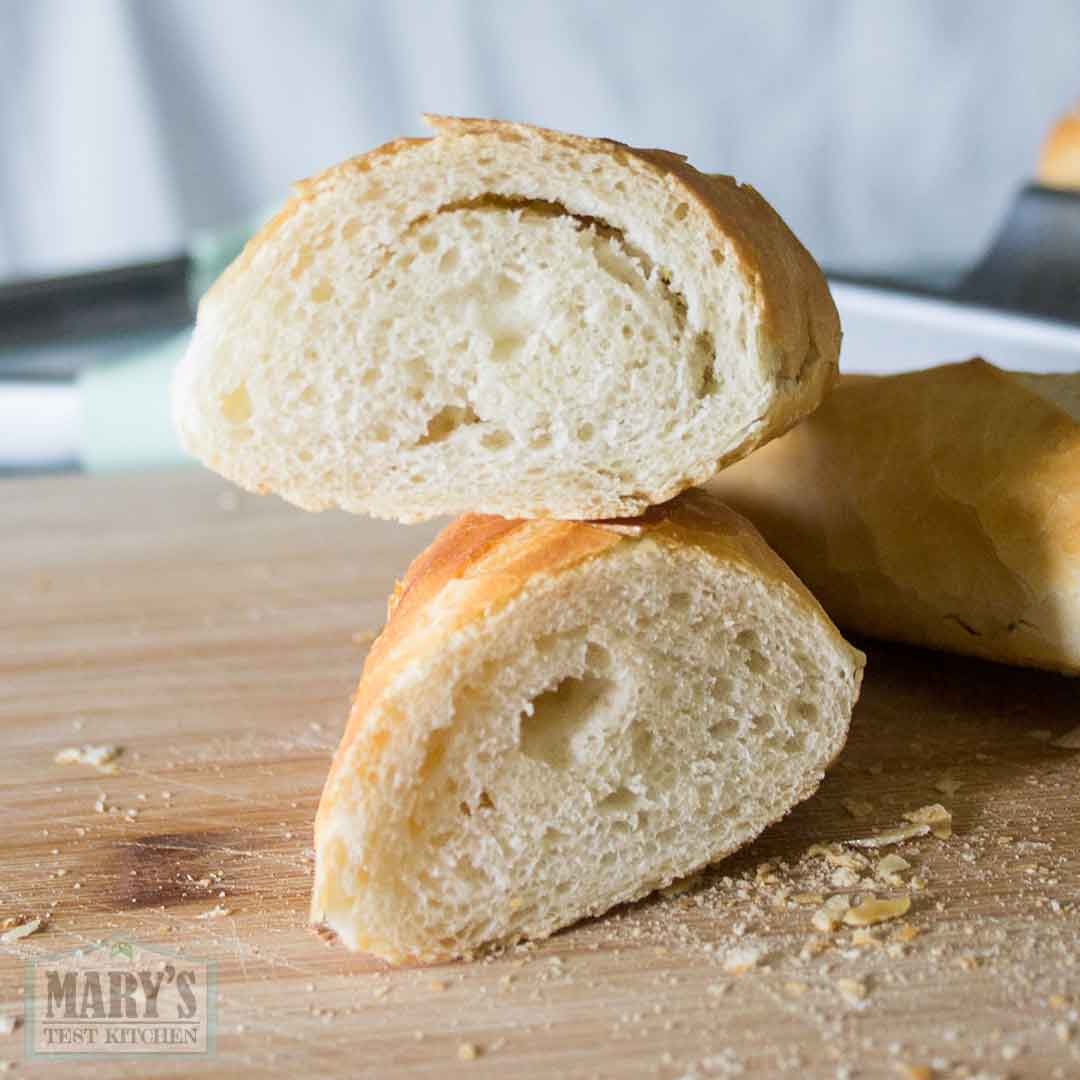
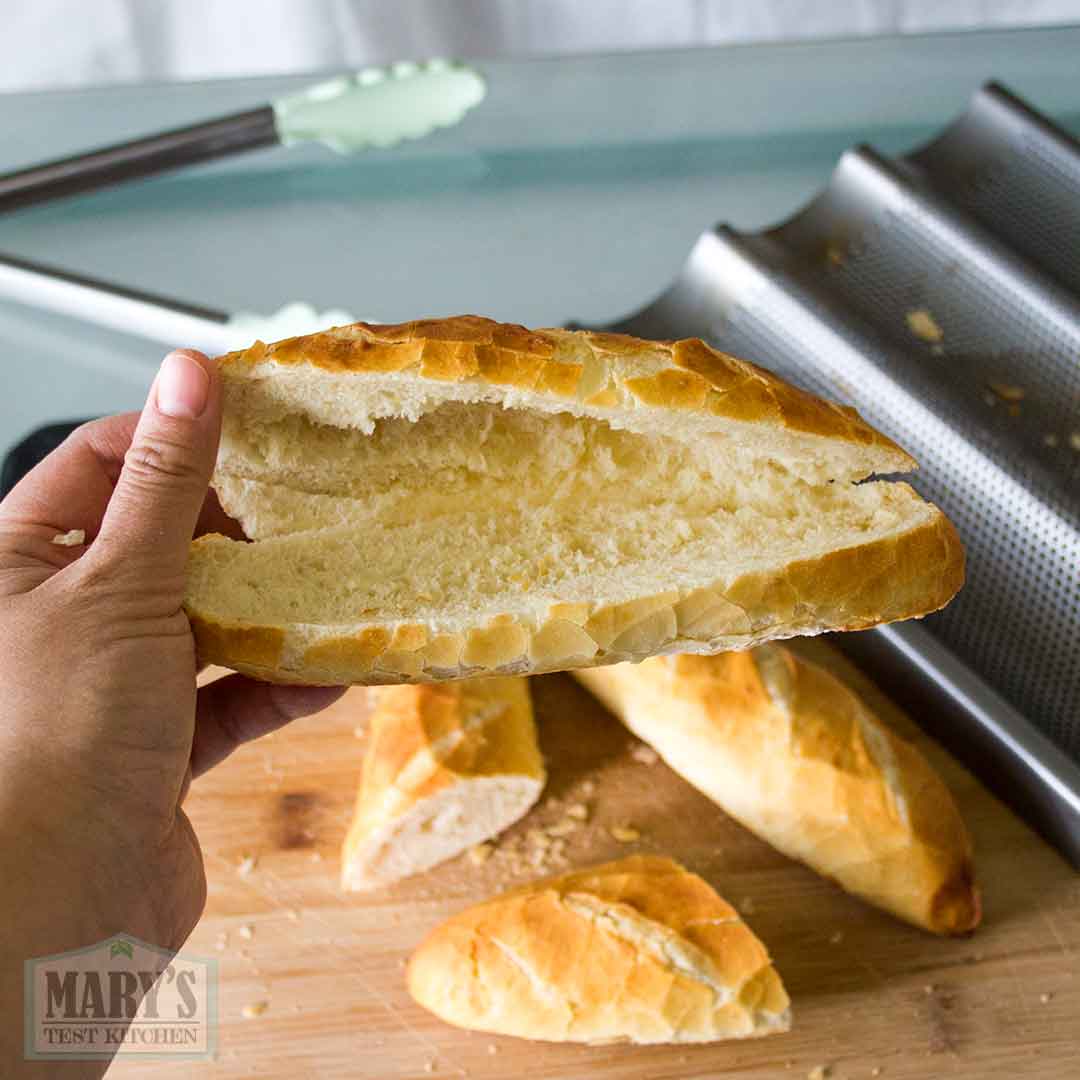
During testing, I making the banh mi with dough rested for 48 hours made the best banh mi. The dough was properly hydrated throughout without kneading, the flavor was mildly developed with cold fermentation, while the gluten stayed strong enough to rise and bake without collapse. The photo below is a cross-section from a baguette rested for 48 hours.
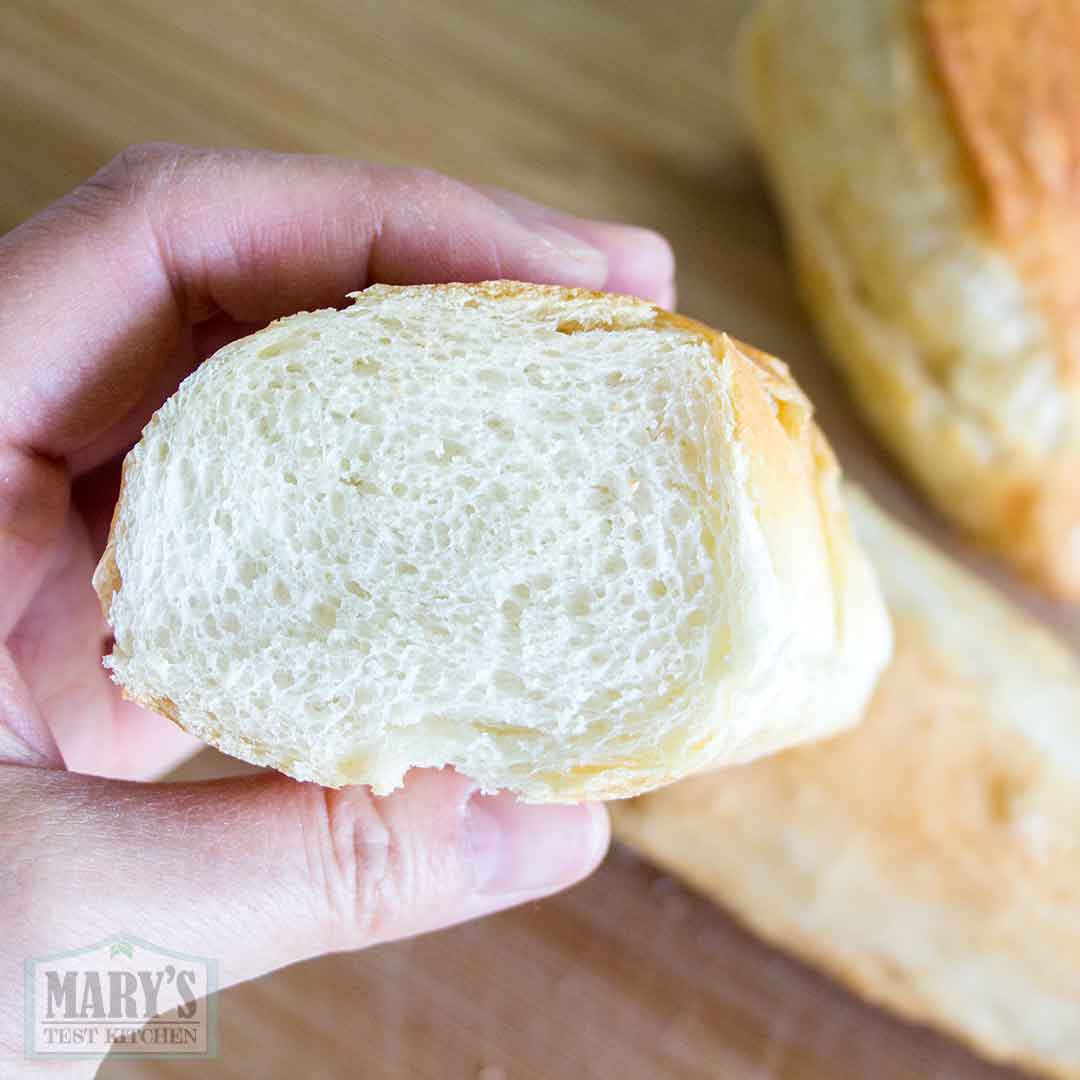
The photo above shows the crumb using dough rested only 24 hours. As you can see, it still looks great on the outside, with crispy thin crust but the crumb is a bit uneven. It also didn’t have as rich of a flavour. That said, the 24 hr no-knead version still came out great enough to make excellent sandwiches.
So if you have the time, I would highly recommend sticking with the 48 hour method. But if you only have 24 hours, you can still make delicious no-knead banh mi.
Have you made this No Knead Banh Mi?
Have you made this recipe? If you have, I would really appreciate if you left a review. If you have any questions, please leave me a comment and I’ll do my best to answer! Whether you leave a review/comment here on the blog or on the Youtube vide, it really helps! I appreciate all the feedback!
Printable recipe for No Knead Banh Mi (Vietnamese Baguette)
No Knead Banh Mi | Easier Vietnamese Baguettes

This no-knead recipe for banh mi makes super crackly, crispy thin crusts and light crumb inside. Perfect for your banh mi sandwiches at home!
Ingredients
- 355ml warm water, 105-110°F (12oz)
- 1 tsp sugar (4g)
- 2 tsp instant yeast (7g)
- 510g bread flour (18oz)
- 1 1/4 tsp salt (7g)
Instructions
Make Dough & Rest
Combine water and sugar; stir to dissolve. Add yeast and let bloom 5 minutes.
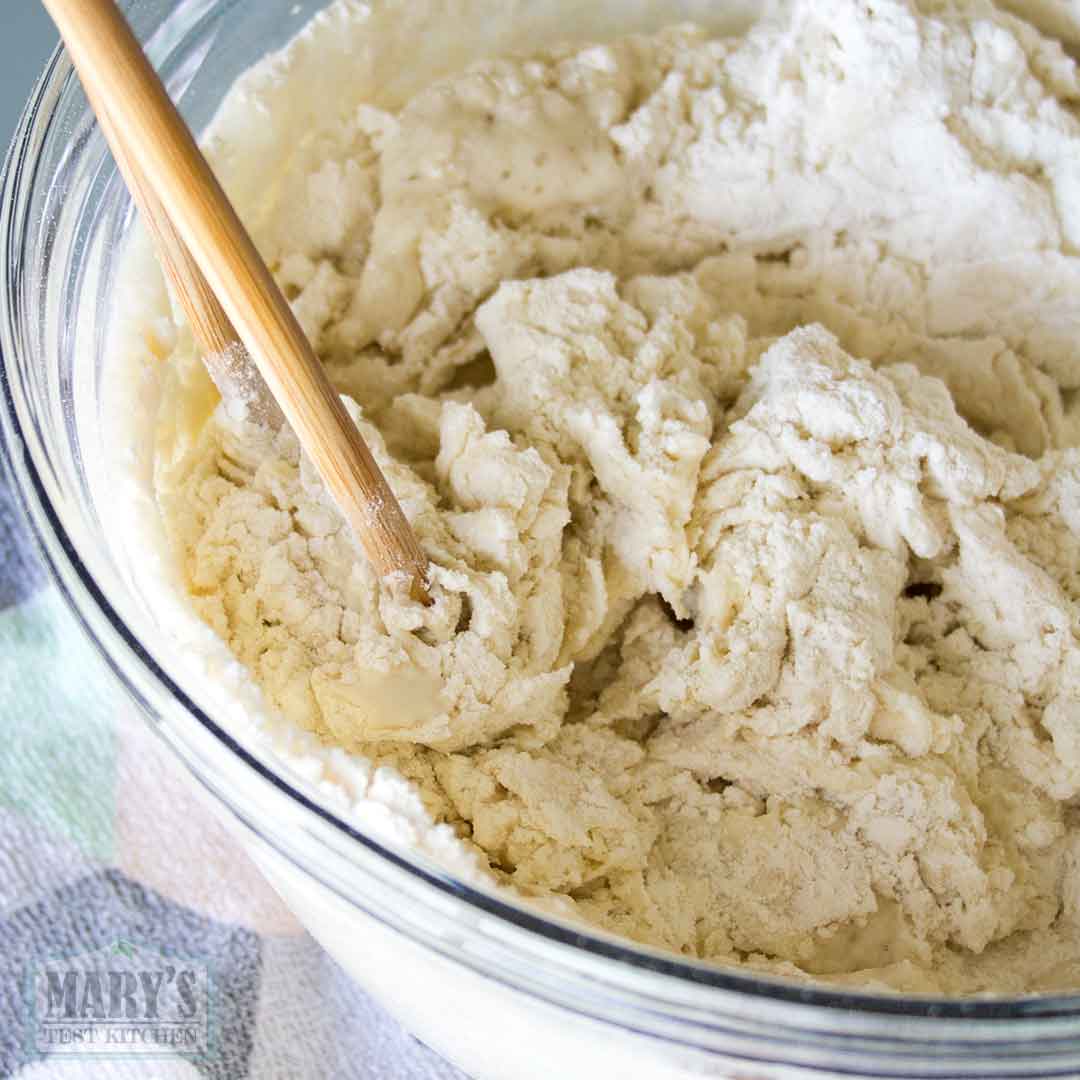
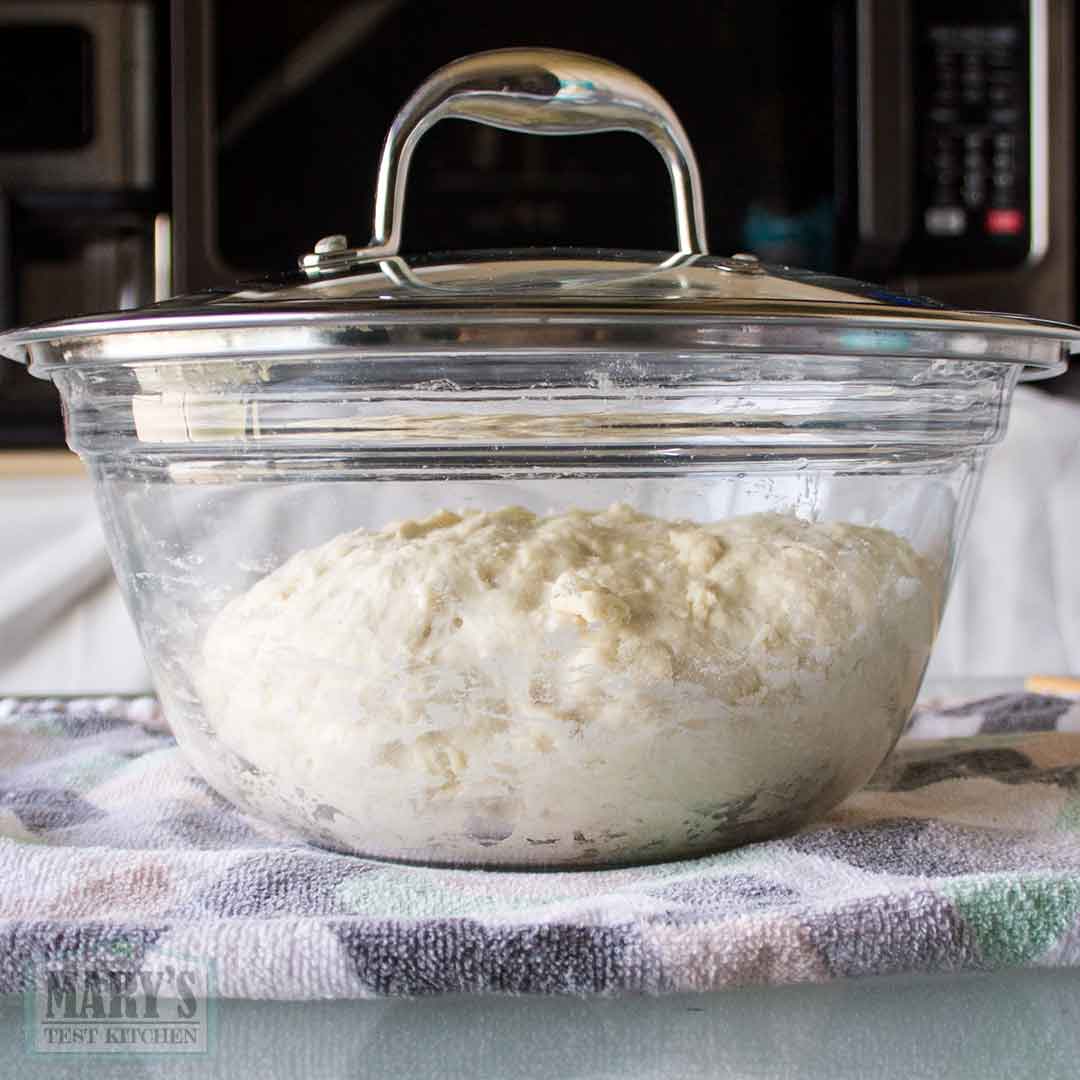
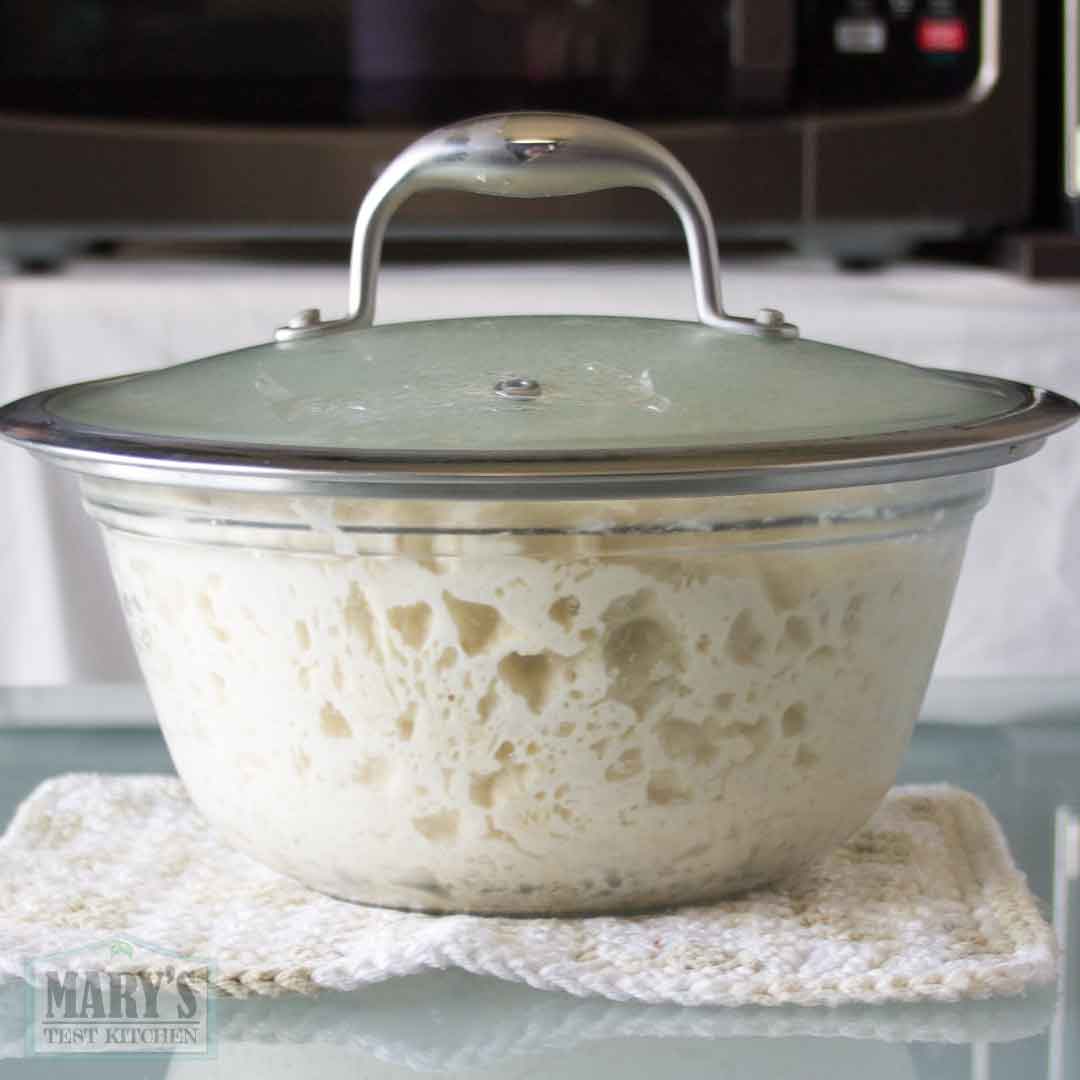
Add bread flour, then salt. stir to combine into shaggy dough and no obvious dry flour remains. Cover the bowl and let rest in the refrigerator for 24 - 48 hours. 48 hours is recommended for the best texture and flavor.
Divide & Shape Banh Mi Dough
Rest the dough at room temperature for 30 minutes to make the cold dough easier to work. Then transfer the dough to a lightly floured surface and press out excess gas bubbles before forming in to a log. Divide into 6 or 9 portions (depends on the size you want). Before starting the next step, set a kettle of water to boil; you will use 2 cups soon and 100ml later during baking.
Press gas bubbles out of each piece and shape into a ball (see video for tips). Starting with the dough ball you made first, roll it flat with a rolling pin. The dough may be a little sticky; use a little flour to help you.
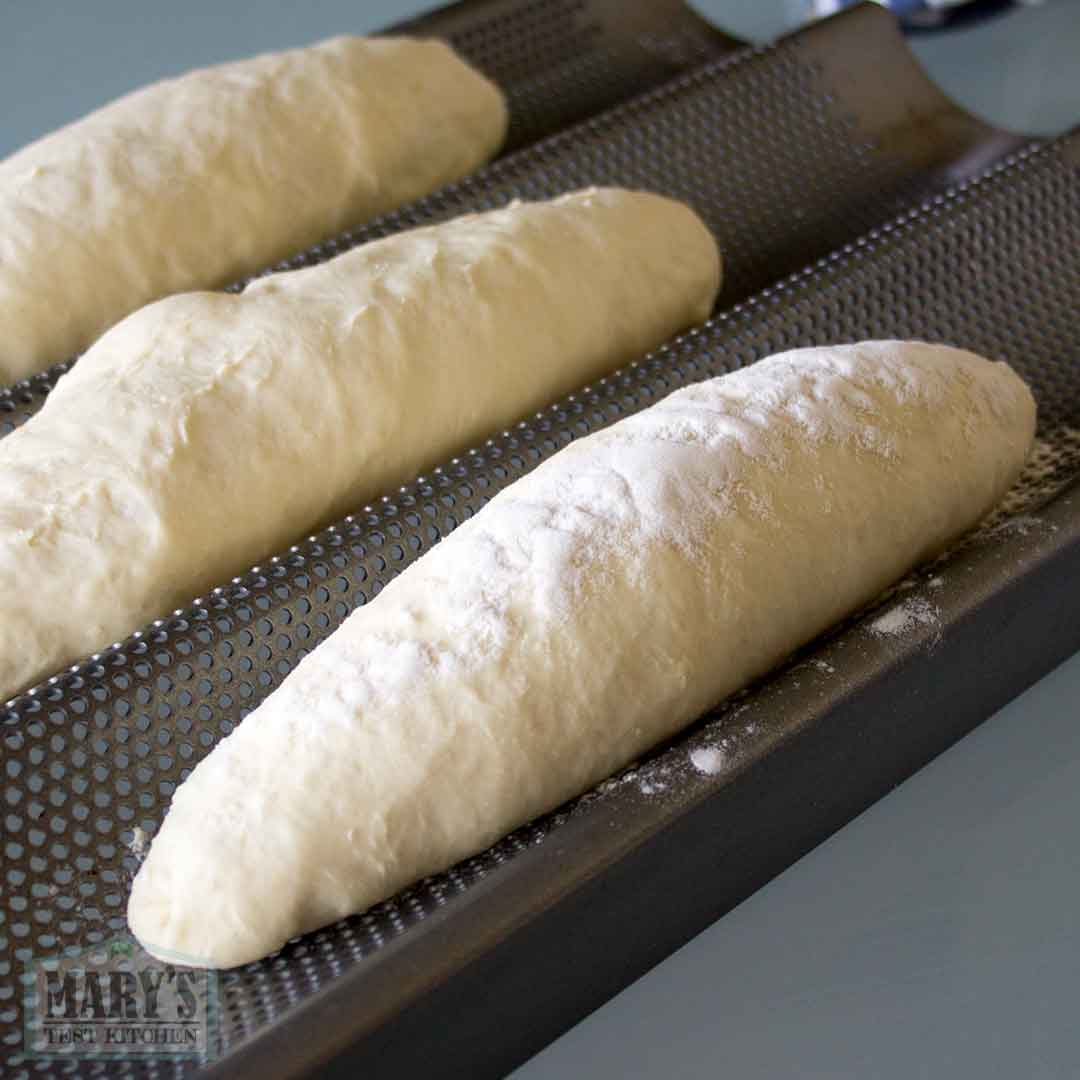
Starting with one short side, roll dough up while tapering the sides to create a baguette shape. Pinch along the seam to seal. Then roll it to smooth the seam and lengthen the baguette. Arch hands so the baguette stays thicker in the middle, sloping to points towards the ends.
Place shaped baguettes on non-stick baguette pan with the seam side down. Cover to prevent drying out (see video for tips). Repeat with remaining dough balls.
Create a warm humid proofing space
With the oven OFF, place a metal baking pan on the bottom rack. Fill it with 2 cups of hot water from the kettle. Place the covered baguette pan on the middle rack and close the door. Let the raw banh mi rise for 45 minutes or until doubled in size.
Afterwards, remove the baguette pan, baking pan and empty the water. Preheat to 475°F.
Slash & Bake
When 475°F reached, restart that kettle. When it reaches a boil, turn it off but don't pour your 100ml yet. Carefully uncover risen baguettes. Mist baguettes and blade with water. Cut slashes across baguettes about 1 cm deep.
Immediately, place baguettes on the middle rack. Carefully, place the metal quarter baking pan back on the bottom rack and pour in 100ml hot water, just off the boil. Spray a few more times with water and close the door. Bake for 18 to 20 minutes or until the baguettes become golden brown.
Cool
Let the loaves cool to room temperature before slicing for sandwiches.
Notes
If all the banh mi don't fit in your baguette pan at once, you will bake in 2 cycles. Don't slash the baguettes until they are about to go into the oven.

I measured all of the ingredients on a scale, but the dough wasn’t shaggy, per your video. It was dry, crumbly, and had probably at least 1/4 of dry flour. I put a few tablespoons of water. Is that ok or was that mistake? It is in the fridge now and will be doing 48 hours. If after the 48 hours, it is still very sticky, should i add more flour? What would be the fix? Thank you!
Hi Susan,
If the dough became sticky after you added the water, then yes, it was unnecessary. However, not unsalvagable. Just a few extra tablespoons of water shouldn’t be an issue. I would avoid adding flour.
Good luck,
Mary
Hi Mary,
Thank you so much for this recipe. It worked great. The inside is fluffy and flavorful and the outside has that thin glass crispy crust so needed in a banh mi bun.
I waited 48 hours for the dough to mature. I was worried that the gluten had not developed enough because there was some tearing when I stretched the dough balls to make the final shape. But everything came out and tastes great.
I’m glad I found a recipe with only uses flour, yeast, salt and water. I did not want to have to include other dough improvers like egg or wheat gluten or vitamin C or diastatic malt.
Thanks again!!!!
You’re very welcome! I’m so glad you found success, DJ! Thank you for giving the recipe a try and for your lovely comment.
Best,
Mary