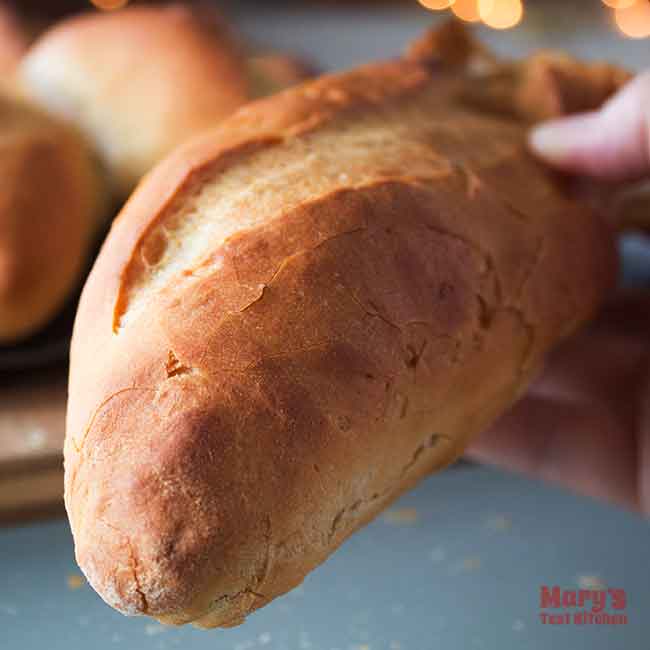
If you want light and airy Vietnamese Baguettes at home, you’ve come to the right place! The crust is thin, crackly and very crisp while the interior is light and fluffy like a cloud. This is the bread to make Banh Mi sandwiches; the iconic Vietnamese street food (or as I knew them in the 90’s, Vietnamese Subs).
Pin this for later or Skip to the Printable Recipe.
Video tutorial for How to Make Vietnamese-style Baguettes (Bánh Mì)
What is a Vietnamese Baguette or Bánh Mì?
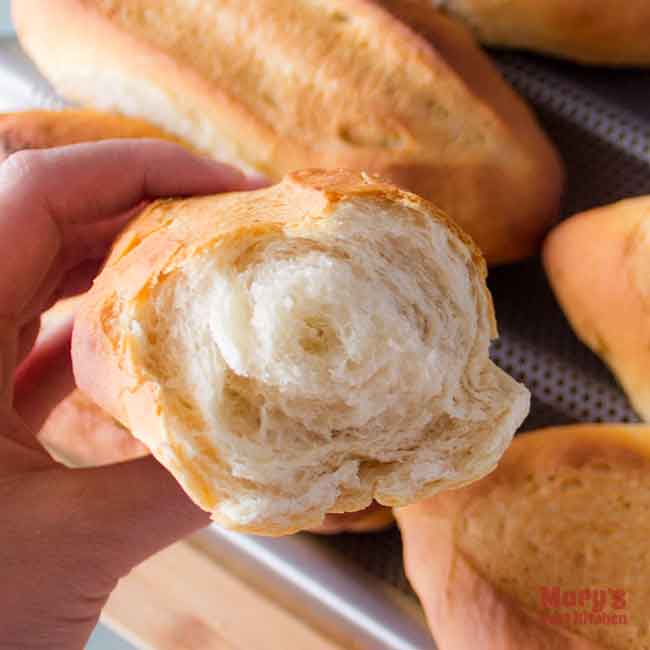
If you ever wondered what is the bread that your favourite Vietnamese sandwich shop is using, it’s Bánh Mì! The outside is very crisp but also thin, giving a satisfying crackle as you bite into it. The inside is extremely light with a crumb that is super fine and pillow-y.
What’s the difference between Vietnamese Baguette and French Baguette?
Bánh Mì feels as light as a cloud in comparison in comparison to a French Baguette. French baguettes have a chewier open crumb and have a thicker crunchy crust. While Vietnamese Baguettes have a pillowy fluffy crumb that is super light and a crackly thin crust.
Can I make Bánh Mì sandwiches with French bread?
You might wonder, why go through the trouble. Can’t you just use a French baguette for your Vietnamese sandwich? The answer is a hard no!
French baguettes have a much thicker crust with a chewier interior. Put the same fillings in a French baguette and you’ll have a more difficult time chewing through. And while I have made do for a craving or two back in the day, it’s just not going to give you the experience of a Bánh Mì sandwich.
Why make Vietnamese Baguettes at home?
Honestly, if you have access to a Vietnamese bakery or your local sandwich shop will sell you the bread, buy it from them! They are super fantastic, always high quality, and very affordable.
But if you, like me, have a compulsion to learn how to make your own everything, making your own Vietnamese baguettes at home is a truly satisfying activity. From creating the soft smooth dough, to shaping the single-serve baguettes, watching them rise in your steamy kitchen, and seeing them spring open when you slash them just before baking, and finally to marvel at their golden crispy perfection; you’ve just got to experience it yourself. At least once.
And then, also like me, you might feel compelled to make them every week!
How long does homemade Vietnamese Baguette keep & how to store
While eating fresh bread baked on the same day is an experience unlike any other, these Vietnamese baguettes can be enjoyed even several days later! Make sure you let them cool to room temperature before trying any of these storage options.
If you know you’ll be eating them the next day, there’s no special storage solution required. Just put them in a bread box or container and leave at room temperature.
If you want the loaves to keep for a few days, you can put them in a large zip-top bag and store them in the fridge. They should stay fresh for 3 to 5 days.
If you know you won’t get around to them for longer then a few days, then place them in freezer bags and he baguettes will keep for up to 2 months if properly wrapped up.
How to make day-old Vietnamese Baguette fresh again
To revive your stored bánh mì to their original glory, toast them in the oven or air fryer with steam! If frozen, let them thaw first. Then, whether they were stored on the counter, in the fridge or freezer, you can follow these steps.
In an air fryer, pour a few tablespoons of water into the air fryer liner. Place your baguettes in the basket and air fry at 350°F for 1 to 3 minutes.
In the oven, place a metal baking dish on the bottom rack and add a few tablespoons of hot water, just off the boil. Then place your baguettes on the middle rack and bake at 350°F for 5 to 10 minutes.
Since appliances all vary, please take these instructions as guidelines only and check your baguettes often! The heat from the oven or air fryer warms the bread through and crisps up the crust while the steam helps keep moisture throughout so it doesn’t dry out. In fact, the inside becomes soft and moist again as if it was fresh!
However please keep in mind, if the water runs out the crust can become more hard. So if you want the crust to be more delicately crisp, add more water!
Ingredients for Vietnamese Baguettes
As with most classic bread recipes, all you really need is flour, yeast, and salt for this bánh mì bread dough. Plus a bit of sugar for the yeast to feed on in this particular case.
What kind of flour is used for bánh mì dough?
Has someone told you that Vietnamese bakeries put rice flour in their bánh mì dough? Or that you should mix in low-gluten flour for that super light interior? Well, they told you the same lie they told me! After over ten years of trying to get this recipe right, I finally figured out that high-protein bread flour is the key!
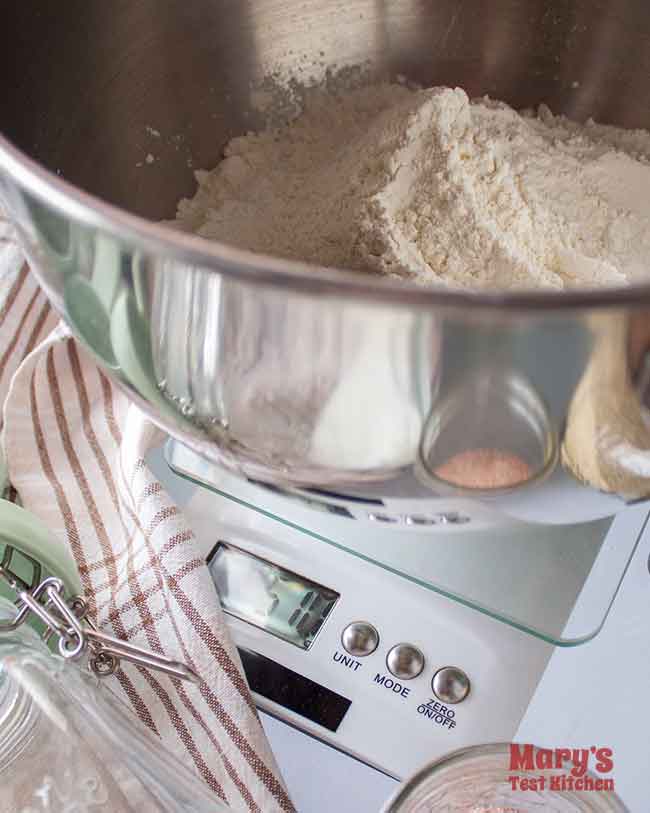
In particular, I found success with bread flour that contains 13% gluten content.
I also tested this recipe using all-purpose flour and the results were pretty good too! However, I was using Robin Hood all-purpose flour and it also shows 13% gluten on the website. Not all all-purpose flours will have such a high gluten content.
To simulate lower gluten AP flour, I mixed some cake flour with bread flour for about 10% gluten content. The result looked pretty good. However, it did not crackle in quite the same way. Plus, the crumb was denser on the inside; not as springy and light.
Instant VS Traditional Dry Active Yeast
While I specify instant yeast in the printable recipe, it actually works with both instant or traditional dry active yeast. Instant yeast is milled finer than traditional dry active yeast. So technically using the same spoon measurements would have you using more instant than traditional. However, this difference is so negligible that different measurements aren’t necessary.
If you’re using traditional dry active yeast, simply let your teaspoons be a bit more generous.
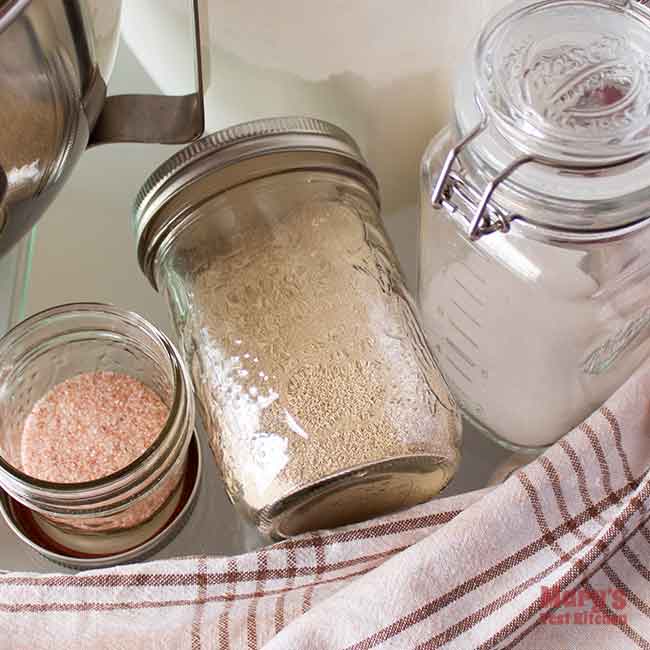
One advantage of instant yeast is that you can add it straight in with the flour; there is no need to soak it in water so it blooms first. However, if you are making this recipe for the first time, using a fresh container of yeast (or yeast from the back of the pantry from who knows when), or are generally not super experience in making bread, I highly suggest following the blooming step anyway. Then you can be sure that your yeast is active, the water not too hot, and it will generate sufficient rising power.
When this recipe becomes part of your regular repertoire, feel free to skip the blooming step.
Warm water
The water you use should be between 105°F to 110°F. It’s warm enough to get the yeast active but not so hot that you risk killing the yeast prematurely. It feels a bit warmer than lukewarm. But since feeling for temperature by touch isn’t too accurate, I highly suggest using a thermometer.
After many years of putting off this purchase, I finally got a infrared thermometer gun last year and it’s been so handy in the kitchen for all sorts of cooking and baking. This is an affiliate link you can use to see the brand I got. If you decide to purchase through that link, I will get a small commission at no extra charge to you. So thank you in advance if you decide to support my work in that way.
Salt
You can use pink Himalayan salt as I like to do (mostly because it makes for pretty video and photos), but regular table salt or sea salt will work just as well.
And before anyone asks, please include the salt for flavour. Bread made without salt doesn’t taste as good. But rest assured, even with the full measure of salt, your bread will not taste particularly salty; just the way bread should taste!
Equipment for Homemade Bánh Mì
You will need a few things to make your Bánh Mì come out like the ones from a Vietnamese bakery (or as close as we can at home). These are:
- a baguette pan (non-stick),
- spray bottle (for water),
- a very sharp non-serrated knife,
- and optionally, a stand mixer.
A baguette pan has curved rows so that your baked baguettes have a lovely cylindrical shape. They are also perforated so air can circulate and helps to make a beautiful crust. However, not all are made the same! Don’t make the mistake I did and get one with narrow rows that make your baguettes come out like breadsticks. Or a pan with too few rows so you put in all this effort and can only bake four loaves at a time.
I went through two baguette pans before I landed on my perfect holy grail baguette pan (affiliate link).
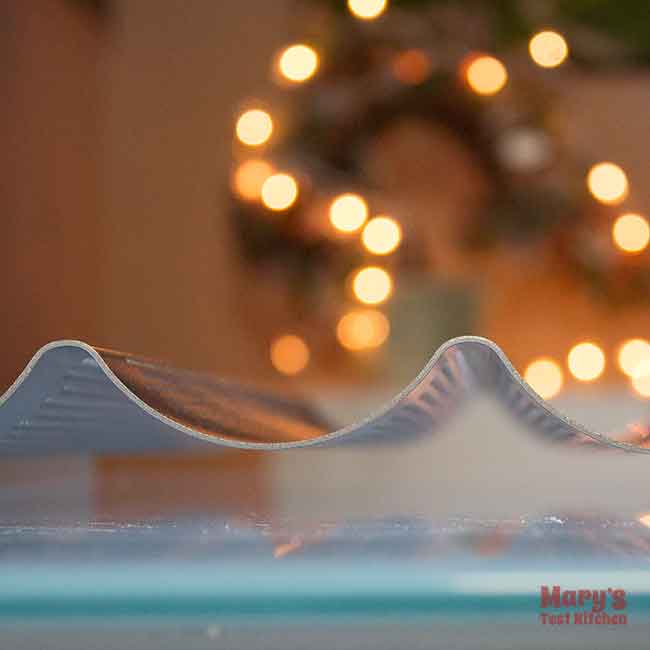
No baguette Pan Work-Around However, if you are keen to make these Vietnamese-style baguettes NOW and cannot wait to get a pan, go ahead and use a parchment-lined baking sheet. To help the baguettes stay separate when they are rising, fold your parchment paper to create walls between the three rows of baguettes.
The shape won’t be quite the same and you do lose a bit of the experience BUT your flat-bottomed bánh mì will still taste spectacular. Remember, these are your crispy golden vessels of pillow-y soft perfection and there ARE no rules!
Any spray bottle that can give you an even mist of water will do. You’ll need to mist your risen loaves just before you slash them; this helps the blade slice through easily. And you’ll want to mist them just after you place them in the oven too.
Finally, to easily create slashes that will allow your baguettes the freedom to rise to their full potential in the oven, you’ll need a very sharp blade. You could use a bread lame which is specifically made for that purpose. Or make do with a freshly sharpened chef’s knife, like I do.
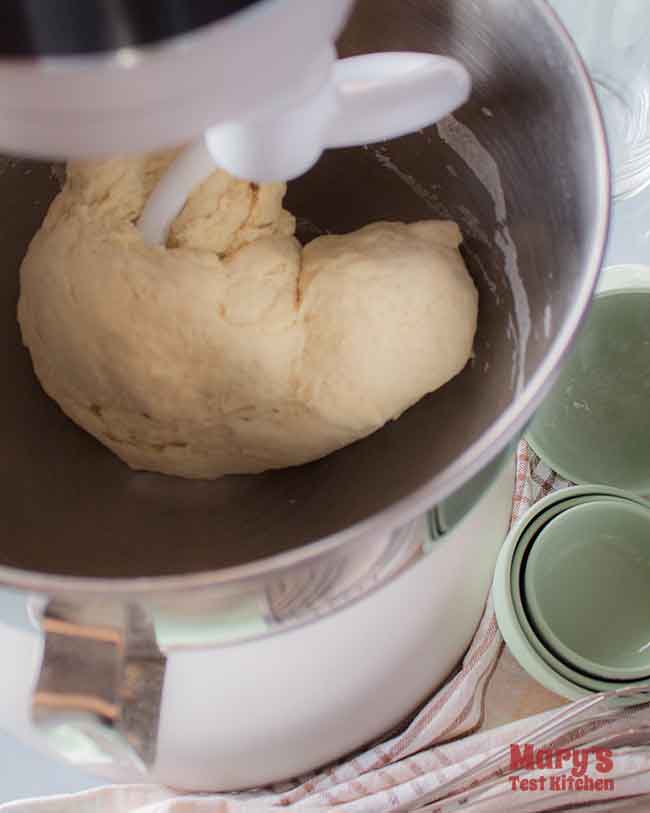
Optionally, you can use a stand mixer to make the job of kneading the dough to silky softness much easier. A sturdy food processor can do the job as well, though you will work in short pulses to prevent over-working the dough.

What people are saying about this Banh Mi recipe
Since posting, I’m so happy that so many people have made this recipe and enjoyed fresh banh mi from their own ovens!


Whether you leave a review here on the blog or in the Youtube video comments, it really helps! I appreciate all the feedback!
Printable recipe for Vietnamese Baguette (Bánh Mì)
How to Make Vietnamese Baguettes | Banh Mi
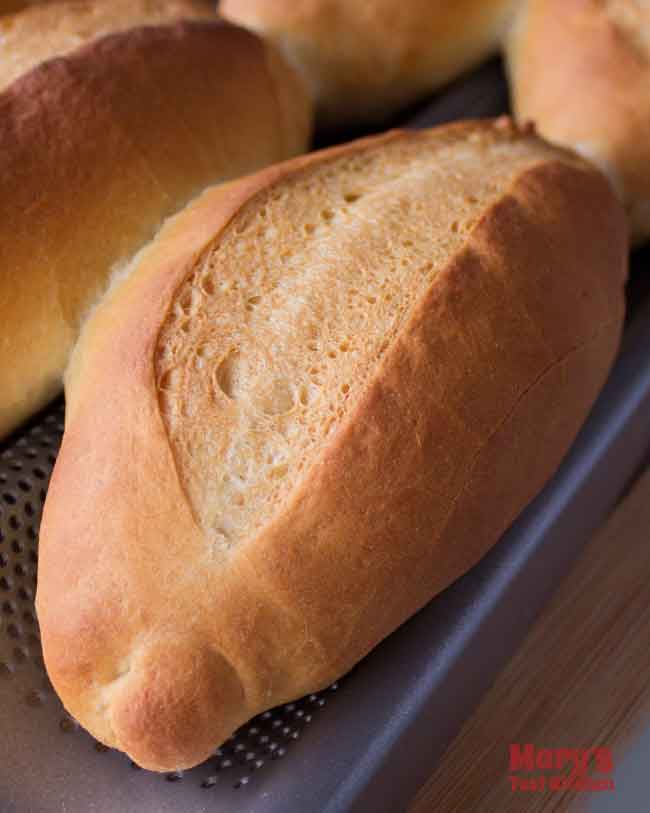
Make Banh Mi at home! Also known as Vietnamese Baguettes, the crust is thin, crackly and very crisp while the interior is light and fluffy like a cloud. These are perfect to make Banh Mi sandwiches! Plus, they are not just great on the first day; you can revive day old (or even older) bread to it's original crispy-yet-soft glory in a couple steps.
Ingredients
- 310ml warm water, 105-110°F (10.8oz)
- 1 tsp sugar
- 2 1/4 tsp instant yeast
- 510g bread flour (18oz)
- 1 tsp salt
Instructions
Make Dough
Rinse stand mixer bowl with hot water. Combine warm water with sugar and instant yeast. Let stand for 5 to 10 minutes to bloom (to check that the yeast is active). Add flour and sprinkle over salt. Stir to form ragged dough.
Knead & Proof
Ramp up to speed slowly to speed 4 (or max speed for your machine to knead without rocking or burning out) and run 10 minutes. If working manually, knead dough with oiled hands to prevent sticking. Knead until dough is smooth and elastic. Cover and rest 30 minutes.
Uncover and repeat kneading at speed 4 for 10 minutes.
If working manually, press the air pockets out of the dough and knead again until it is very smooth and elastic. Let it rest a few minutes and conduct a windowpane test. That is, you should be able to stretch the dough gently until it is thin enough you can see light through it without breaking.
Shape into a ball and cover. Proof in a warm, draft-free location for 60 minutes until the dough has doubled to tripled in size.
Divide and Shape
Press gas pockets out of the risen dough, weigh and divide into 6 even pieces. Press gas bubbles out of each piece and shape into a ball.
Set a kettle of water to boil; you will use 2 cups plus 100ml later.
Starting with the dough ball you made first, roll it flat with a rolling pin. Dust with flour to prevent excessive sticking.
Starting with one short side, roll dough up while tapering the sides to create a baguette shape. Pinch along the seam to seal. Then roll it to smooth the seam and lengthen the baguette. Arch hands so the baguette stays thicker in the middle, sloping to points towards the ends.
Place shaped baguettes on non-stick baguette pan with the seam side down. Cover with plastic wrap(*see notes) to prevent drying out. Repeat with remaining dough balls.
Steam Oven Proof
With the oven OFF, place a metal quarter baking pan on the bottom rack. Fill with 2 cups of hot water, just off the boil. Place the covered baguette pan on the middle rack and close the door. Proof for 45 minutes.
Afterwards, remove the baguette pan, baking pan and empty the water. Start preheating oven to 475°F. Meanwhile, sharpen your knife and prepare spray bottle of water.
Slash and Bake
When your oven has reached 475°F, carefully uncover your risen baguettes which will be doubled in size. Also turn the kettle back on.
Mist baguettes and blade with water. Holding the knife at a 30° angle, make slashes about 1 cm deep (little less than 1/2") down the length of each baguette.
Carefully, place the metal quarter baking pan back on the bottom rack and pour in 100ml hot water, just off the boil. Place the slashed baguettes on the middle rack, spray a few more times with water and close the door. Bake for 18 to 20 minutes or until the baguettes become golden brown.
Cool before slicing. Store at room temperature for up to a day. Bag if keeping longer and store in fridge. Revive stored baguettes by toasting in air fryer / oven with a few tablespoons of water until hot and crisp again.
Notes
*One person who made this recipe had their plastic wrap stick to their proofed loaves. As I'm not sure why (mine never stuck), you might oil the baguettes as the last step when you're shaping them as a preventative measure.
Or use the usual damp, lint-free kitchen towel. If the kitchen towel sticks, you can wet the top of it and when the water soaks through, it should release easily. Careful not to use too much water as it can deflate your loaves.
Nutrition Information:
Yield:
6Serving Size:
1Amount Per Serving: Calories: 314Total Fat: 2gSaturated Fat: 0gTrans Fat: 0gUnsaturated Fat: 1gCholesterol: 0mgSodium: 392mgCarbohydrates: 63gFiber: 2gSugar: 1gProtein: 11g
Nutritional Information automatically calculated by a plugin and may not be correct.


Unfortunately mine did not work. The plastic wrap got really stuck the buns while they were proofing and removing it kind of messed up their rise. I went ahead and baked them but they are pretty crunchy on the outside. Maybe my oven runs hot? The baked bread had a very crunchy exterior, more like a French baguette but maybe even too chewy and crunchy. The inside is okay but it would be hard to eat in as a sandwich for sure. Maybe I’ll try again another day.
Hi Kelly!
Thanks for sharing this comment 🙂 I think we chatted on instagram about your results?
Extra crunchy/chewy crust tells me you’re right about your oven. It might run on the hot side. I use an oven thermometer when testing recipes just to make sure my oven is calibrated correctly.
Short of recalibrating your oven, to mitigate this for next time, you might use extra water in your pan and check the baguettes earlier.
Sorry, I’m not sure why your plastic wrap stuck. I found mine never stuck! I assumed it was because of the steamy oven proofing session. But oiling the wrap or using the usual damp-lint free kitchen towel instead might be the answer.
Hope that helps for next time!
Thanks so much for trying the recipe <3
Mary
Same issue, Saran Wrap stuck all over them 🙁 so unfortunate that after so much effort it didn’t work
You can just reshape them and let them rise again. Sounds like your dough needed more flour/less water. Humidity can cause this issue.
This is a gorgeous bread! The dough felt great, baked up great. I had to bake and extra 10 min, I think, but was perfectly crusty.
Definitely a keeper! Thank you!
Hi Dorothy!
Thanks so much for sharing your experience with my recipe 🙂 I’m so glad you enjoyed it. And extra thanks for sharing your adjustments as all ovens can vary a bit and this is a fantastic real-life example.
Cheers,
Mary
Hi,I want to make these but my oven maxes out at 425 (it’s convection). Do you think I can still make these?
Probably. Sorry, I can’t provide guidance to adjust the recipe for your oven though!
Hi Mary,
I finally got a chance to try out this recipe and it’s the best banh mi baguette recipe I’ve tried to date. The baguettes had a nice thin crust exterior while being super soft on the inside! thank you for sharing your recipe!
Hi Wendy,
That’s fantastic! Thank you so much for trying my recipe and sharing your experience <3 Glad you enjoyed it!
Cheers,
Mary
Hi! Your recipe is the best I’ve tried so far. One issue though is the the top cooks much faster than the bottom – such that the bottom isn’t brown (but also not pure dough) when I take it out…but if I left it in longer, then the top would burn. Any insight on how to provide an even baking experience in a home oven?
I followed your recipe all seemed good came out with hard crust but sadly a few hours later they went soft-
I did put them in a wooden bread box once they were cold, wrapped in cotton tea towel.
Could you please let me Know what could be causing this.
thank you
Hi Mari,
To keep the crustiness, cool it on a rack with lots of air flow especially on the bottom. Plus just store in a paper bag or something that allows for good air flow as well. However if your environment is humid, there might not be any fix for it going soft. However, it’s quite easy to crisp soft baguettes up again. If you have a toaster oven or air fryer it’s faster. Just air fry / bake at 400°F for a few minutes. To make sure it’s still soft on the inside, you can also add a splash of water to the bottom on the basket/oven. Same concept if you just have an regular oven but it takes a bit longer.
Hope that helps.
Cheers,
Mary
Hi Mary, do you use top and bottom heat of the oven or just bottom heat when baking banh mi?
Great question, Stella. My oven only has bottom heat
Hi Mari,
I’ve just made these lovely buns and came out nice except for the oven temperature 475 seems to be too high. It started burning from the top at 12 mins. I took them out at around 13 mons and they we ok. I’ll be careful with oven next time…. May be set to 425 and see. Thank you for great recipe.
Hi Lasa,
It sounds like your oven is not calibrated correctly and runs hotter than the gauge reads. Sounds like you figured out how to make it work for you though! Thanks so much for sharing your experience.
Cheers,
Mary
Just made these- they are amazing! I followed the recipe as listed and it worked so well. Thanks for this posting.
Awesome, John! Way to bake 🙂
Thanks for sharing your experience.
Hi Mary! Could I make these into small versions? 12 instead of 6? How long would I bake it for?
Hi Jenny,
I’m sure you could but I don’t have the exact timing for you.
If I was in your shoes, I would check it at 10 minutes in and decide from there.
Hope that helps!
-Mary
Thank you for the recipe! It’s delicious, I love hearing the crackling sound of the crust and so fluffy inside! I did add dough conditioner how they made it in Vietnam. This recipe is going to be my go to for banh mi baguette! Again, thank you.
you’re welcome!